| ID |
Date |
Author |
Subject |
|
503
|
Fri Feb 9 17:04:39 2024 |
JM, AR, CB, NH | Run12 - Background |
|
|
502
|
Fri Feb 9 11:58:04 2024 |
TD + CB, JM, AR, NH, AB | Run10 contd, Run11 |
12.46 DAQ continues G22-88/R10_14

      c. 20MeV 16O2+ + 4He

      DSSSD bias OK - attachment 1
      ambient temperature 17.7 deg C ( c. 1deg C increase cf. earlier this week )

      FEE64 temperatures OK - attachment 2

      All system wide checks OK
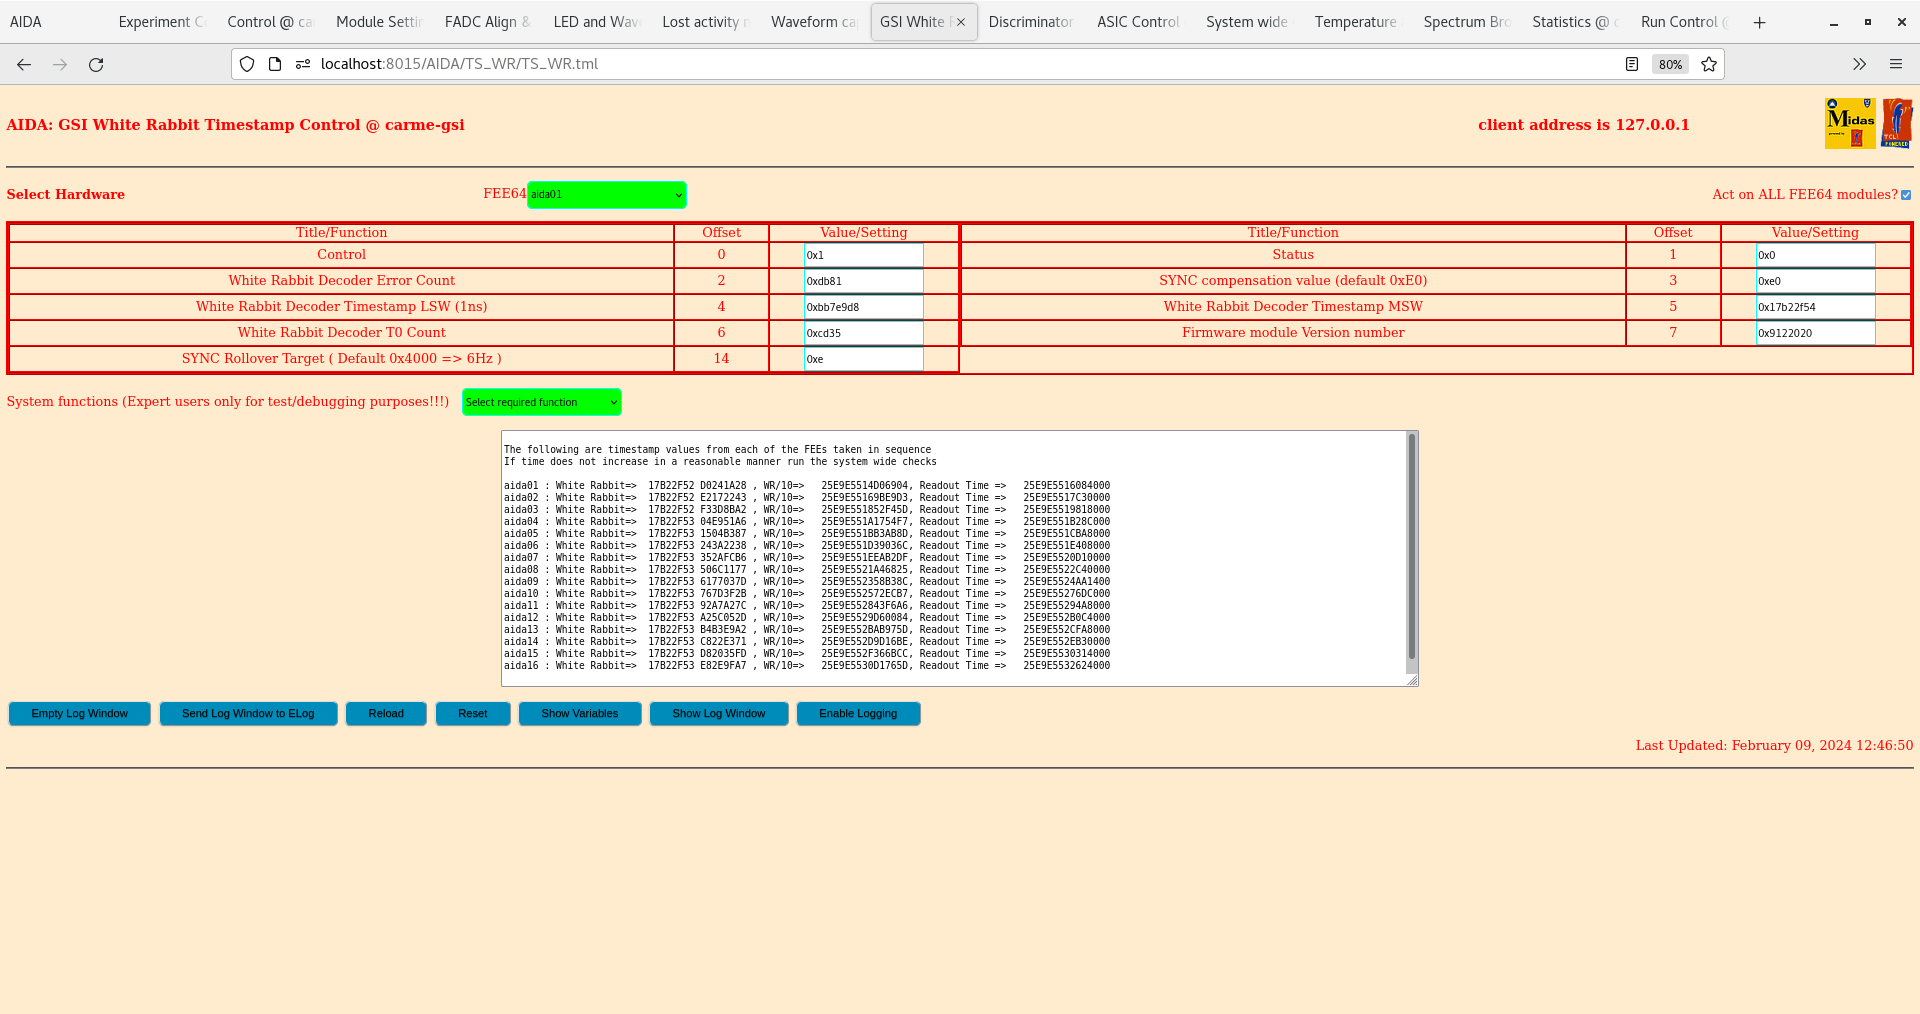
      WR timestamp control OK - attachment 3

      ADC data item stats - attachment 4
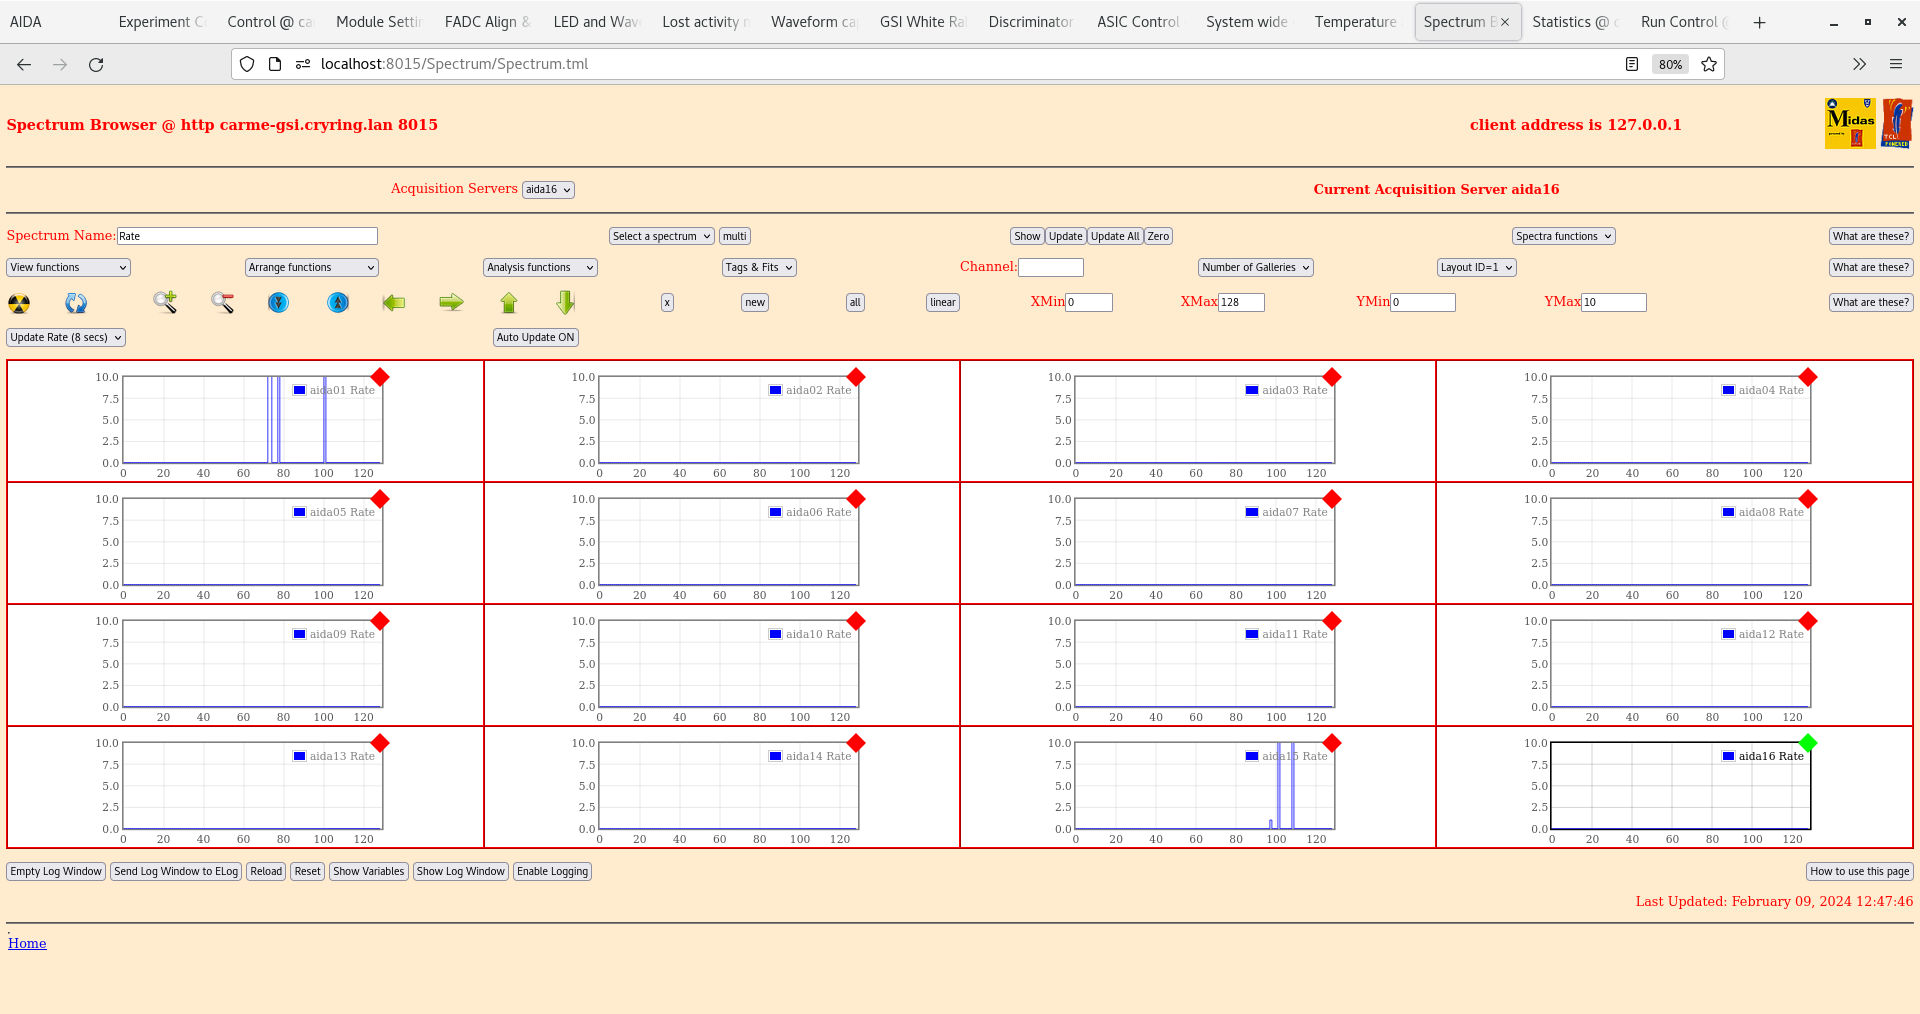
      FEE64 rates c. 0Hz except 'hot' channels aida01 ( 71k ) and aida15 ( 8k )

      per FEE64 Rate and Stat spectra - attachments 5-8
       events ( beam? ) aida01 asic #4 and aida04 asic #4 ( c. 200k per ASIC channel )

      per FEE64 1.8.L spectra - attachments 9-10
       most spectra showing background and, possibly, a small amount of scattered beam?

      per FEE64 1.8.W spectra - 20us FSR - attachments 11-12

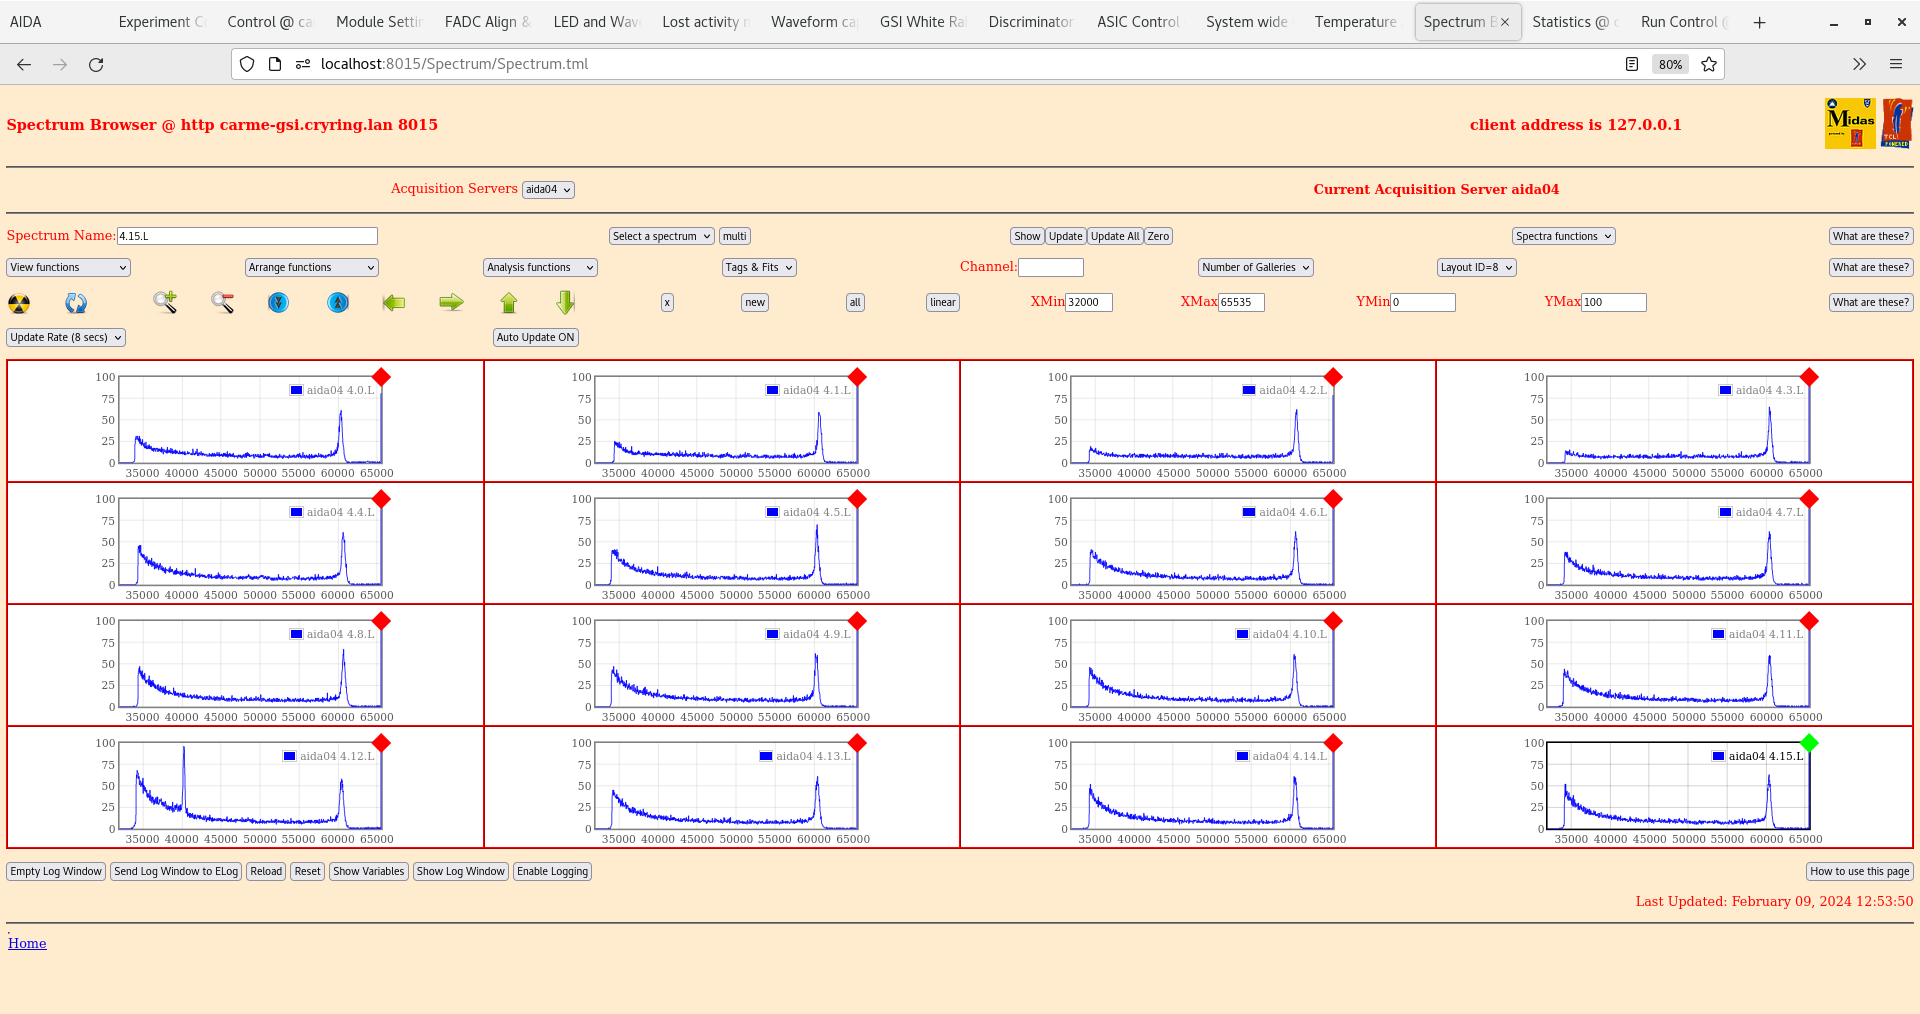
      aida04 3*L and 4*L spectra - attachments 13-15
       distribution by strip # - uniform across asic# #4, continuing across asic #3 with abrupt fall off c. channel 9
       not Rutherford - more consistent halo/beam scattering?
       what are the current lab angles subtended by the DSSSDs?

      Rutherford cross section for 20MeV 16O+4He


               Reaction: 4He(16O,16O)4He

                      A:           4         16         16          4
                      Z:           2          8          8          2
              Mass(amu):    4.002603  15.994915  15.994915   4.002603
             Error(keV):       0.001      0.002      0.002      0.001
                 Origin:
                 Status:

  Projectile lab energy:   20.000 MeV
              CM energy:    4.003 MeV

                     Particle 3                                 Particle 4
                   ( scattered )                                ( recoil )

  Lab         Cross Section         CM    Lab/CM    Lab        Lab      Lab
 Angle      Lab           CM       Angle   Ratio   Energy     Angle    Energy
 (deg)           (mb/sr)           (deg)           (MeV)      (deg)    (MeV)

  0.00 NaN          Inf            0.000 NaN       20.000     90.000    0.000
  1.00 0.143028E+09 0.572301E+07   4.999   0.040   19.976     87.500    0.024
  2.00 0.894079E+07  356425.      10.017   0.040   19.902     84.992    0.098
  3.00 0.176669E+07  69982.6      15.072   0.040   19.780     82.464    0.220
  4.00  559329.      21951.4      20.186   0.039   19.607     79.907    0.393
  5.00  229335.      8887.05      25.382   0.039   19.382     77.309    0.618
  6.00  110782.      4221.76      30.690   0.038   19.103     74.655    0.897
  7.00  59959.1      2235.75      36.144   0.037   18.768     71.928    1.232
  8.00  35299.6      1279.52      41.790   0.036   18.371     69.105    1.629
  9.00  22192.2      775.052      47.692   0.035   17.907     66.154    2.093
 10.00  14729.2      489.347      53.941   0.033   17.366     63.029    2.634
 11.00  10261.1      317.919      60.685   0.031   16.732     59.658    3.268
 12.00  7514.20      209.725      68.185   0.028   15.976     55.907    4.024
 13.00  5900.47      137.756      77.018   0.023   15.035     51.491    4.965
 14.00  5693.43      85.2271      89.184   0.015   13.688     45.408    6.312

 Maximum lab scattering angle (  14.49 deg ) exceeded

________________________________________________________________________________


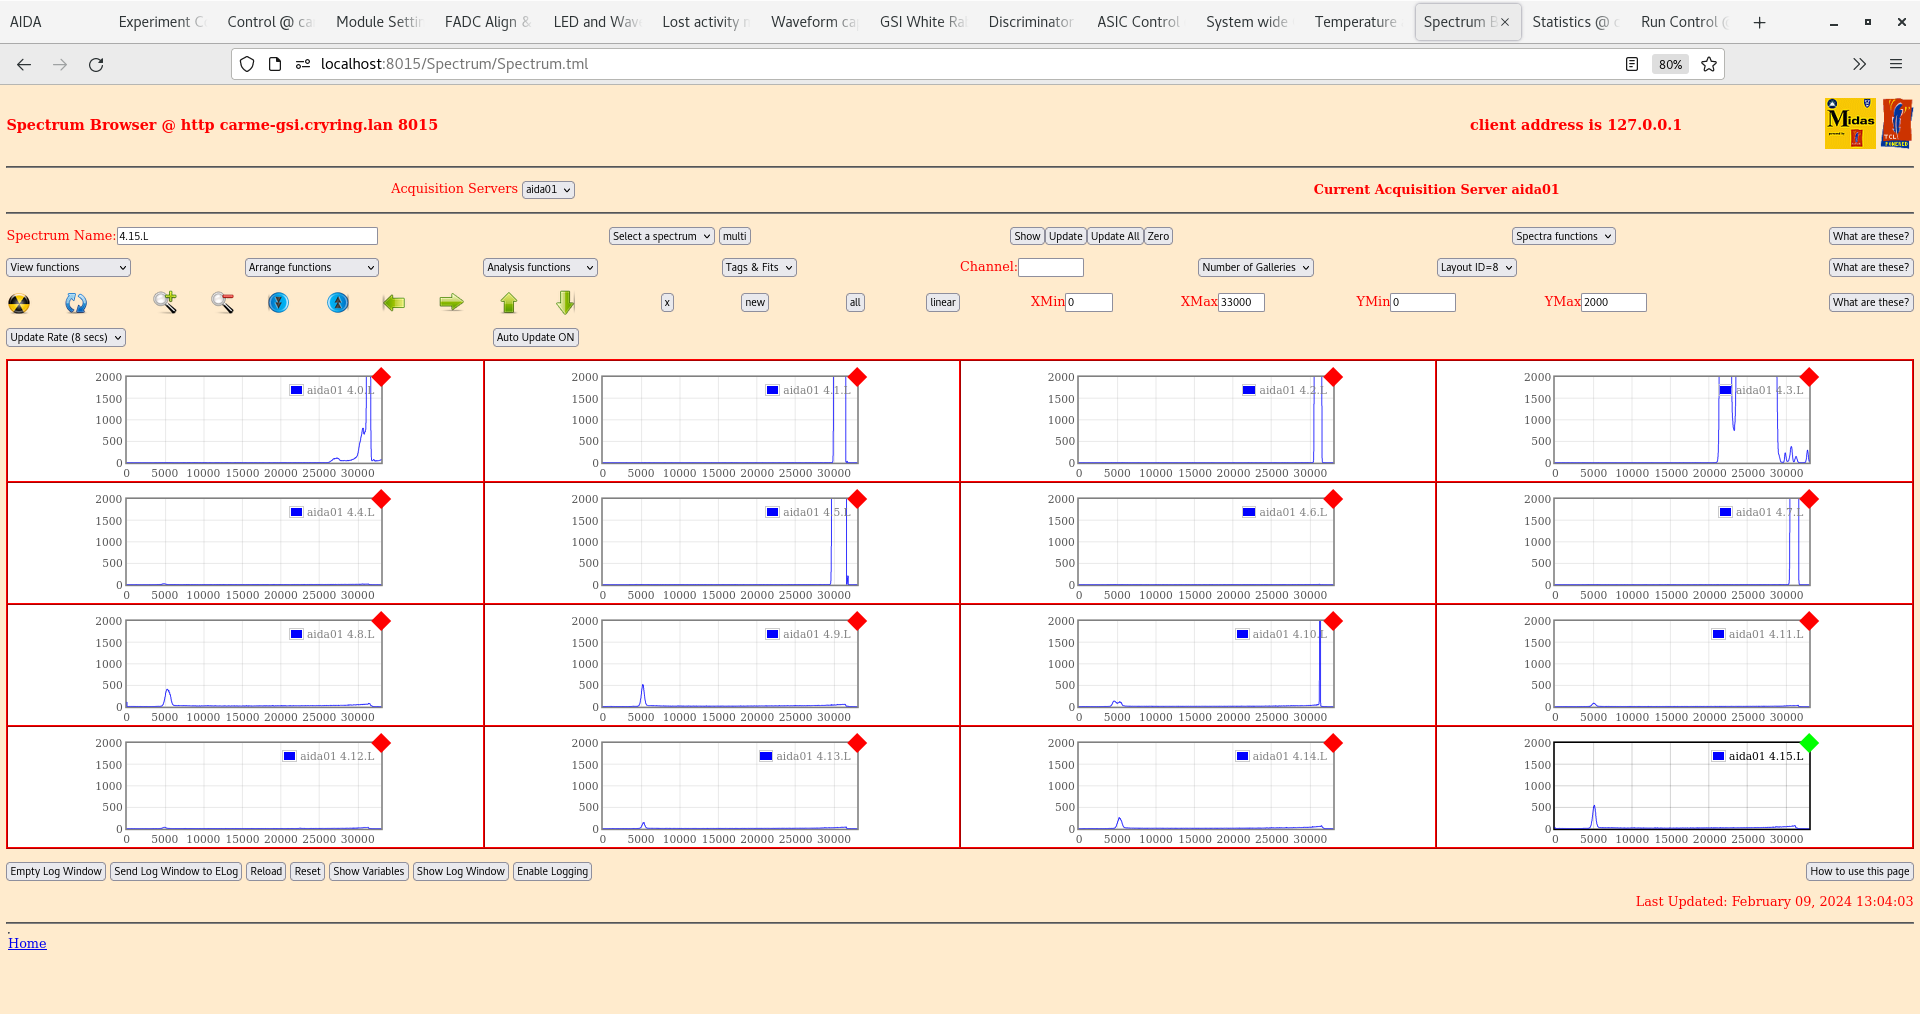
      aida01 4*L spectra - attachments 19-23
       channels 0-8 - high stats structure(s) at low energy
       channels 9-16 - high energy peak cf. aida04 asic #4 spectra

      Merger, Merger stats, TapeServer - attachments 16-18

Started Run 11 with beam ON.

We observe the same pattern of counts in DSSD0 (Top left detector) but not in DSSD1,2,3 (attachment 25). Moving in the left arm with the pneumatic we see a large drop in
the rate on DSSD0 to essentially zero. The beam on the CRYRING monitor appears to disappear.
When we move the right pneumatic IN, we observe an increase in the number of counts in the bottom-left part of the detector. The position is likely to be a mistake in the
strip assignment.
No increase observed in the leakage current. Will try systematically tomorrow.

Beam position monitoring from the CRYRING are shown in attachments 25-27 |
| Attachment 1: Screenshot_from_2024-02-09_12-45-57.png
|

|
| Attachment 2: Screenshot_from_2024-02-09_12-46-32.png
|

|
| Attachment 3: Screenshot_from_2024-02-09_12-46-59.png
|
|
| Attachment 4: Screenshot_from_2024-02-09_12-47-37.png
|

|
| Attachment 5: Screenshot_from_2024-02-09_12-47-59.png
|
|
| Attachment 6: Screenshot_from_2024-02-09_12-48-59.png
|

|
| Attachment 7: Screenshot_from_2024-02-09_12-49-17.png
|

|
| Attachment 8: Screenshot_from_2024-02-09_12-49-39.png
|

|
| Attachment 9: Screenshot_from_2024-02-09_12-50-18.png
|

|
| Attachment 10: Screenshot_from_2024-02-09_12-51-04.png
|

|
| Attachment 11: Screenshot_from_2024-02-09_12-51-48.png
|

|
| Attachment 12: Screenshot_from_2024-02-09_12-52-25.png
|

|
| Attachment 13: Screenshot_from_2024-02-09_12-54-05.png
|
|
| Attachment 14: Screenshot_from_2024-02-09_12-56-04.png
|

|
| Attachment 15: Screenshot_from_2024-02-09_12-56-20.png
|

|
| Attachment 16: Screenshot_from_2024-02-09_12-56-52.png
|

|
| Attachment 17: Screenshot_from_2024-02-09_12-57-06.png
|

|
| Attachment 18: Screenshot_from_2024-02-09_12-57-36.png
|

|
| Attachment 19: Screenshot_from_2024-02-09_13-03-20.png
|

|
| Attachment 20: Screenshot_from_2024-02-09_13-03-38.png
|

|
| Attachment 21: Screenshot_from_2024-02-09_13-03-54.png
|

|
| Attachment 22: Screenshot_from_2024-02-09_13-04-22.png
|
|
| Attachment 23: Screenshot_from_2024-02-09_13-04-59.png
|

|
| Attachment 24: Screenshot_from_2024-02-10_10-07-57.png
|

|
| Attachment 25: 20240209_174604.jpg
|

|
| Attachment 26: 20240209_174705.jpg
|

|
| Attachment 27: 20240209_174718.jpg
|

|
|
501
|
Fri Feb 9 07:57:38 2024 |
AR, CB, AB, JM | Run10 - First cool beam on target |
8:58
System wide checks okay, except
Base Current Difference
aida08 fault 0x0 : 0xc : 12
aida09 fault 0x0 : 0xb : 11
FPGA Timestamp error counter test result: Passed 14, Failed 2
If any of these counts are reported as in error
The ASIC readout system has detected a timeslip.
That is the timestamp read from the time FIFO is not younger than the last
Temperatures okay
Attatchment 1: Layout 7 Waveforms
Attatchment 2: Temperatures
Attatchment 3: Layout 8 Waveforms
Attatchment 4: Layout 2 counter okay
Attatchment 5: Layout 4 spectrum okay
Attatchment 6: Leakage current okay
Switched to run 10 (run 9 is overnight background)
10:00 Target pressure on. Attachment 7
Beam on target
Observe low counts. Only aida4 showing anything (attachment 8)
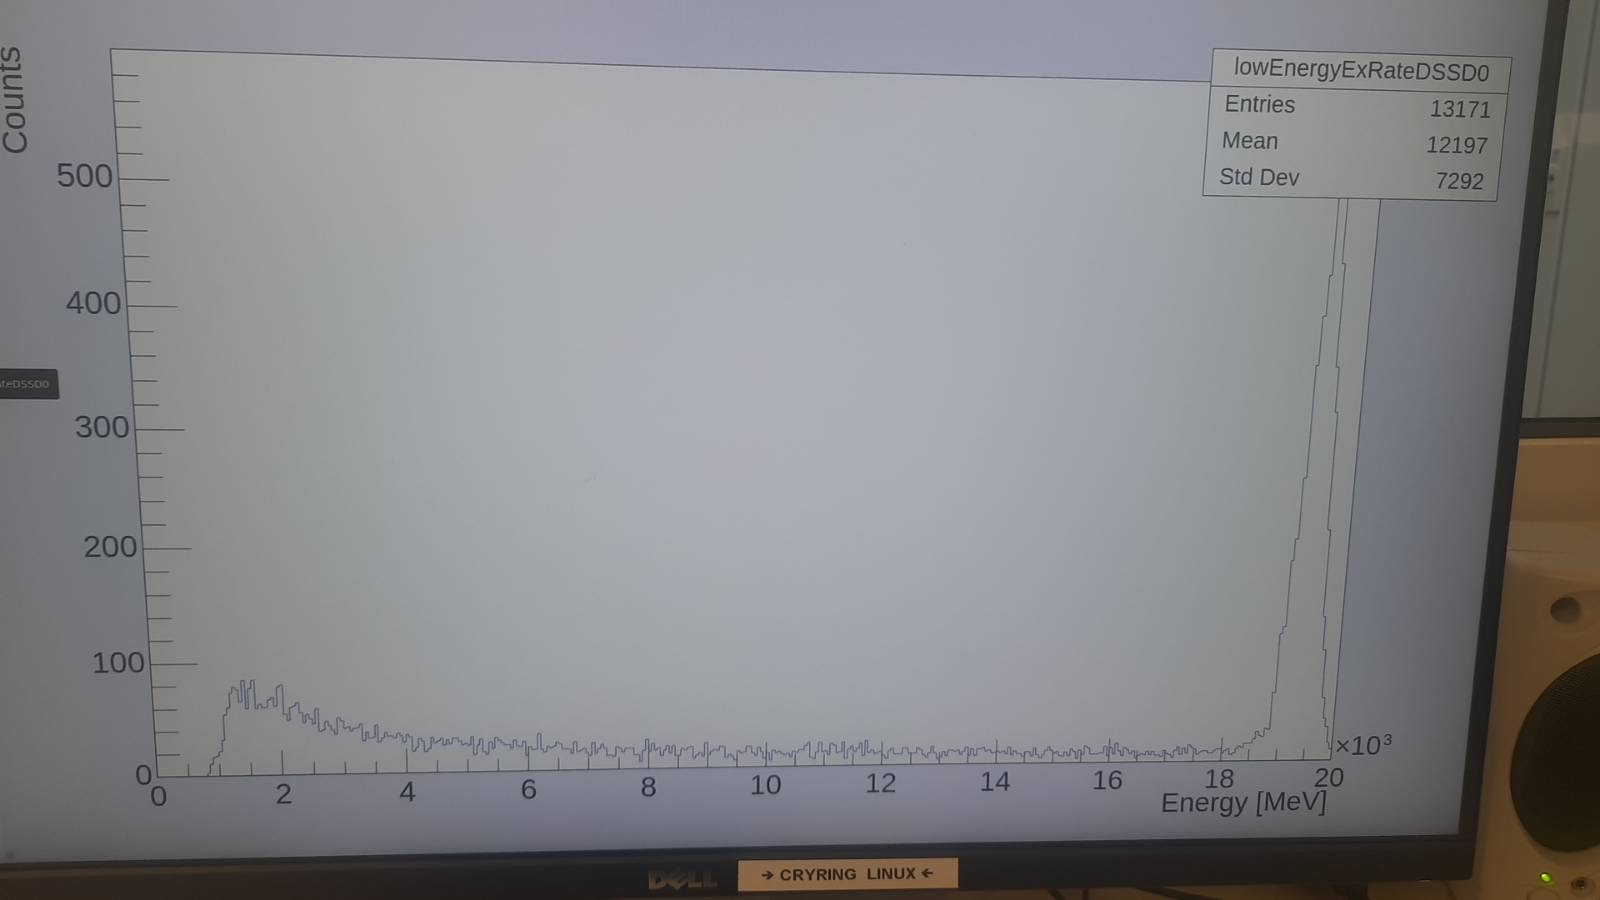
See a peak around 19 MeV in LowEnergyExratedssd0 (can only see in the dssd0) that is assumed to be Rutherford scattering - Attachment 12
Temperatures ok
Wavefroms on attatchment 9 show only signals from aida04 - attachment 9
/////// UPDATE ////////
Peak observed is not from Rutherford, we think it is beam (or part of it) hitting the detector
Attachment 10 shows waveforms after the beam was turned off -> counts in aida 4 are gone.
Beam off = no peak at 19 MeV for LowEnergyExdssd0.
Leakage current ok (attachment 11)
//// BEAM ON AGAIN UPDATE ////
Still see peak at 20 MeV, see attachment 13
Peak is not in dssds 1,2,3 only in dssd 0 (Top left detector) (attatchments 14,15,16 respectively)
Leakage currents OK (attatchment 17)
Attachment 18: LowEnergyXYtotalDSSD0 plot showing all hits in one spot (this is with BEAM AND TARGET on)
TEST: Turning off target while beam is running, can still see hotspot in DSSD0 but no others, so definitely beam related. (attatchment 18)
Tom's estimate: 10^6 particles in 10 minutes - not as many as can be handled
/////// UPDATE ////////
No beam, no target (target off)
All checks ok (see attachment 20 and 21 for rates and temperatures)
Attachment 22: Layout 7 waveforms
Attatchment 23: Layout 8 waveforms
Attachment 24: Layout 2 waveforms
Attachment 25: Layout 1 waveforms (rate)
Atatchment 26: Leakage current
Attachment 27: LowEnergyExRatedssd 0,1,2,3 respectively
Note: Data similar to that seen in DSSD0 (19 MeV peak) is not observed in MIDAS for the other DSSDs -> Issue is not related to the monitoring code
|
| Attachment 1: Screenshot_from_2024-02-09_09-03-01.png
|

|
| Attachment 2: Screenshot_from_2024-02-09_09-03-28.png
|

|
| Attachment 3: Screenshot_from_2024-02-09_09-04-12.png
|

|
| Attachment 4: Screenshot_from_2024-02-09_09-08-45.png
|

|
| Attachment 5: Screenshot_from_2024-02-09_09-11-08.png
|

|
| Attachment 6: Screenshot_from_2024-02-09_09-13-29.png
|

|
| Attachment 7: 20240209_100016.jpg
|

|
| Attachment 8: Screenshot_from_2024-02-09_11-19-45.png
|

|
| Attachment 9: Screenshot_from_2024-02-09_11-21-36.png
|

|
| Attachment 10: Screenshot_from_2024-02-09_11-40-36.png
|

|
| Attachment 11: Screenshot_from_2024-02-09_11-39-09.png
|

|
| Attachment 12: dfcbe734-8730-4e0f-acfd-5e778e2b3f9f.JPG
|
|
| Attachment 13: Screenshot_from_2024-02-09_13-17-12.png
|

|
| Attachment 14: Screenshot_from_2024-02-09_13-17-27.png
|

|
| Attachment 15: Screenshot_from_2024-02-09_13-17-31.png
|

|
| Attachment 16: Screenshot_from_2024-02-09_13-17-40.png
|

|
| Attachment 17: Screenshot_from_2024-02-09_13-18-46.png
|

|
| Attachment 18: Screenshot_from_2024-02-09_13-41-38.png
|

|
| Attachment 19: Screenshot_from_2024-02-09_13-55-21.png
|

|
| Attachment 20: Screenshot_from_2024-02-09_16-25-22.png
|

|
| Attachment 21: Screenshot_from_2024-02-09_16-25-38.png
|

|
| Attachment 22: Screenshot_from_2024-02-09_16-27-06.png
|

|
| Attachment 23: Screenshot_from_2024-02-09_16-27-40.png
|

|
| Attachment 24: Screenshot_from_2024-02-09_16-28-11.png
|

|
| Attachment 25: Screenshot_from_2024-02-09_16-28-39.png
|

|
| Attachment 26: Screenshot_from_2024-02-09_16-29-55.png
|

|
| Attachment 27: Screenshot_from_2024-02-09_16-30-11.png
|

|
|
500
|
Thu Feb 8 17:11:50 2024 |
CB, EH | Pulser walkthrough |
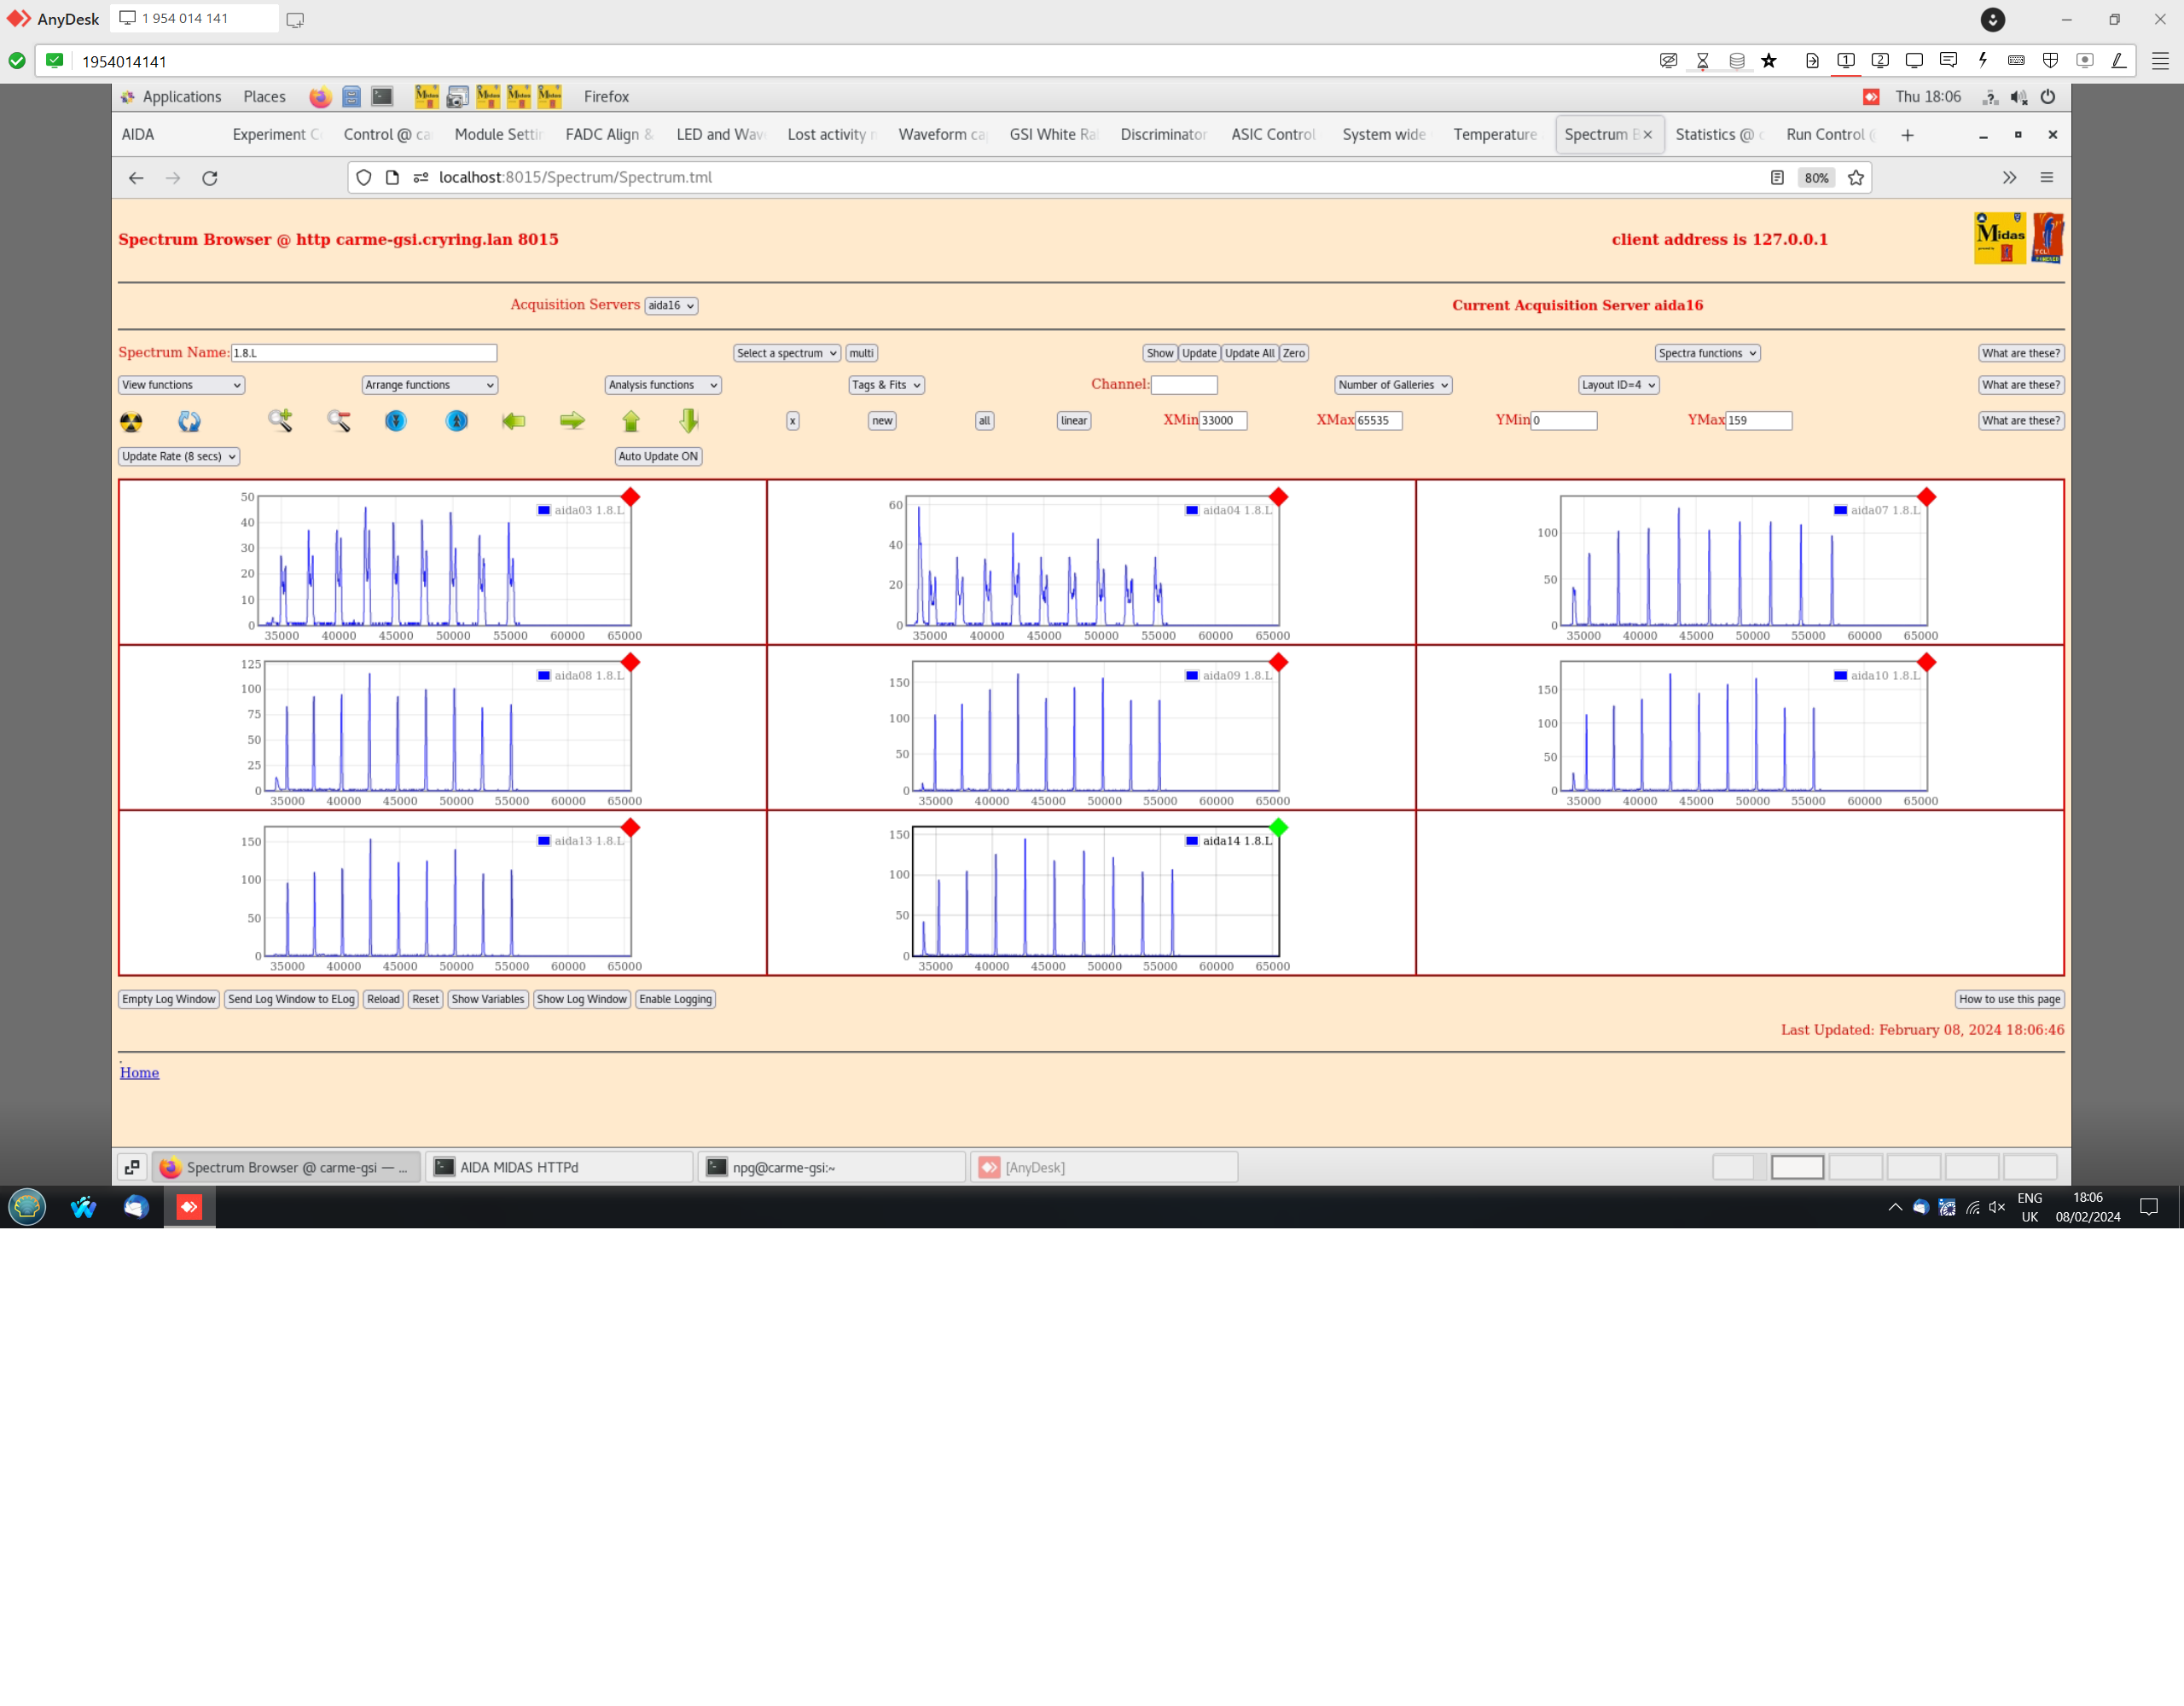
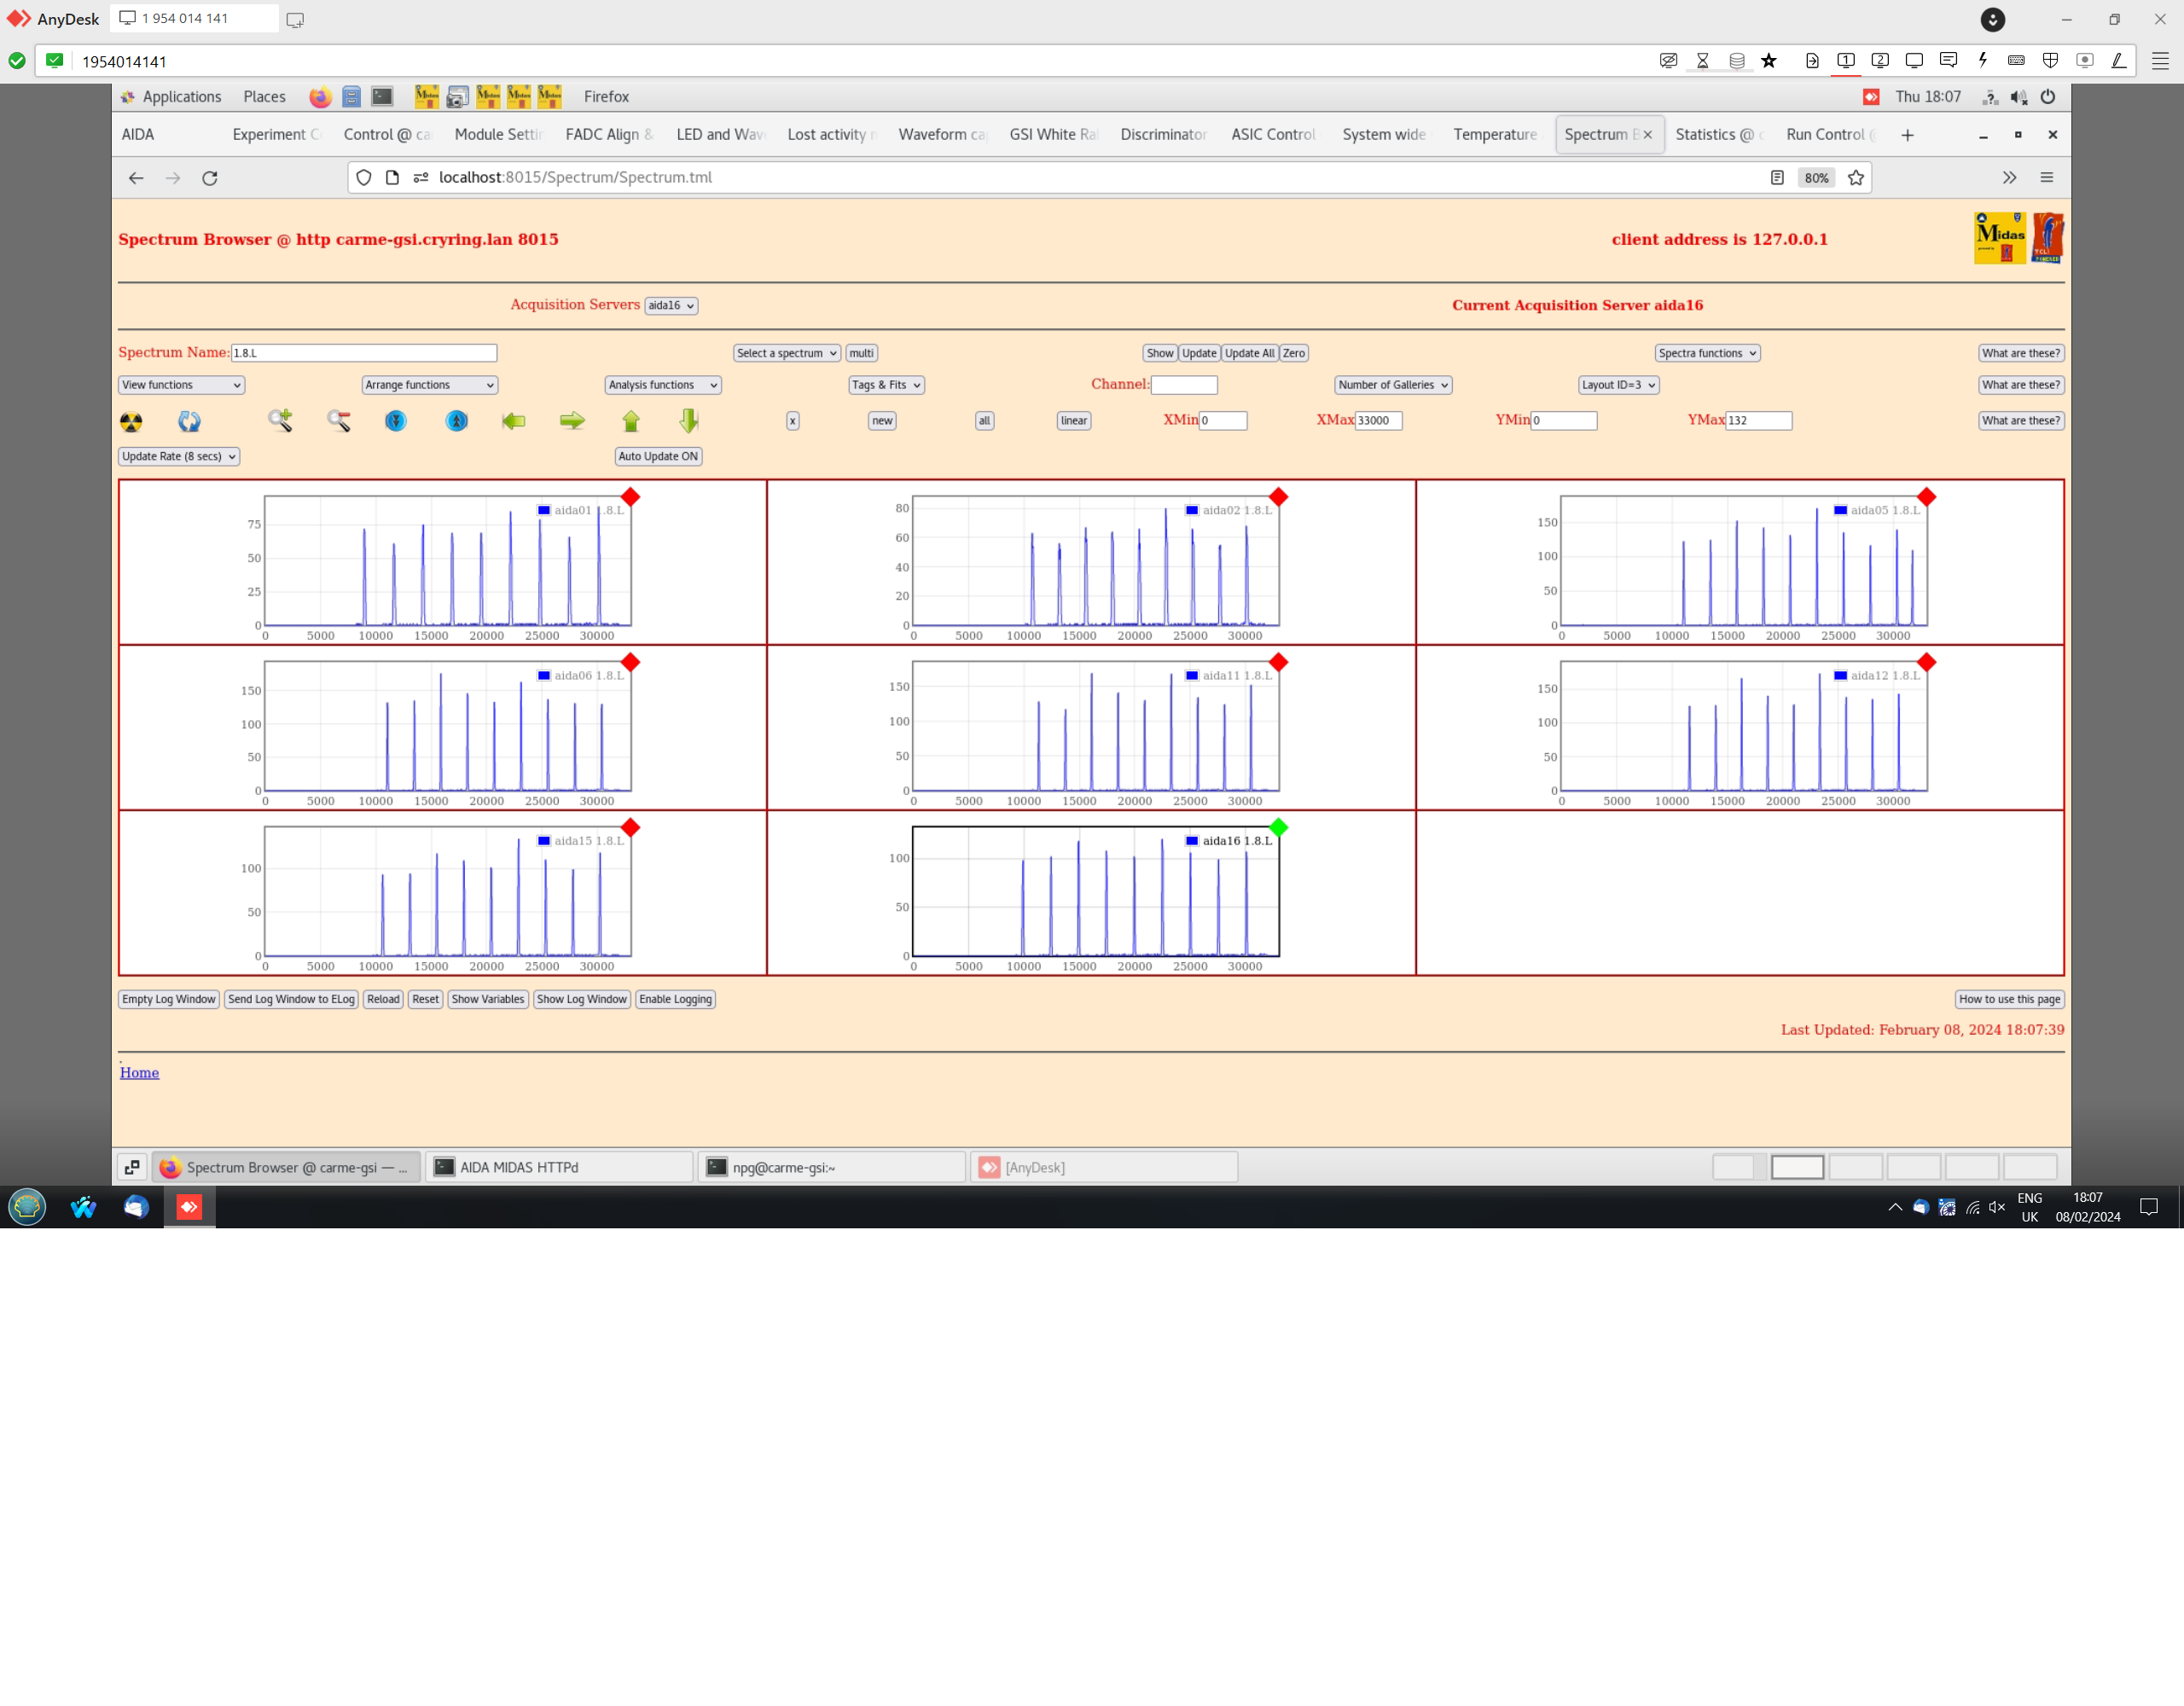
17:30 File G22-88/R8

Pulser walkthrough

EGG Ortec 448 Pulser

Amplitide 90,000-10,000 @ 10,000 step
Normalise 5.0
Attenuators x5 IN
t_r 100ns
Tau_d 50us
Frequency Int Osc 50Hz
Polarity + ( - polarity via Cooknell SA1 Sum & Invert Amp )
18:10 Moved to new run R9
Pulser off. Overnight background. |
| Attachment 1: 4.png
|
|
| Attachment 2: 3.png
|
|
|
499
|
Thu Feb 8 14:59:59 2024 |
JM, TD | Change p+n FEE64 settings |
ASIC settings for the pn FEEs has been reset to the default aida settings. This was done to combat the observed dropping of several  channels in pn only FEE modules
following motors movement. This effect was also observed in 2022 in several pulser walkthroughs conducted pre and post detector movement. No dropped channels were
observed in nn FEEs.

ASIC seetings changed;

IBias LF feedback from 0xf to 0x8
diode link threshold from 0xbf to 0xca

We also set the slow comparatort for all FEE modules back to 0x64 (1 MeV)

Settings tested using only 2 pn FEE modules (aida05 and aida16). Movement left and right. Dropped channels observed in all pn FEEs except aida05 and aida16. All pn ASIC
settings then changed. Movement for 10 repeptitions. No dropped channels observed in pn FEEs.

New settings saved in 2024Feb08-15.59.09 |
|
498
|
Thu Feb 8 11:22:28 2024 |
JM | Shifters instruction 2024 |
EMERGENCY SHUTDOWNS
1. CARME motors: Q key on keyboard while on workspace 1 of appc218 (right of this double-monitor setup)
2. Internal target:
ELOG
Each shift should put all information relating to the shift in ONE elog entry unless a significant change occurs during the shift i.e beam off, target off, run change, detectors out etc.
Elog entry should be named by the shift - morning/afternoon/night followed by the current run number
TO DO FOR THE SHIFTERS - CHECK EVERY HOUR AND POST TO ELOG WITH SCREENSHOTS. ELOG should be updated with current beam energy, injection beam intensity, system checks OK/not, FEE temperature OK/not, Statistics OK/not, Merger OK/not, tape server data rate, Motors OK/not and min/max motors potentiometer value. The time of each update should be noted in the elog. Screenshots of important screens (detailed below) should also be uploaded to the elog.
CARME DAQ
CARME computer has 6 workspaces (WS), two monitors for each WS.
WS1 : left monitor - fee power
right monitor - Detector Bias control, fee power server (just a terminal, do not close)
WS2 : left monitor - DAQ controls
right monitor - DAQ server (just a terminal, do not close)
Most important tabs (DAQ controls)
- Run control : shows daq status, stopped / going
- Fee temperatures : temperatures of fees labelled aida01, aida02, aida03, aida04, aida05, aida06, aida07, aida08, aida09, aida10, aida11, aida12, aida13, aida14, aida15, aida16. Hit reload, temperatures will update and should all be green. 1-2 C above safe limit (top) is OK. More than that - warn expert shifter immediately.
- Statistics : shows the statistics for each fee. Make sure ADC Data Items is selected in the left hand menu. Hit update all (SCREENSHOT once, if no changes record OK in elog)
- System wide checks : checks for the setup. Click on 'Check Clock Status', 'Check ADC Calibration' and 'Check the White rabbit decoder status' to run checks. (SCREENSHOT once, if no changes record OK in elog)
- Spectrum browser : loads histograms for fees and fee channels from preset layouts. select layout from 'layout ID' then restore layout from 'Arrange functions' drop down menu. Check layout 1, Select log scale and change xmax as 128 . This displays the data rate per strip. If any strips are a lot higher than the others, or very different from previous entry, make a note in the ELOG. (SCREENSHOT once, if no changes record OK in elog)
- Asic control : sets asic parameters
WS3 : left monitor - Merge control, Tape server
right monitor - servers (just terminals, do not close) , data being written to file
- Check NewMerger tab. Hit reload button and see if 'current links with data' and 'current merged data rate' are updating. All links should go green, but not necessarily at the same time. Keep hitting refresh until you see all of them going green at least once.
- Data rate, hit reload should be around 100,000. Record data rate in elog
- Check tapeService tab. Hit reload button. Check data rate in Kbytes/sec box. Record data rate to elog. This is where the current run number is displayed
- On the right-hand monitor, bottom right terminal, check the current run fragment (sub-run) is being written and is slowly increasing in size. It refreshed automatically every 5 seconds.
WS4 : Leakage current plot
- Check leakage current plot is stable. Transients will occur during motors movement but baseline current should remain consistent. Make sure it is updating and time is correct. (SCREENSHOT once, record OK in elog if no changes) Check present values on WS2, CAEN window
WS5 : Online data monitoring
- Check the following plots are updating for each DSSD
- LowEnergyXYTotal (right click - col - colz). This shows the total number of events, per pixel, since the code was started / re-started.
- LowEnergyXYRate (right click - col - colz). This shows the rate over the last 20 seconds.
- LowEnergyExRate (double left click. Right click on y axis - Log scale on y). Rate over the last 20 seconds
- LowEnergyExTotal (double left click. Right click on y axis - Log scale on y). This shows the total energy deposited on all X strips since code restart.
- LowEnergyEyTotal (as above). as above, Y strips. (SCREENSHOT of each per DSSD per shift. If significant changes are observed screenshot again)
WS6 : Browser, ELOG
-->IMPORTANT NOTE: MIDAS DAQ can respond slowly. DO NOT try to change tab or give new command while the previous one is being executed. Check activity in right-hand part of tab currently in use. Do not double click on buttons.
Motors computer (Computer to the right)
- Check motors cycle is running. The code will cycle through the loaded motors instructions. When an instruction is being done it is highlighted in bold. Check the bold highlighting cycles through entire set of instructions.
- Check potentiometer is reproducing same max/min values for each cycle of instructions.
- Detectors are on LEFT and RIGHT arm.
- No need for screenshots, but record in the ELOG you checked this.
|
|
497
|
Wed Feb 7 13:50:20 2024 |
Elena Hanu, Carlo Bruno, Michael Lestinsky | Afternoon shift |
14:50
Temperature, Statistics fine (see screenshots).
System wide checks fine (see below).
All FEEs pass clock check.
All FEEs pass White Rabbit check.
ADC Calibration check:
FEE64 module aida02 failed
FEE64 module aida16 failed
Calibration test result: Passed 14, Failed 2
If any modules fail calibration , check the clock status and open the FADC Align and Control browser page to rerun calibration for that module
FPGA timestamp error check:
Base Current Difference
aida09 fault 0x1 : 0xa : 9
FPGA Timestamp error counter test result: Passed 15, Failed 1
If any of these counts are reported as in error
The ASIC readout system has detected a timeslip.
That is the timestamp read from the time FIFO is not younger than the last
16:00 Slow comp thresh lowered to 100 keV in preparation for detector moving. Will have to test systematically what is the highest threshold we can accept
17:00 Temps fine. No overnight run.
|
| Attachment 1: Screenshot_from_2024-02-07_14-53-36.png
|

|
| Attachment 2: Screenshot_from_2024-02-07_14-56-37.png
|

|
| Attachment 3: Screenshot_from_2024-02-07_14-51-21.png
|

|
|
496
|
Wed Feb 7 10:09:14 2024 |
CB, JG, EM | Morning Shift |
11:00
Changed slow comp threshold to 0x32 (500 keV). Checkloaded.
Temperature, Statistics fine (see screenshots).
System wide checks fine (see below).
All FEEs pass clock check.
All FEEs pass White Rabbit check.
ADC Calibration check:
FEE64 module aida02 failed
FEE64 module aida16 failed
Calibration test result: Passed 14, Failed 2
If any modules fail calibration , check the clock status and open the FADC Align and Control browser page to rerun calibration for that module
FPGA timestamp error check:
Base Current Difference
aida09 fault 0x1 : 0xa : 9
FPGA Timestamp error counter test result: Passed 15, Failed 1
If any of these counts are reported as in error
The ASIC readout system has detected a timeslip.
That is the timestamp read from the time FIFO is not younger than the last
|
| Attachment 1: Screenshot_from_2024-02-07_11-10-08.png
|

|
| Attachment 2: Screenshot_from_2024-02-07_11-10-59.png
|

|
| Attachment 3: Screenshot_from_2024-02-07_11-15-53.png
|

|
| Attachment 4: Screenshot_from_2024-02-07_11-20-38.png
|

|
|
495
|
Tue Feb 6 09:39:54 2024 |
CB | Detector bias tests |
10:30 Found ADC#4 on aida 1 and 4 are suddenly noisy. See attach 1-2. Checkloaded multiple times - no effect.
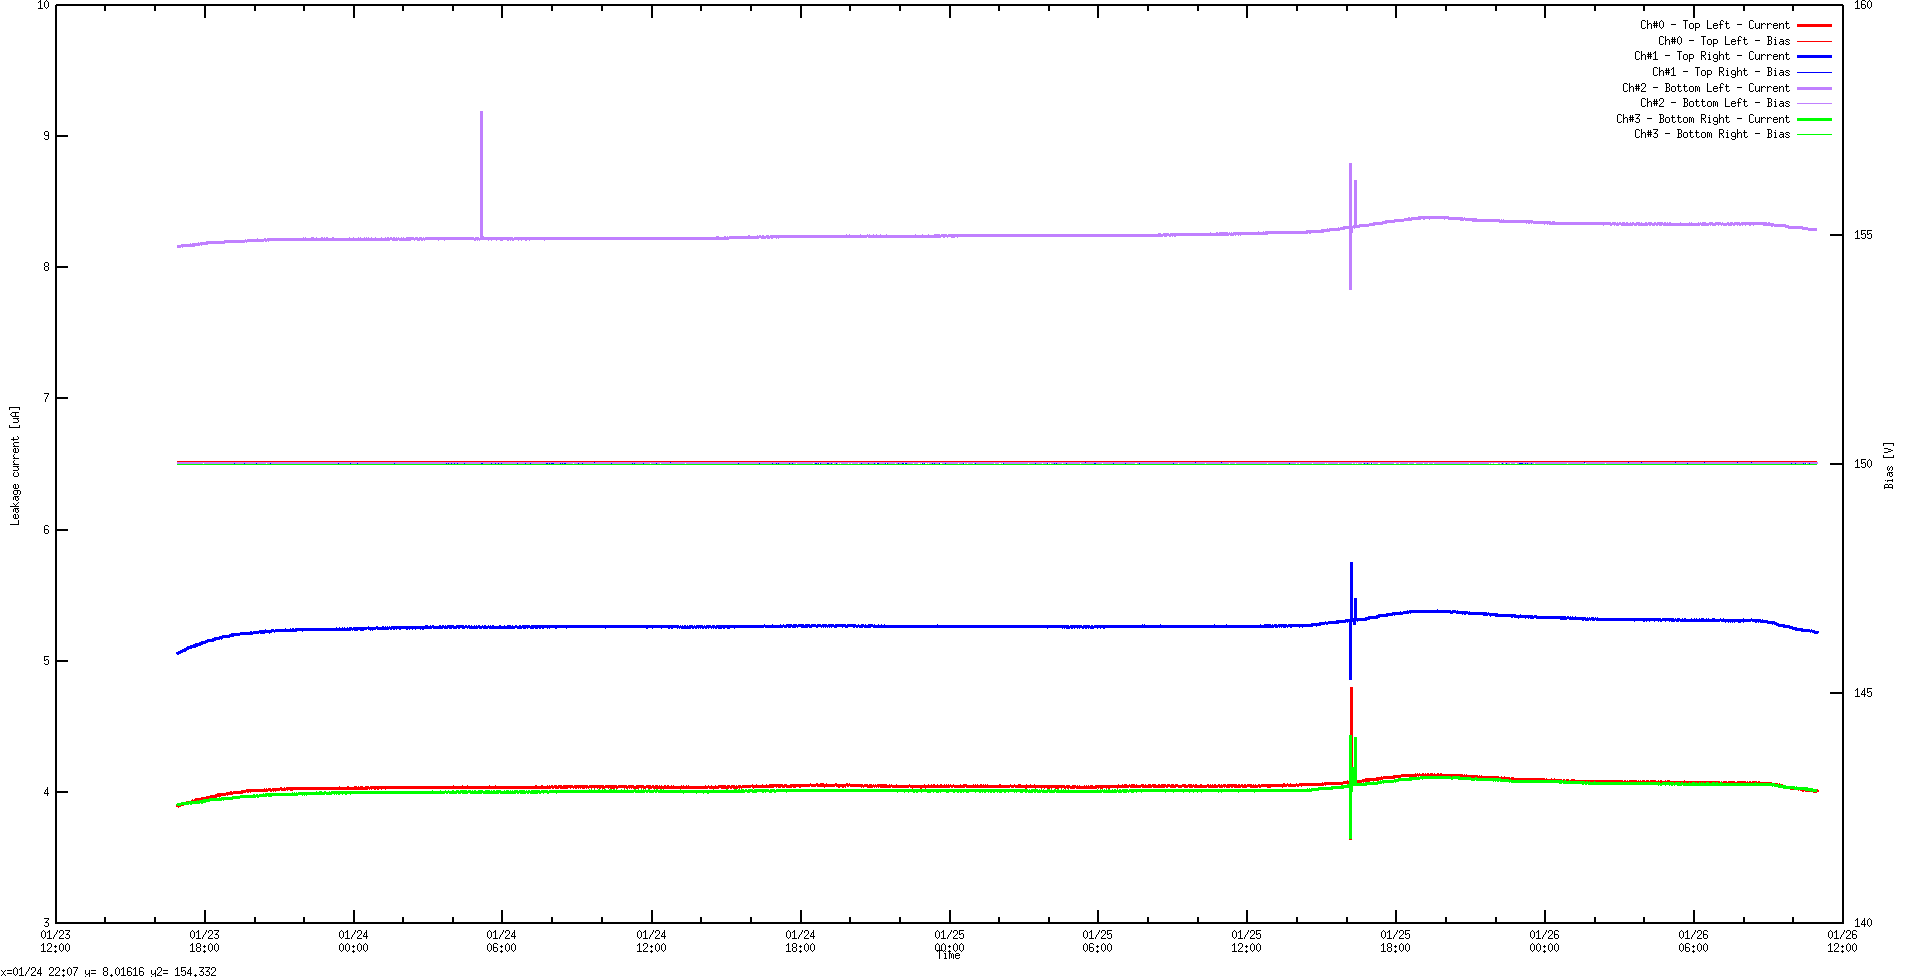
Leakage current overnight was stable, but a clear transient can be observed yesterday around the times of the DSSD motion test. We did not observe this in the cave looking at the CAEN module - it might have been too fast.
Now reducing bias to 50 V and will check differences later. FEE temperatures OK.
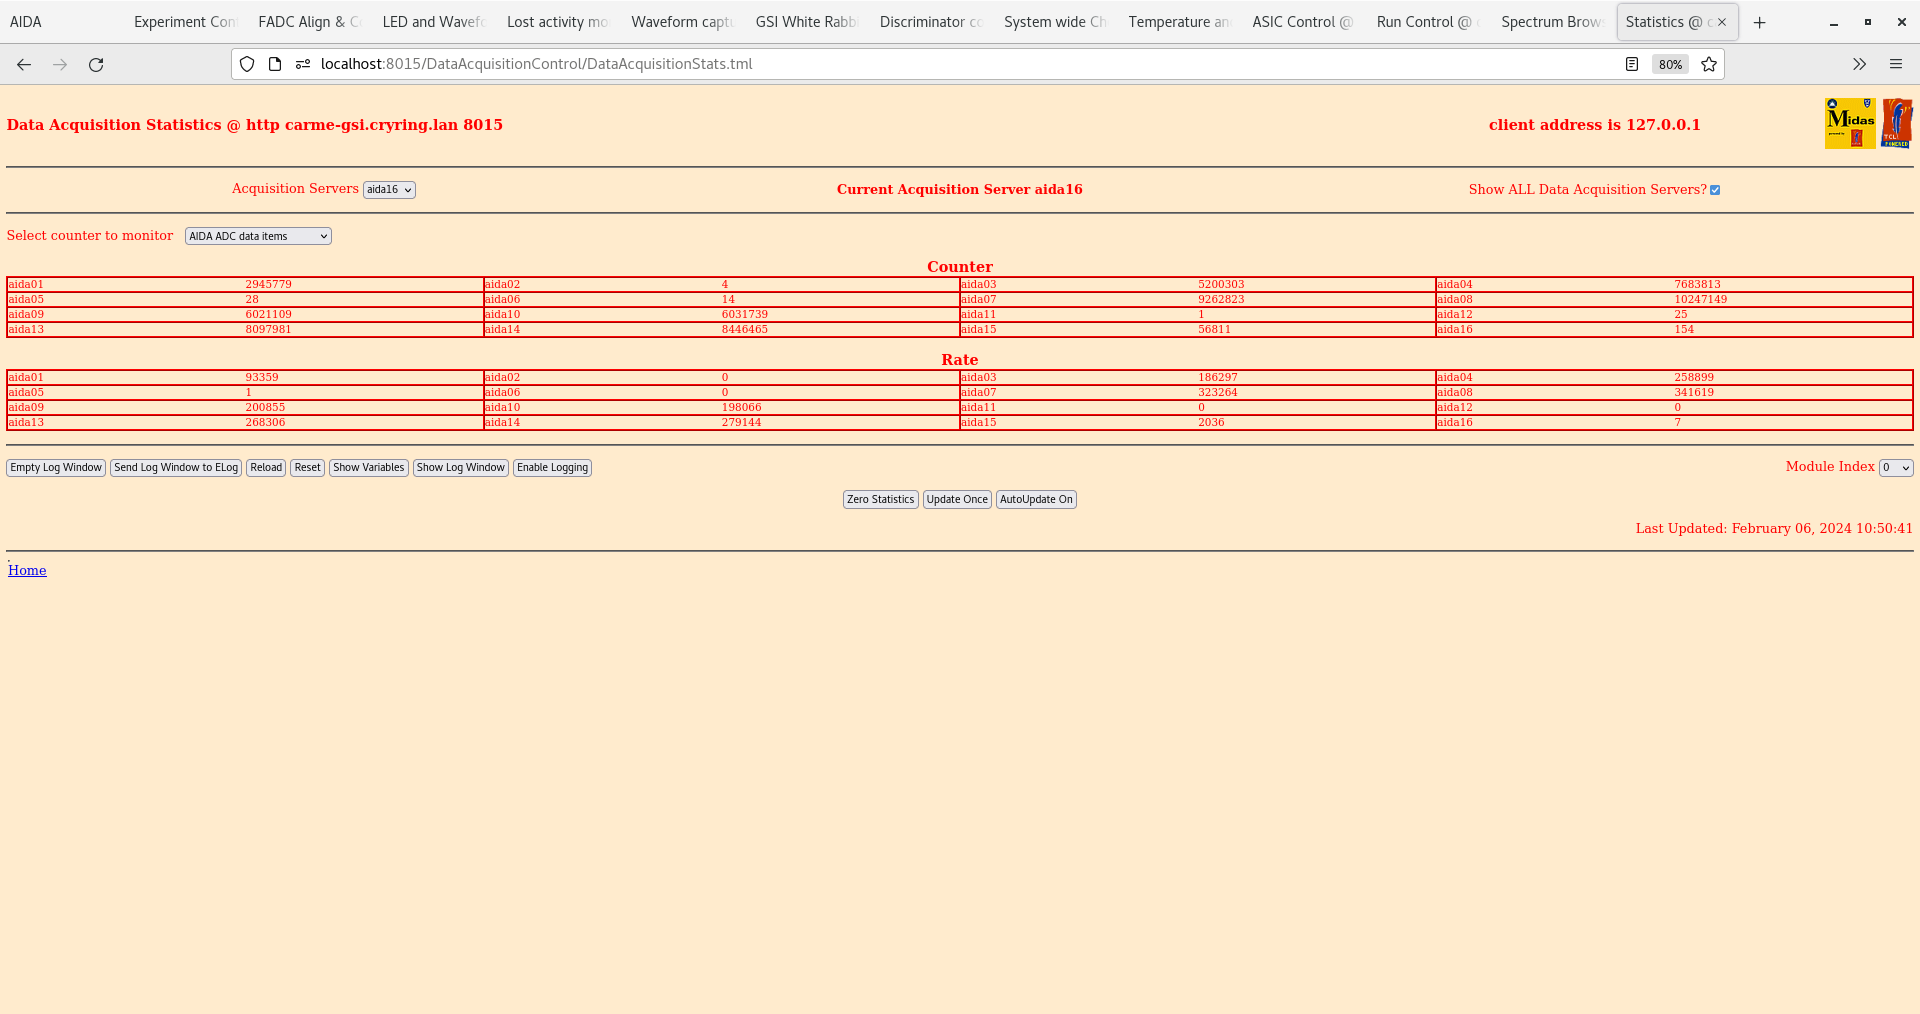
10:50 Started DAQ. Rates are much higher in n+n strips, but p+n strips appear unaffected. See attach 4-5.
Stopped DAQ. Will leave 50V until after lunch.
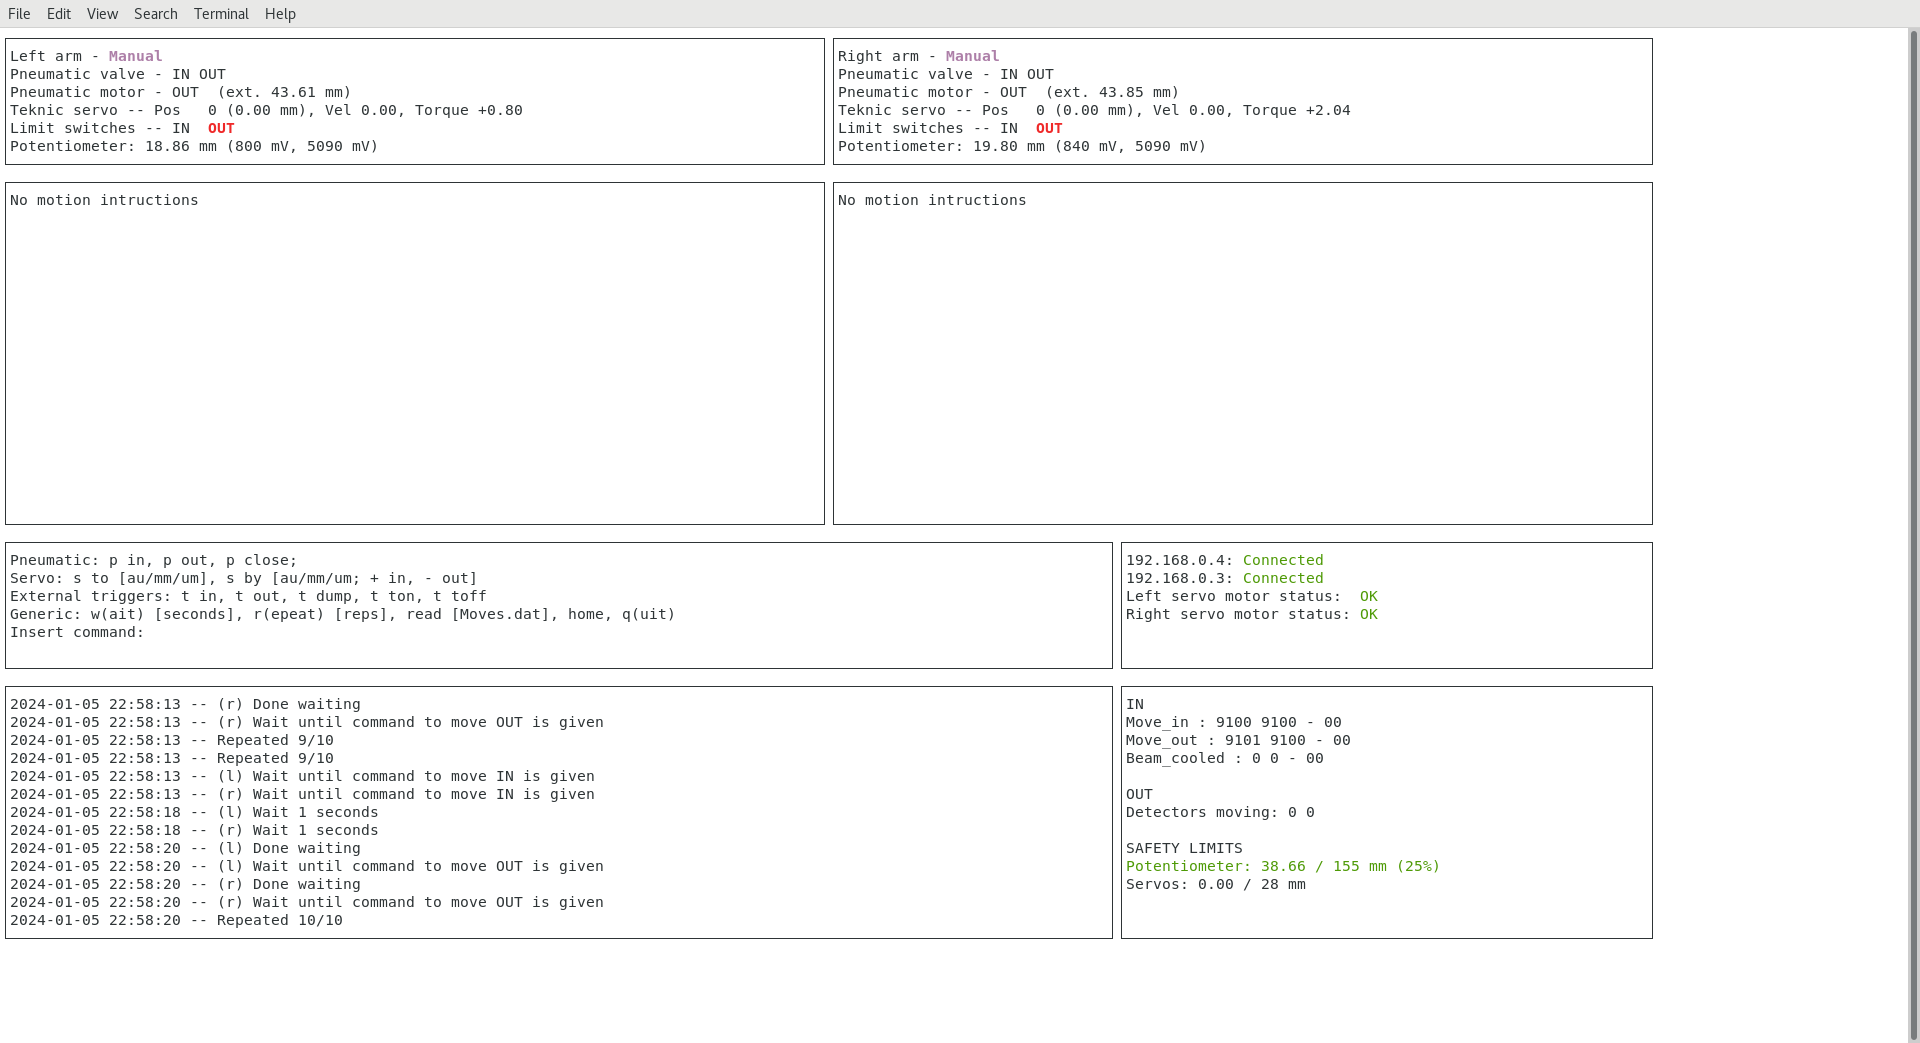
11:27 Checked motor control status after yesterday's setup (see previous ELOG entry). See attach 6.
IN counters are respectively: read, increases, latch (left), latch (right)
Read is the number of pulses sent with the instruction to move. Increases is the number of times the instruction was considered. Latch on/off indicates the 1 s time interval during which commands sent to a motor arm (left or right) are considered double-firing or mistake, and ignored.
The number of increases is the same for move in/out - good!
The number of increases for move out is 1 unit less than move in - one double pulse / double command must have been received overnight and ignored.
Note torque on right arm is 2 (arbitrary units) which is unusually high and may indicate some tension in the kapton wires. No apparent effect on DSSD2,4 on that arm. Will not move for now.
13:24 FEE temperatures OK, leakage currents decreasing slighly.
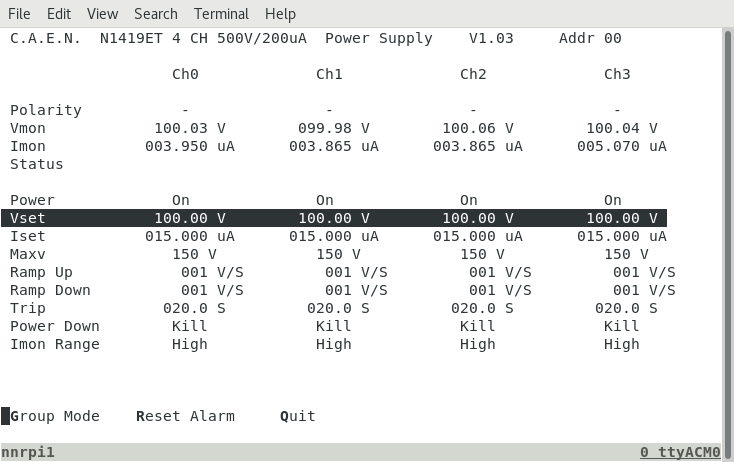
13:41 Slowly increased bias to 100V. Interestingly it is now DSSD#4 (Ch#3) that displays the highest leakage current. Attach 7
13:45 Stats & Rates look rather similar to earlier this morning at 150V, but aida01 and 04 are quieter. Attach 8-9. Will leave at 100V for a while longer before moving to 150V.
15:20 Set bias to 150V
15:50 Nikos testing target. Started short run. Stats & Rates attached (10-11). Same as yesterday, aida01 and 04 ADC#4 no longer noisy.
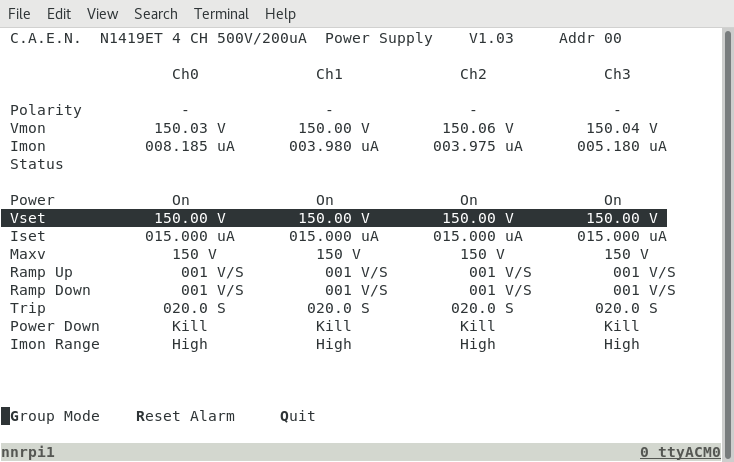
V-I on attach 12-13. Legends unreliable!
17:00 Nikos completed target test. YR09 pressure around 3E-10 mbar with around 5E11 atoms/cm2 He target. Target not quite stable (10-20%), some optimisation required, but pressure holds at 3E-10 mbar for several minutes.
Beam on target will increase ring pressure. Can't test for now. Target tests without beam complete. Need to log all the data remotely. No logging available at present.
Leaving bias at 150V overnight. No run.
|
| Attachment 1: Screenshot_from_2024-02-06_10-39-06.png
|

|
| Attachment 2: Screenshot_from_2024-02-06_10-39-15.png
|

|
| Attachment 3: Screenshot_from_2024-02-06_10-39-27.png
|
|
| Attachment 4: Screenshot_from_2024-02-06_10-51-42.png
|

|
| Attachment 5: Screenshot_from_2024-02-06_10-51-50.png
|
|
| Attachment 6: Screenshot_from_2024-02-06_11-26-53.png
|
|
| Attachment 7: Screenshot_from_2024-02-06_13-41-40.png
|
|
| Attachment 8: Screenshot_from_2024-02-06_13-44-26.png
|

|
| Attachment 9: Screenshot_from_2024-02-06_13-44-38.png
|

|
| Attachment 10: Screenshot_from_2024-02-06_15-49-10.png
|

|
| Attachment 11: Screenshot_from_2024-02-06_15-49-16.png
|

|
| Attachment 12: Screenshot_from_2024-02-06_15-53-22.png
|

|
| Attachment 13: Screenshot_from_2024-02-06_15-54-40.png
|
|
|
494
|
Mon Feb 5 20:15:31 2024 |
CB, TD | Detector move in/out signals |
17.43 setup signals from detector movement controller.

See attachment 1
                                                         NIM               TTL                 TTL             +12V
Signal from CRYRING ------> CAEN N89 ------> LF4000 -------> CAEN N89 -------> LeCroy 222 -------> PCB amp -------> start move in
( active high )         TTL              NIM  FIFO  -------> CAEN N89 -------> LeCroy 222 -------> PCB amp -------> start move out
                                                    not(NIM)               TTL                 TTL    ^        +12V
                                                                                                      |
                                                                                                      |
CAEN N89 mode switch to OUT                                                                                                  PSU +12V

Widths of signals from LeCroy 222
 move in = 75ms
 move out = 25ms

Note - the outputs of EG&G/ESN LF4000 FIFO could be connected directly to the LeCroy 222 as the inputs accept NIM and TTL |
| Attachment 1: 20240205_174307.jpg
|

|
|
493
|
Mon Feb 5 19:43:52 2024 |
CB, TD, ML | BuTIS reference for VETAR2 |
16.40 CB/ML install fibre optic cable from patch panel beneath dipole downstream of YR09/CARME chamber to VETAR2 front panel fibre connector - see attachments 1 & 2.

VETAR2 LCD display changes from magenta to cyan.

DAQ stop. DAQ reset. DAQ setup.

All system wide checks OK.

WR timestamp control - attachment 3 is timed 16.43.11 UTC+1

WR timestamp 0x17B101E7 7FCD1ACD -> 1707147827543349965ns -> 1707147827s -> Monday, February 5, 2024 3:43:47 PM UTC ( https://www.epochconverter.com/ ) |
| Attachment 1: 20240205_173029.jpg
|

|
| Attachment 2: 20240205_172957.jpg
|

|
| Attachment 3: Screenshot_from_2024-02-05_16-43-18.png
|

|
|
492
|
Mon Feb 5 12:48:50 2024 |
CB TD | Pulser walkthough - Run4 |
13.41 DAQ start - file G22-88/R4

Pulser walkthrough

EGG Ortec 448 Pulser

Amplitide 90,000-10,000 @ 10,000 step
Normalise 5.0
Attenuators x5 IN
t_r 100ns
Tau_d 50us
Frequency Int Osc 50Hz
Polarity + ( - polarity via Cooknell SA1 Sum & Invert Amp )

File G22-88/R4

14.08 DAQ stop file G22-88/R4_8 |
| Attachment 1: Screenshot_from_2024-02-05_14-04-33.png
|

|
| Attachment 2: Screenshot_from_2024-02-05_14-05-16.png
|

|
|
491
|
Mon Feb 5 05:45:26 2024 |
CB TD | Run3 - end |
06.40 DAQ continues file G22-88/R3_42

      DSSSD bias OK - attachment 1
      ambient temperature 16.8 deg C

      FEE64 temperatures OK - attachment 2

      ADC data item stats - attachments 3
       aida15 rate c. 34k ( 2x 'hot' channels, 1x channel missing, all other channels OK )
       aida01 rate c. 75k ( 2x 'hot' channels )

      per FEE64 Stat spectra - attachments 4-5

      Merger and TapeServer - attachments 6-7

      All system wide checks OK except
       aida02 & aida08 FPGA timestamp error - attachment 8

      WR timestamps OK - attachment 9

09.47 DAQ continues file G22-88/R3_46

      DSSSD bias OK - attachment 10
      ambient temperature 16.8 deg C

      FEE64 temperatures OK - attachment 11

      ADC data item stats - attachments 12
       aida15 rate c. 34k ( 2x 'hot' channels, 1x channel missing, all other channels OK )
       aida01 rate c. 75k ( 2x 'hot' channels )

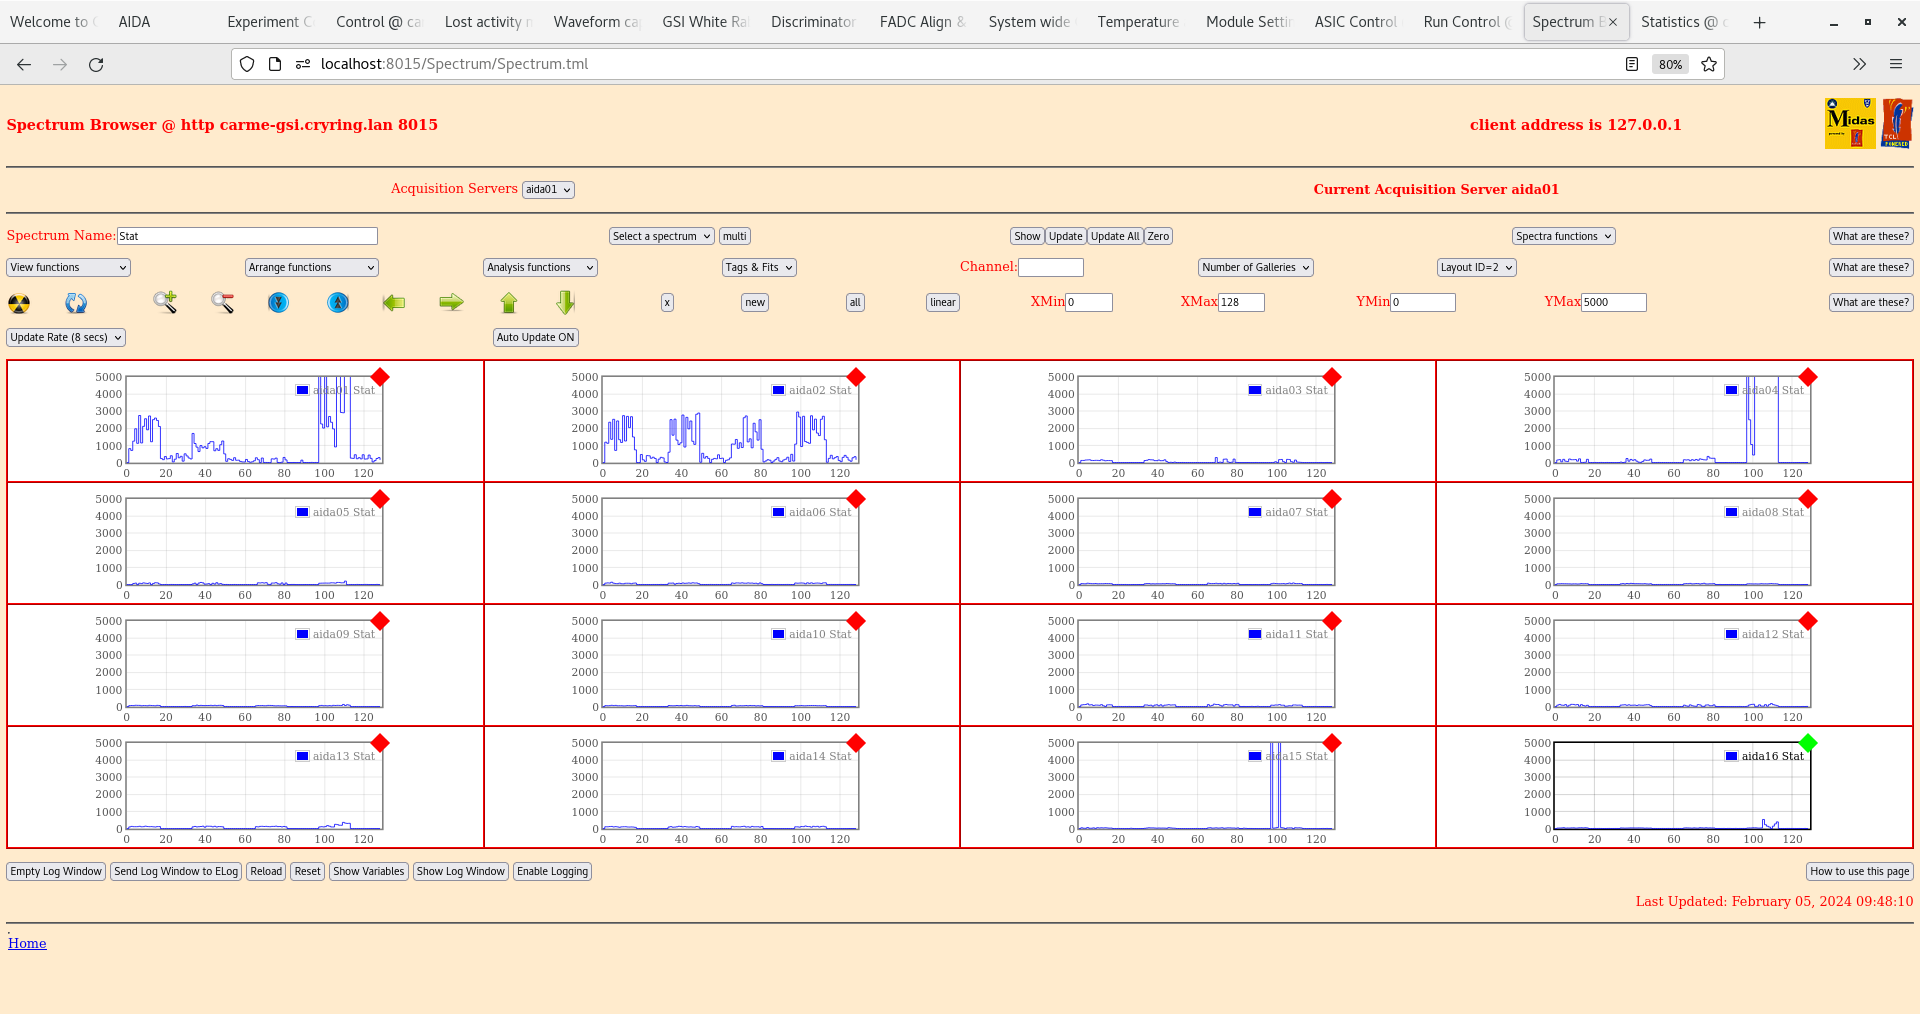
      per FEE64 Stat spectra - attachments 13-14

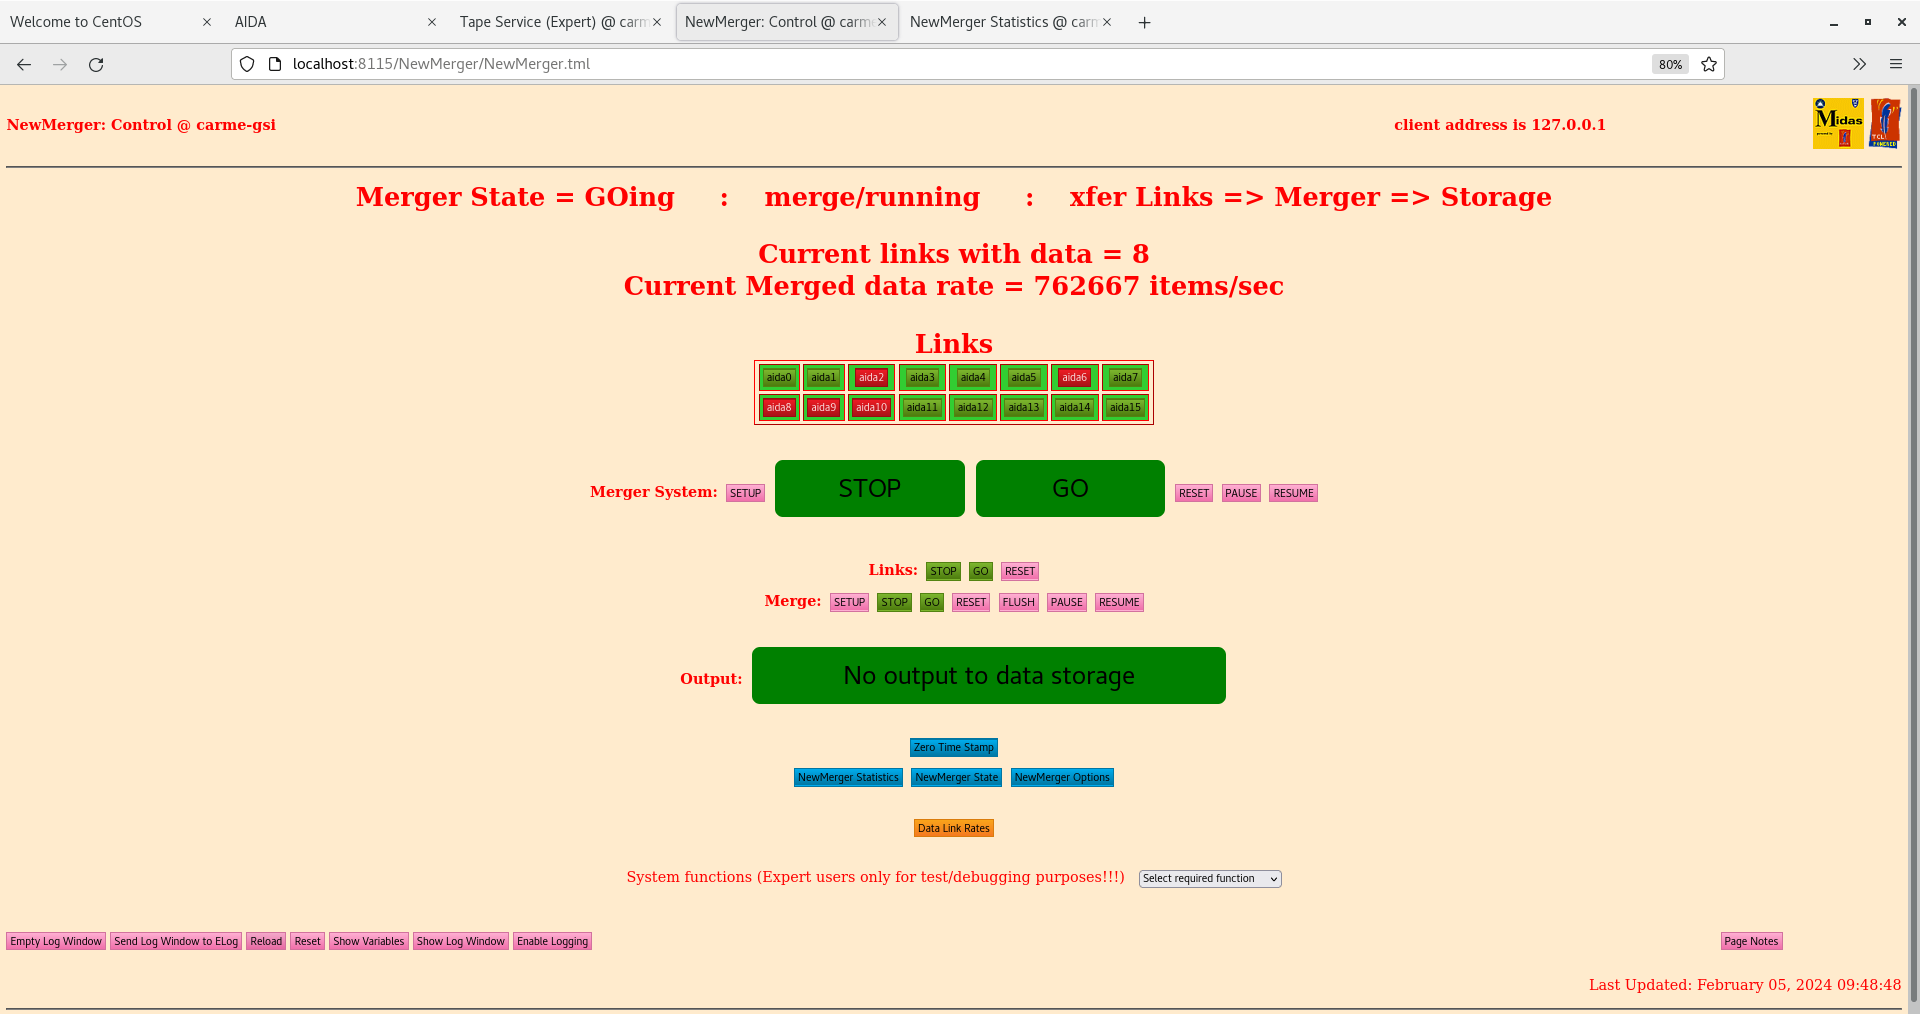
      Merger and TapeServer - attachments 15-16

09.52 per FEE64 Rate spectra - attachments 17-18

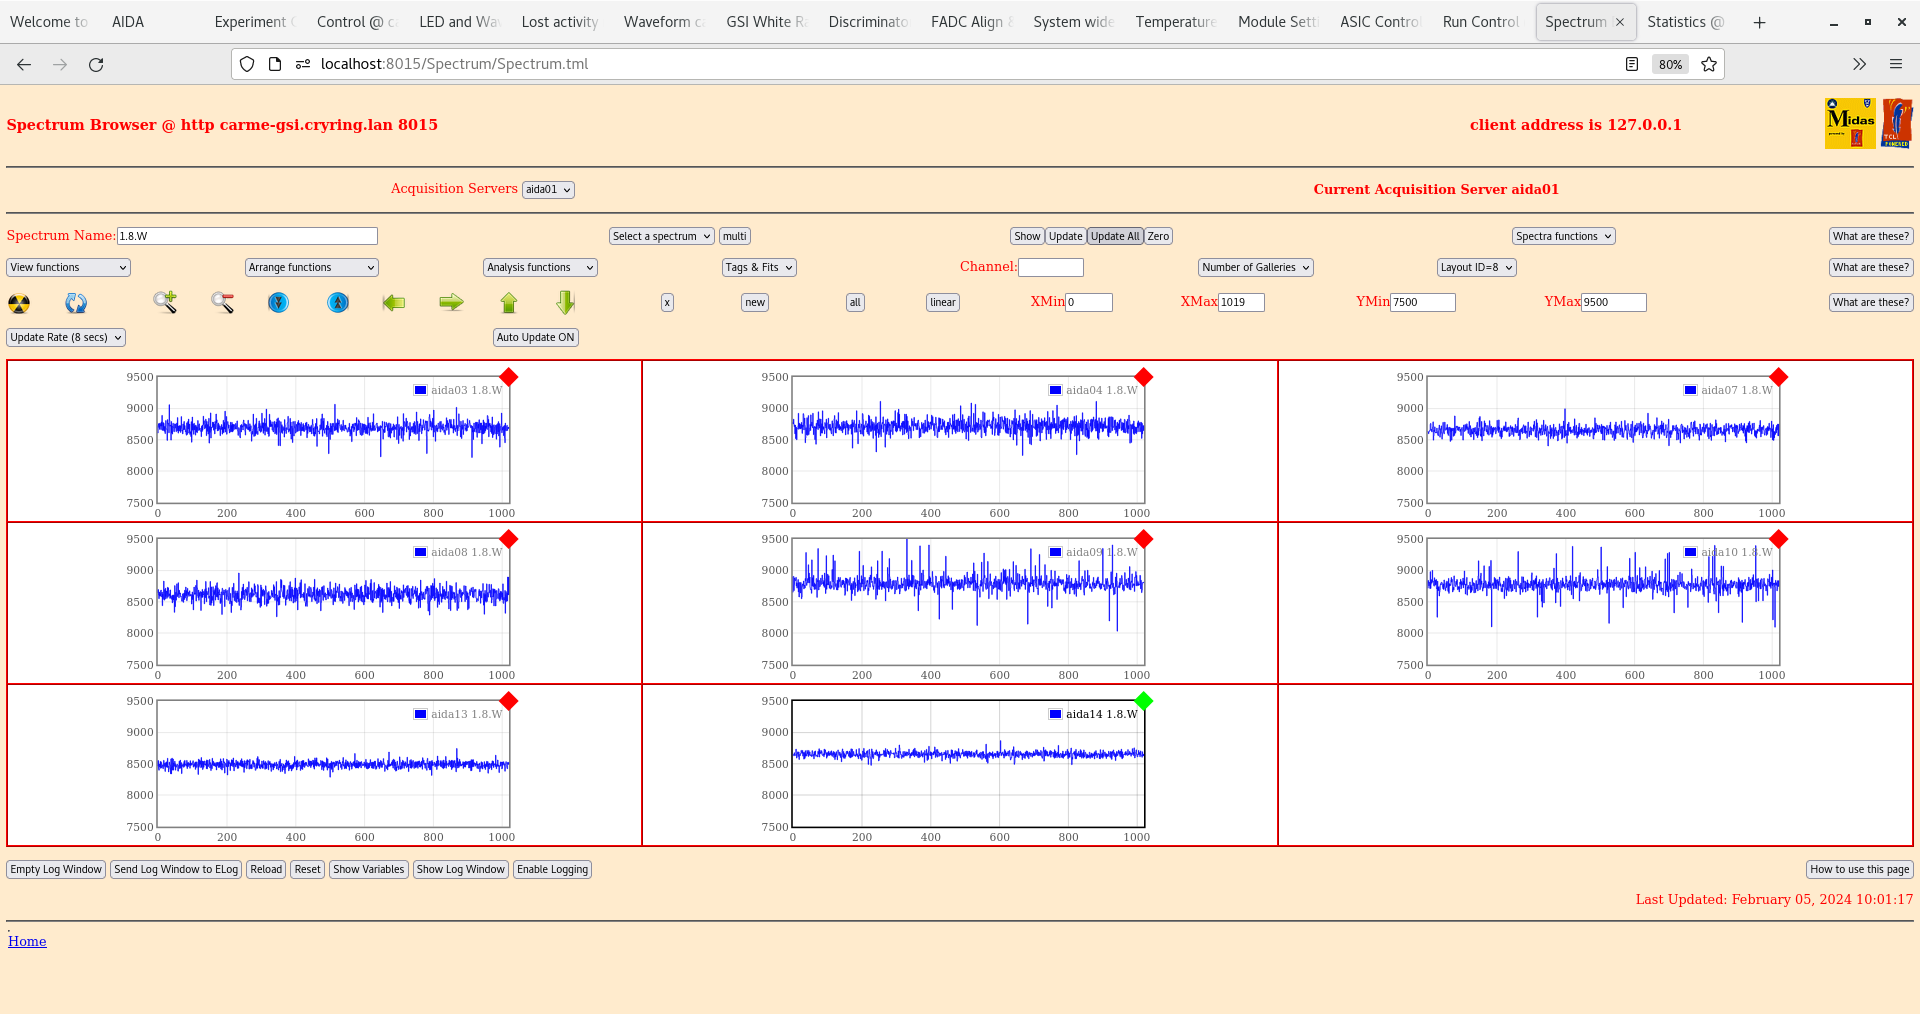
      per FEE64 1.8.L spectra - attachments 19-20

      per FEE64 1.8.H spectra - attachments 21-22

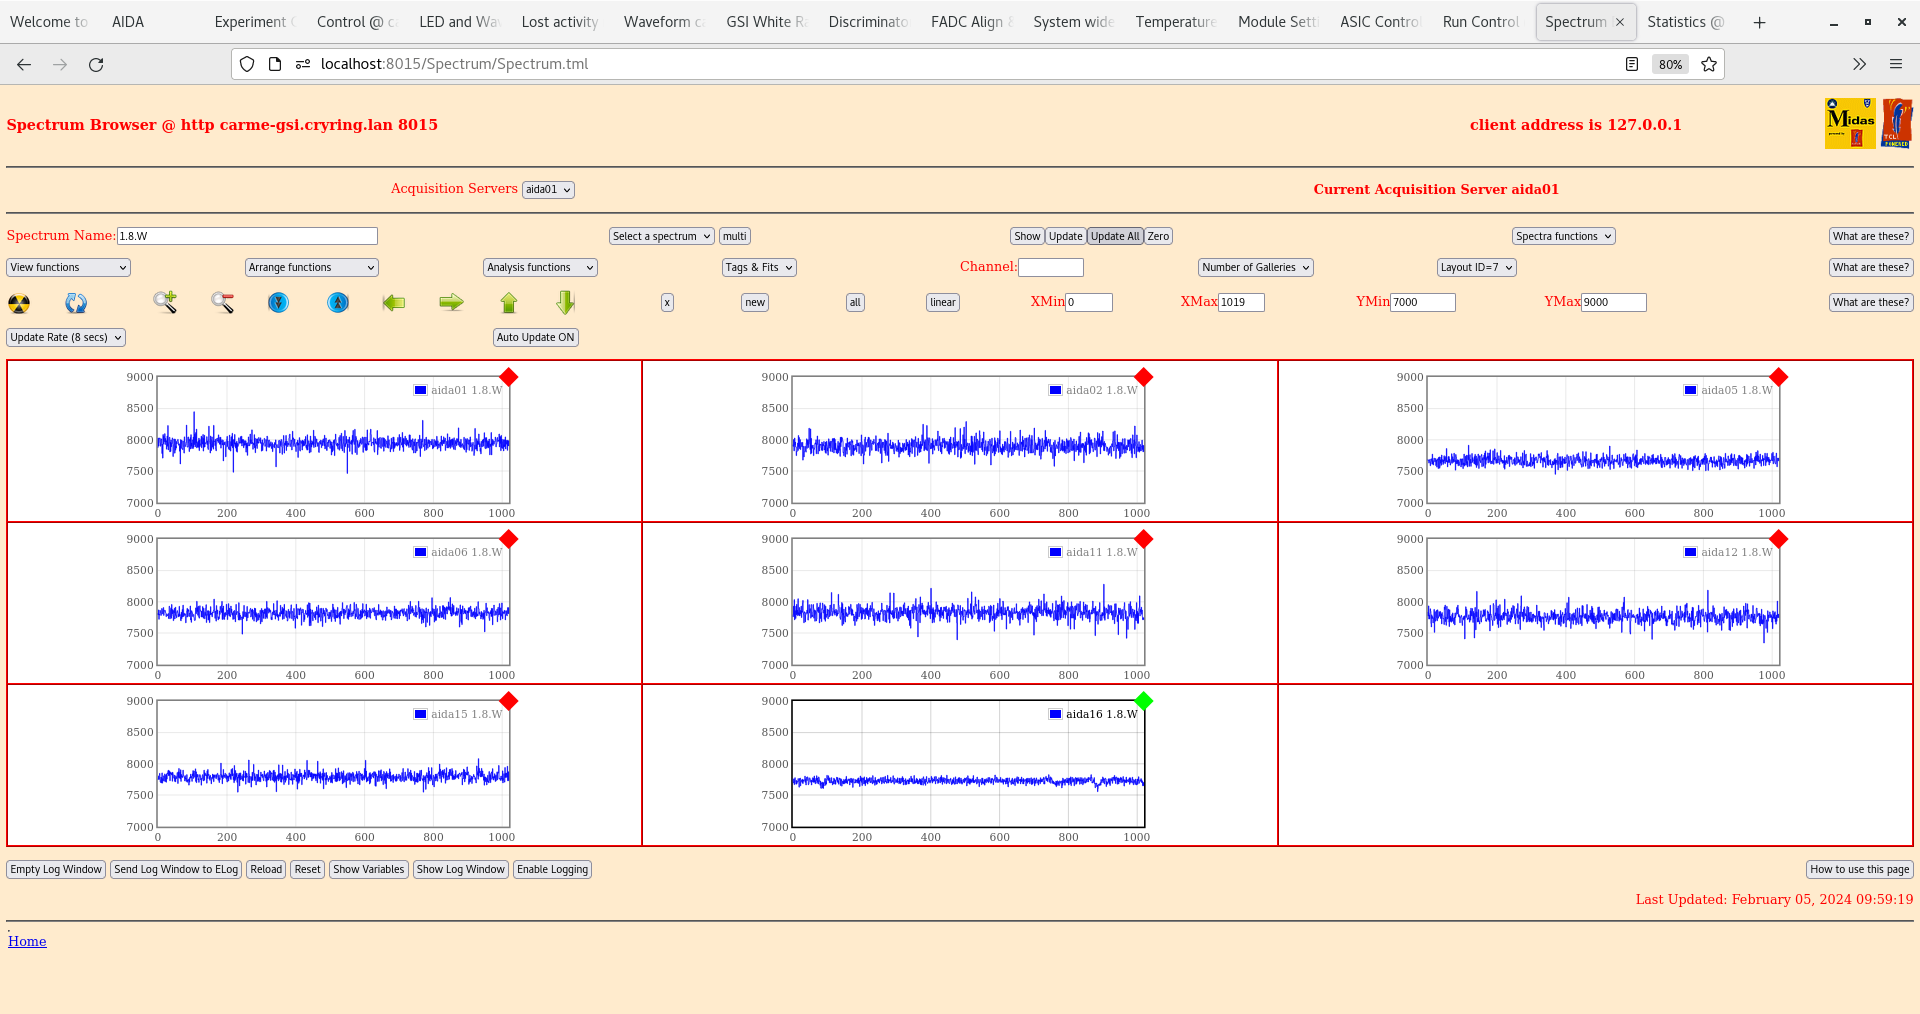
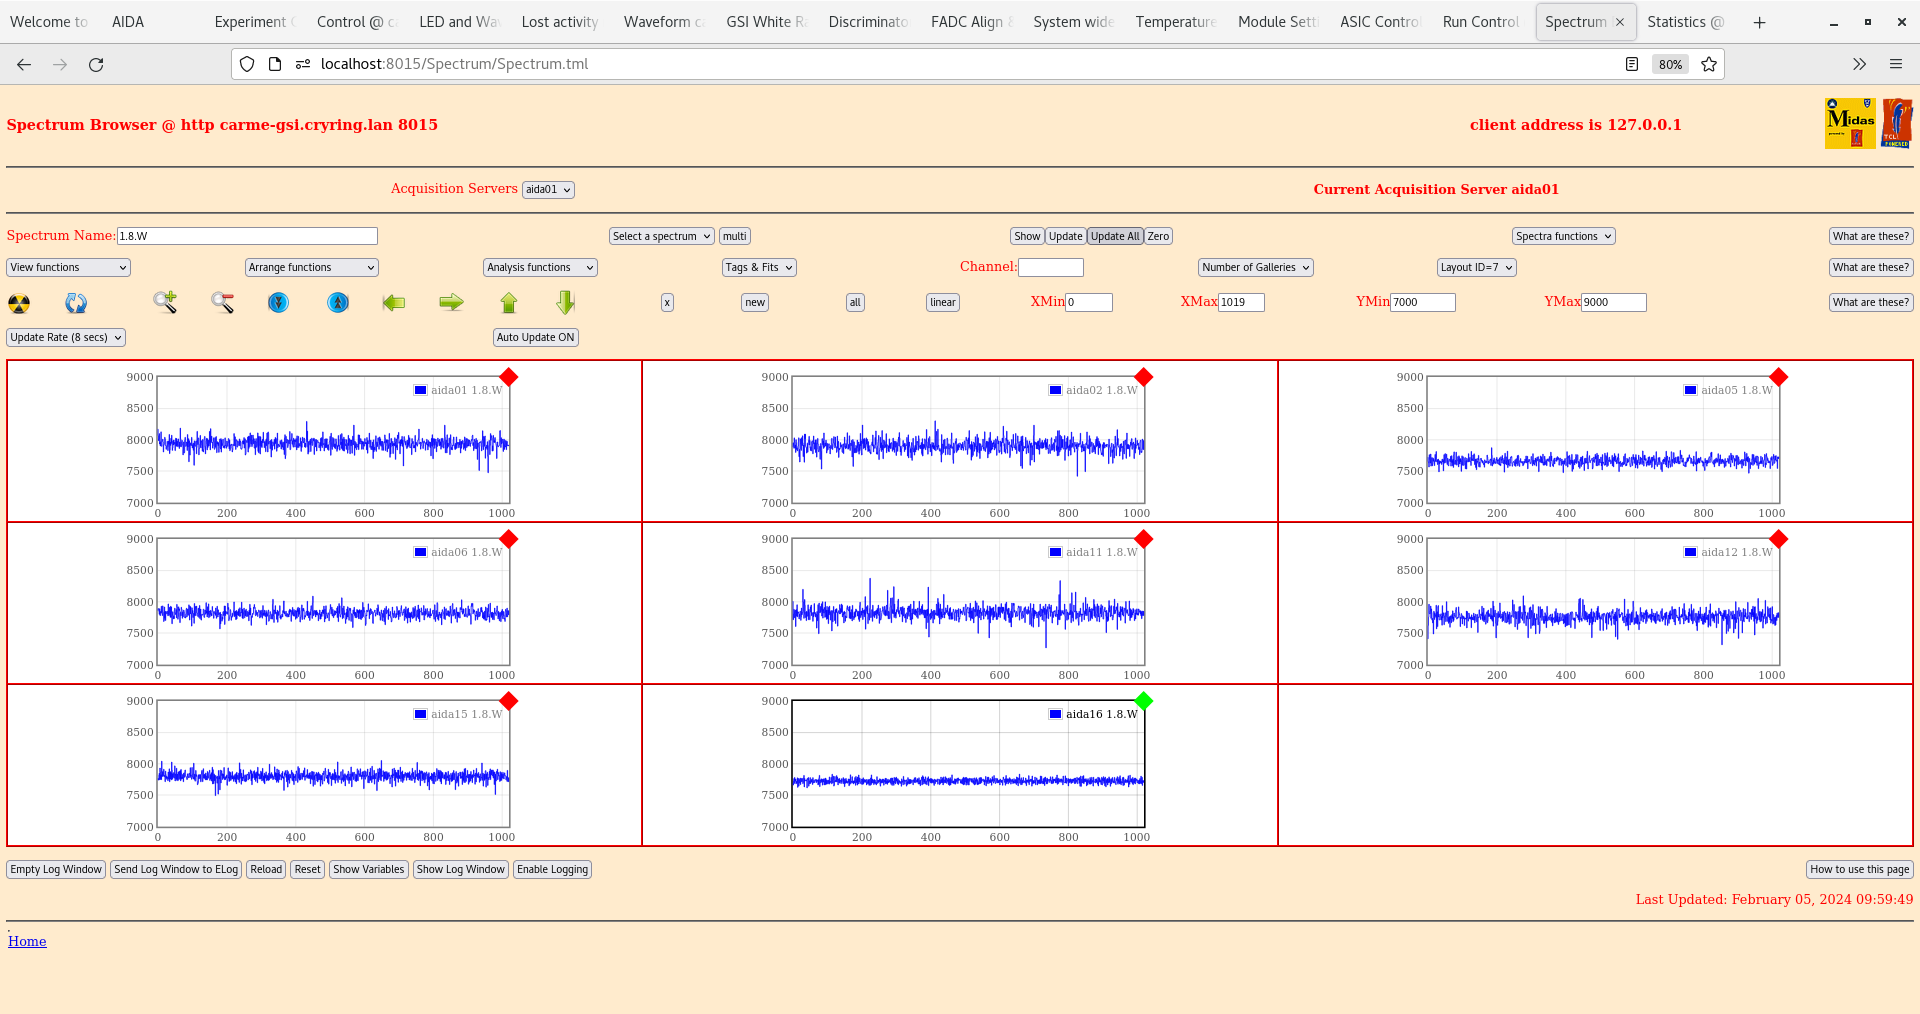
      per p+n FEE64 1.8.W spectra - 20us, 200us, 2ms & 20ms FSR - attachments 23-26

      per n+n FEE64 1.8.W spectra - 20us, 200us, 2ms & 20ms FSR - attachments 27-30


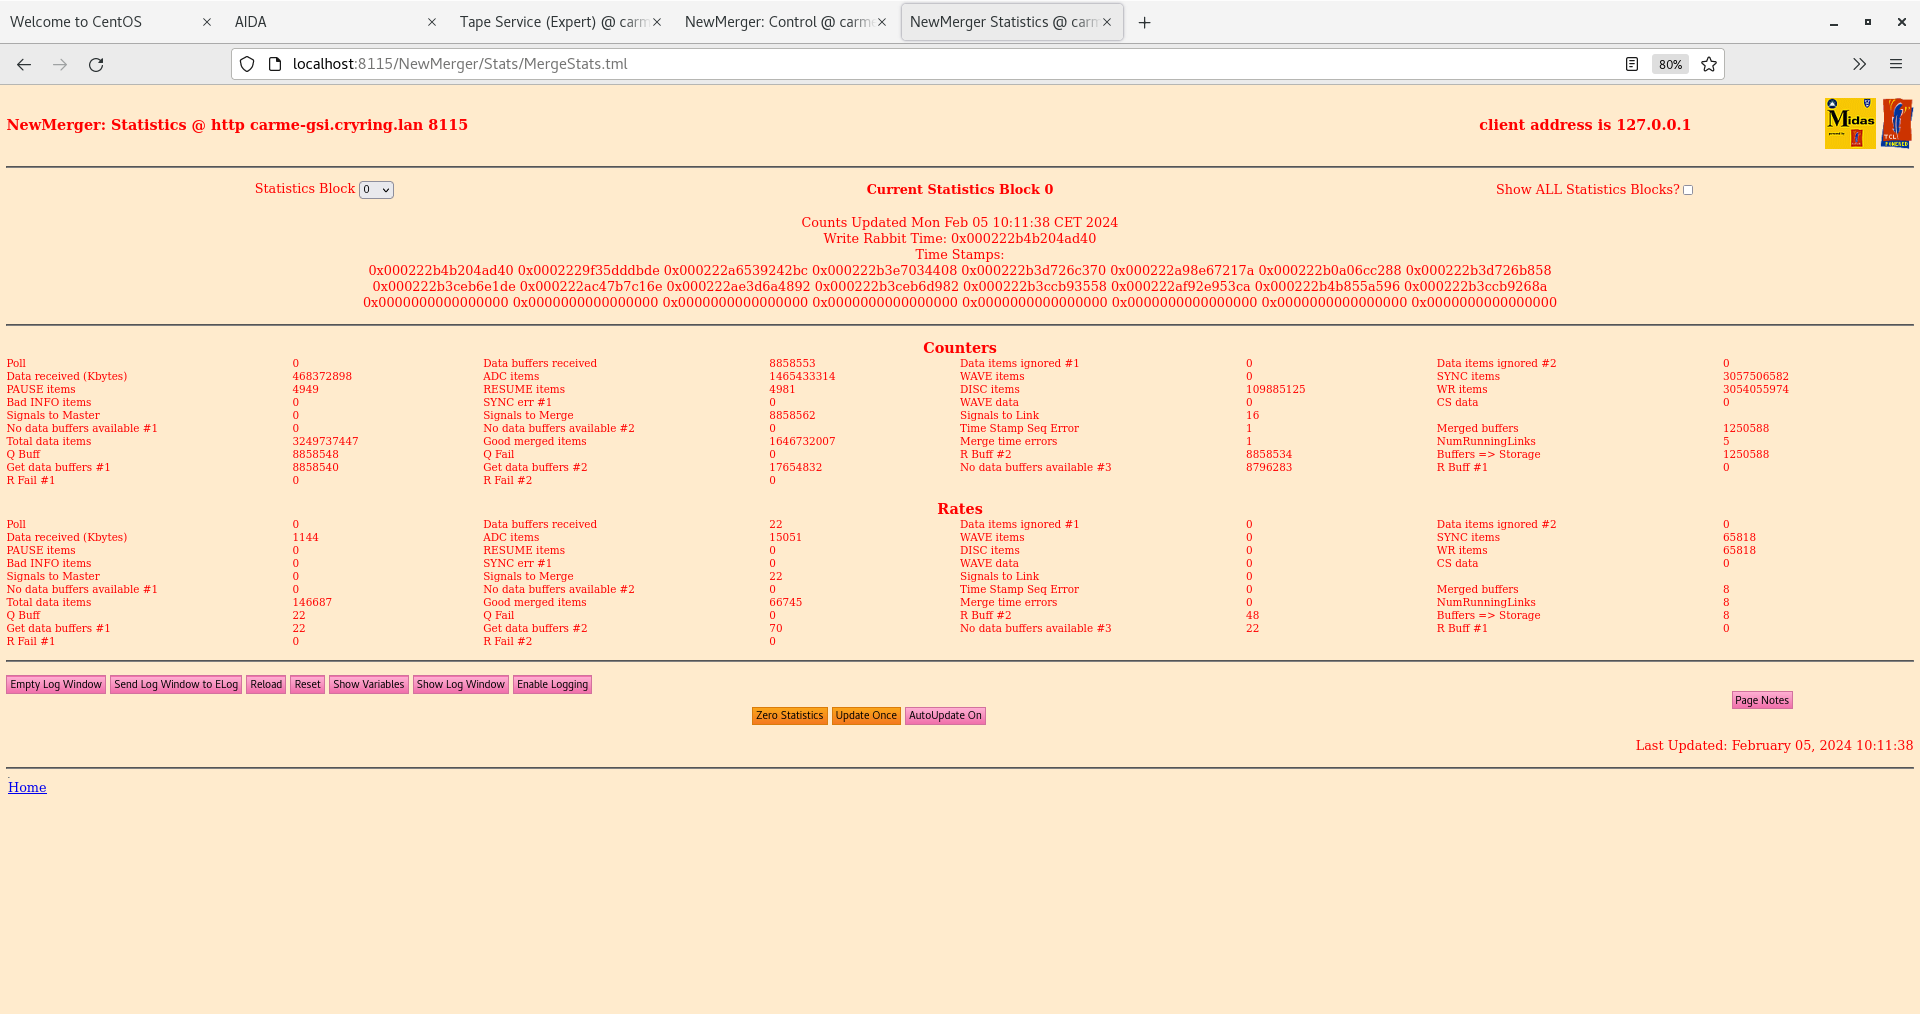
10.11 Merger stats blocks 0-4, 14-16 - attachments 31-38

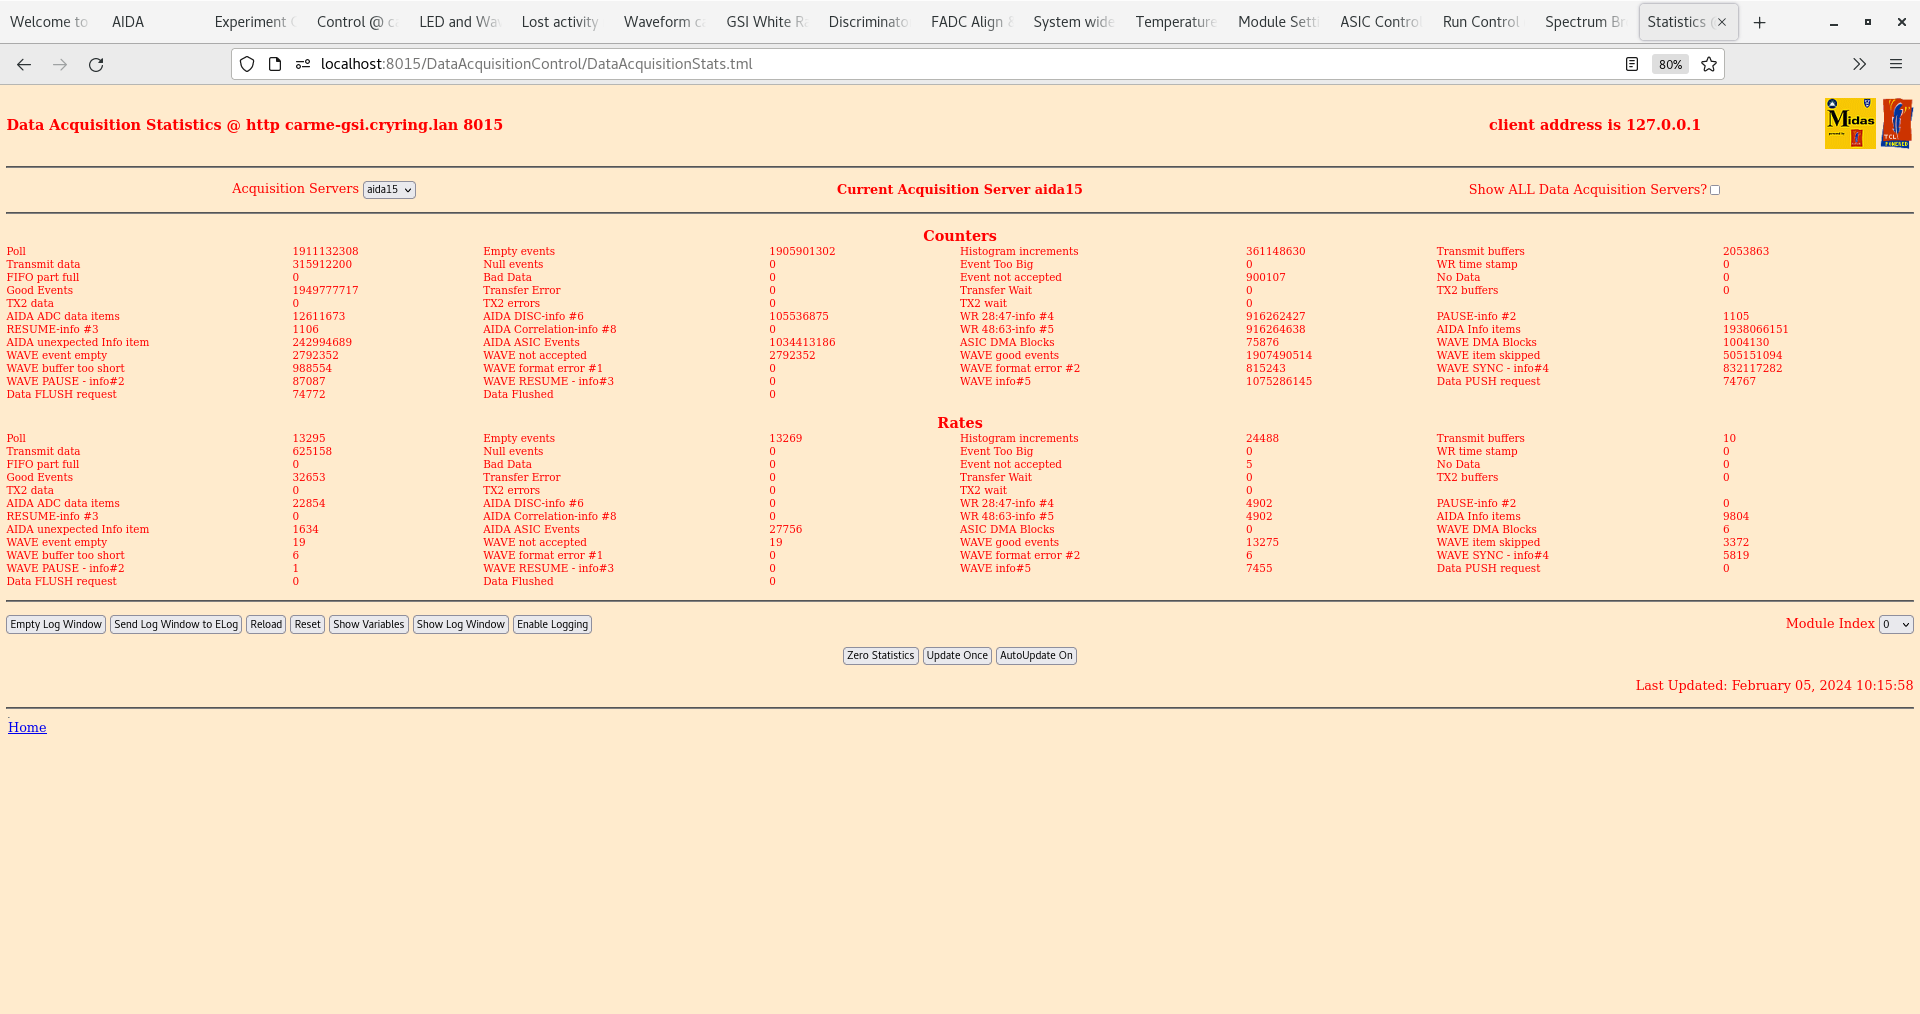
10.14 aida01-aida04, aida14-aida16 stats- attachments 39-45

10.21 Overnight V-I attach 46

10.23 Save current ASIC settings 2024Feb05-10.22.28
       changes to disc mask and LED waveform threshold for some FEE64s

10.32 Analysis of data file G22-88/R3_45 - attachments 47
       deadtime aida01 c. 0.5%, all other FEE64s deadtime c. 0%


13.07 DAQ stop file G22-88/R3_50
      Stop merger
      Stop tapeserver

Afternoon: Tested detector motion. Channels on p+n strips drop out with high threshold (1 MeV), but not with low threshold (100 keV). No issues on n+n strips. Reasons unclear. |
| Attachment 1: Screenshot_from_2024-02-05_06-40-57.png
|

|
| Attachment 2: Screenshot_from_2024-02-05_06-41-22.png
|

|
| Attachment 3: Screenshot_from_2024-02-05_06-41-47.png
|

|
| Attachment 4: Screenshot_from_2024-02-05_06-42-04.png
|

|
| Attachment 5: Screenshot_from_2024-02-05_06-42-29.png
|

|
| Attachment 6: Screenshot_from_2024-02-05_06-42-55.png
|

|
| Attachment 7: Screenshot_from_2024-02-05_06-43-16.png
|

|
| Attachment 8: Screenshot_from_2024-02-05_06-44-10.png
|

|
| Attachment 9: Screenshot_from_2024-02-05_06-44-55.png
|

|
| Attachment 10: Screenshot_from_2024-02-05_09-46-59.png
|

|
| Attachment 11: Screenshot_from_2024-02-05_09-47-39.png
|

|
| Attachment 12: Screenshot_from_2024-02-05_09-47-52.png
|

|
| Attachment 13: Screenshot_from_2024-02-05_09-48-22.png
|
|
| Attachment 14: Screenshot_from_2024-02-05_09-48-29.png
|

|
| Attachment 15: Screenshot_from_2024-02-05_09-48-51.png
|
|
| Attachment 16: Screenshot_from_2024-02-05_09-49-05.png
|

|
| Attachment 17: Screenshot_from_2024-02-05_09-52-04.png
|

|
| Attachment 18: Screenshot_from_2024-02-05_09-52-14.png
|

|
| Attachment 19: Screenshot_from_2024-02-05_09-52-57.png
|

|
| Attachment 20: Screenshot_from_2024-02-05_09-53-33.png
|

|
| Attachment 21: Screenshot_from_2024-02-05_09-55-33.png
|

|
| Attachment 22: Screenshot_from_2024-02-05_09-56-09.png
|

|
| Attachment 23: Screenshot_from_2024-02-05_09-57-05.png
|

|
| Attachment 24: Screenshot_from_2024-02-05_09-58-51.png
|

|
| Attachment 25: Screenshot_from_2024-02-05_09-59-23.png
|
|
| Attachment 26: Screenshot_from_2024-02-05_09-59-56.png
|
|
| Attachment 27: Screenshot_from_2024-02-05_10-03-26.png
|

|
| Attachment 28: Screenshot_from_2024-02-05_10-02-25.png
|

|
| Attachment 29: Screenshot_from_2024-02-05_10-01-57.png
|

|
| Attachment 30: Screenshot_from_2024-02-05_10-01-25.png
|
|
| Attachment 31: Screenshot_from_2024-02-05_10-11-41.png
|
|
| Attachment 32: Screenshot_from_2024-02-05_10-11-46.png
|

|
| Attachment 33: Screenshot_from_2024-02-05_10-11-51.png
|

|
| Attachment 34: Screenshot_from_2024-02-05_10-11-57.png
|

|
| Attachment 35: Screenshot_from_2024-02-05_10-12-04.png
|

|
| Attachment 36: Screenshot_from_2024-02-05_10-12-39.png
|

|
| Attachment 37: Screenshot_from_2024-02-05_10-12-44.png
|

|
| Attachment 38: Screenshot_from_2024-02-05_10-13-11.png
|

|
| Attachment 39: Screenshot_from_2024-02-05_10-14-43.png
|

|
| Attachment 40: Screenshot_from_2024-02-05_10-14-50.png
|

|
| Attachment 41: Screenshot_from_2024-02-05_10-15-43.png
|

|
| Attachment 42: Screenshot_from_2024-02-05_10-15-48.png
|

|
| Attachment 43: Screenshot_from_2024-02-05_10-15-54.png
|

|
| Attachment 44: Screenshot_from_2024-02-05_10-16-00.png
|
|
| Attachment 45: Screenshot_from_2024-02-05_10-16-06.png
|

|
| Attachment 46: Screenshot_from_2024-02-05_10-21-03.png
|

|
| Attachment 47: R3_45
|
*** TDR format 3.3.0 analyser - TD - May 2021
*** ERROR: READ I/O error: 5002
blocks: 32000
ADC data format: 261748120 ( 83699.2 Hz)
Other data format: 171882 ( 55.0 Hz)
Sample trace data format: 0 ( 0.0 Hz)
Undefined format: 0 ( 0.0 Hz)
Other data format type: PAUSE: 194 ( 0.1 Hz)
RESUME: 194 ( 0.1 Hz)
SYNC100: 43648 ( 14.0 Hz)
WR48-63: 43648 ( 14.0 Hz)
FEE64 disc: 84198 ( 26.9 Hz)
MBS info: 0 ( 0.0 Hz)
Other info: 0 ( 0.0 Hz)
ADC data range bit set: 3 ( 0.0 Hz)
Timewarps: ADC: 0 ( 0.0 Hz)
PAUSE: 0 ( 0.0 Hz)
RESUME: 0 ( 0.0 Hz)
SYNC100: 0 ( 0.0 Hz)
WR48-63: 0 ( 0.0 Hz)
FEE64 disc: 0 ( 0.0 Hz)
MBS info: 0 ( 0.0 Hz)
Undefined: 0 ( 0.0 Hz)
Sample trace: 0 ( 0.0 Hz)
*** Timestamp elapsed time: 3127.246 s
FEE elapsed dead time(s) elapsed idle time(s)
0 17.539 0.000
1 0.000 0.000
2 0.000 0.000
3 0.000 991.338
4 0.000 0.000
5 0.000 0.000
6 0.000 0.000
7 0.000 0.000
8 0.000 0.000
9 0.000 0.000
10 0.000 0.000
11 0.000 0.000
12 0.000 0.000
13 0.000 0.000
14 0.500 0.000
15 0.000 0.000
16 0.000 0.000
17 0.000 0.000
18 0.000 0.000
19 0.000 0.000
20 0.000 0.000
21 0.000 0.000
22 0.000 0.000
23 0.000 0.000
24 0.000 0.000
25 0.000 0.000
26 0.000 0.000
27 0.000 0.000
28 0.000 0.000
29 0.000 0.000
30 0.000 0.000
31 0.000 0.000
32 0.000 0.000
*** Statistics
FEE ADC Data Other Data Sample Undefined Pause Resume SYNC100 WR48-63 Disc MBS Other HEC Data
0 172462915 139302 0 0 170 170 27567 27567 83828 0 0 0
1 45 2 0 0 0 0 0 0 2 0 0 1
2 58 0 0 0 0 0 0 0 0 0 0 0
3 167035 79 0 0 0 0 24 24 31 0 0 0
4 332 0 0 0 0 0 0 0 0 0 0 0
5 257 0 0 0 0 0 0 0 0 0 0 0
6 254 0 0 0 0 0 0 0 0 0 0 0
7 370 0 0 0 0 0 0 0 0 0 0 0
8 336 0 0 0 0 0 0 0 0 0 0 0
9 75 0 0 0 0 0 0 0 0 0 0 0
10 99 0 0 0 0 0 0 0 0 0 0 0
11 240 164 0 0 0 0 0 0 164 0 0 0
12 1266 0 0 0 0 0 0 0 0 0 0 0
13 218 0 0 0 0 0 0 0 0 0 0 0
14 89113402 32165 0 0 24 24 16057 16057 3 0 0 2
15 1218 170 0 0 0 0 0 0 170 0 0 0
16 0 0 0 0 0 0 0 0 0 0 0 0
17 0 0 0 0 0 0 0 0 0 0 0 0
18 0 0 0 0 0 0 0 0 0 0 0 0
19 0 0 0 0 0 0 0 0 0 0 0 0
20 0 0 0 0 0 0 0 0 0 0 0 0
21 0 0 0 0 0 0 0 0 0 0 0 0
22 0 0 0 0 0 0 0 0 0 0 0 0
23 0 0 0 0 0 0 0 0 0 0 0 0
24 0 0 0 0 0 0 0 0 0 0 0 0
25 0 0 0 0 0 0 0 0 0 0 0 0
26 0 0 0 0 0 0 0 0 0 0 0 0
27 0 0 0 0 0 0 0 0 0 0 0 0
28 0 0 0 0 0 0 0 0 0 0 0 0
29 0 0 0 0 0 0 0 0 0 0 0 0
30 0 0 0 0 0 0 0 0 0 0 0 0
31 0 0 0 0 0 0 0 0 0 0 0 0
32 0 0 0 0 0 0 0 0 0 0 0 0
*** Timewarps
FEE ADC Pause Resume SYNC100 WR48-63 Disc MBS Undefined Samples
0 0 0 0 0 0 0 0 0 0
1 0 0 0 0 0 0 0 0 0
2 0 0 0 0 0 0 0 0 0
3 0 0 0 0 0 0 0 0 0
4 0 0 0 0 0 0 0 0 0
5 0 0 0 0 0 0 0 0 0
6 0 0 0 0 0 0 0 0 0
7 0 0 0 0 0 0 0 0 0
8 0 0 0 0 0 0 0 0 0
9 0 0 0 0 0 0 0 0 0
10 0 0 0 0 0 0 0 0 0
11 0 0 0 0 0 0 0 0 0
12 0 0 0 0 0 0 0 0 0
13 0 0 0 0 0 0 0 0 0
14 0 0 0 0 0 0 0 0 0
15 0 0 0 0 0 0 0 0 0
16 0 0 0 0 0 0 0 0 0
17 0 0 0 0 0 0 0 0 0
18 0 0 0 0 0 0 0 0 0
19 0 0 0 0 0 0 0 0 0
20 0 0 0 0 0 0 0 0 0
21 0 0 0 0 0 0 0 0 0
22 0 0 0 0 0 0 0 0 0
23 0 0 0 0 0 0 0 0 0
24 0 0 0 0 0 0 0 0 0
25 0 0 0 0 0 0 0 0 0
26 0 0 0 0 0 0 0 0 0
27 0 0 0 0 0 0 0 0 0
28 0 0 0 0 0 0 0 0 0
29 0 0 0 0 0 0 0 0 0
30 0 0 0 0 0 0 0 0 0
31 0 0 0 0 0 0 0 0 0
32 0 0 0 0 0 0 0 0 0
*** Program elapsed time: 24.477s ( 1307.373 blocks/s, 81.711 Mb/s)
|
|
490
|
Sun Feb 4 08:40:04 2024 |
CB TD | Run3 - contd |
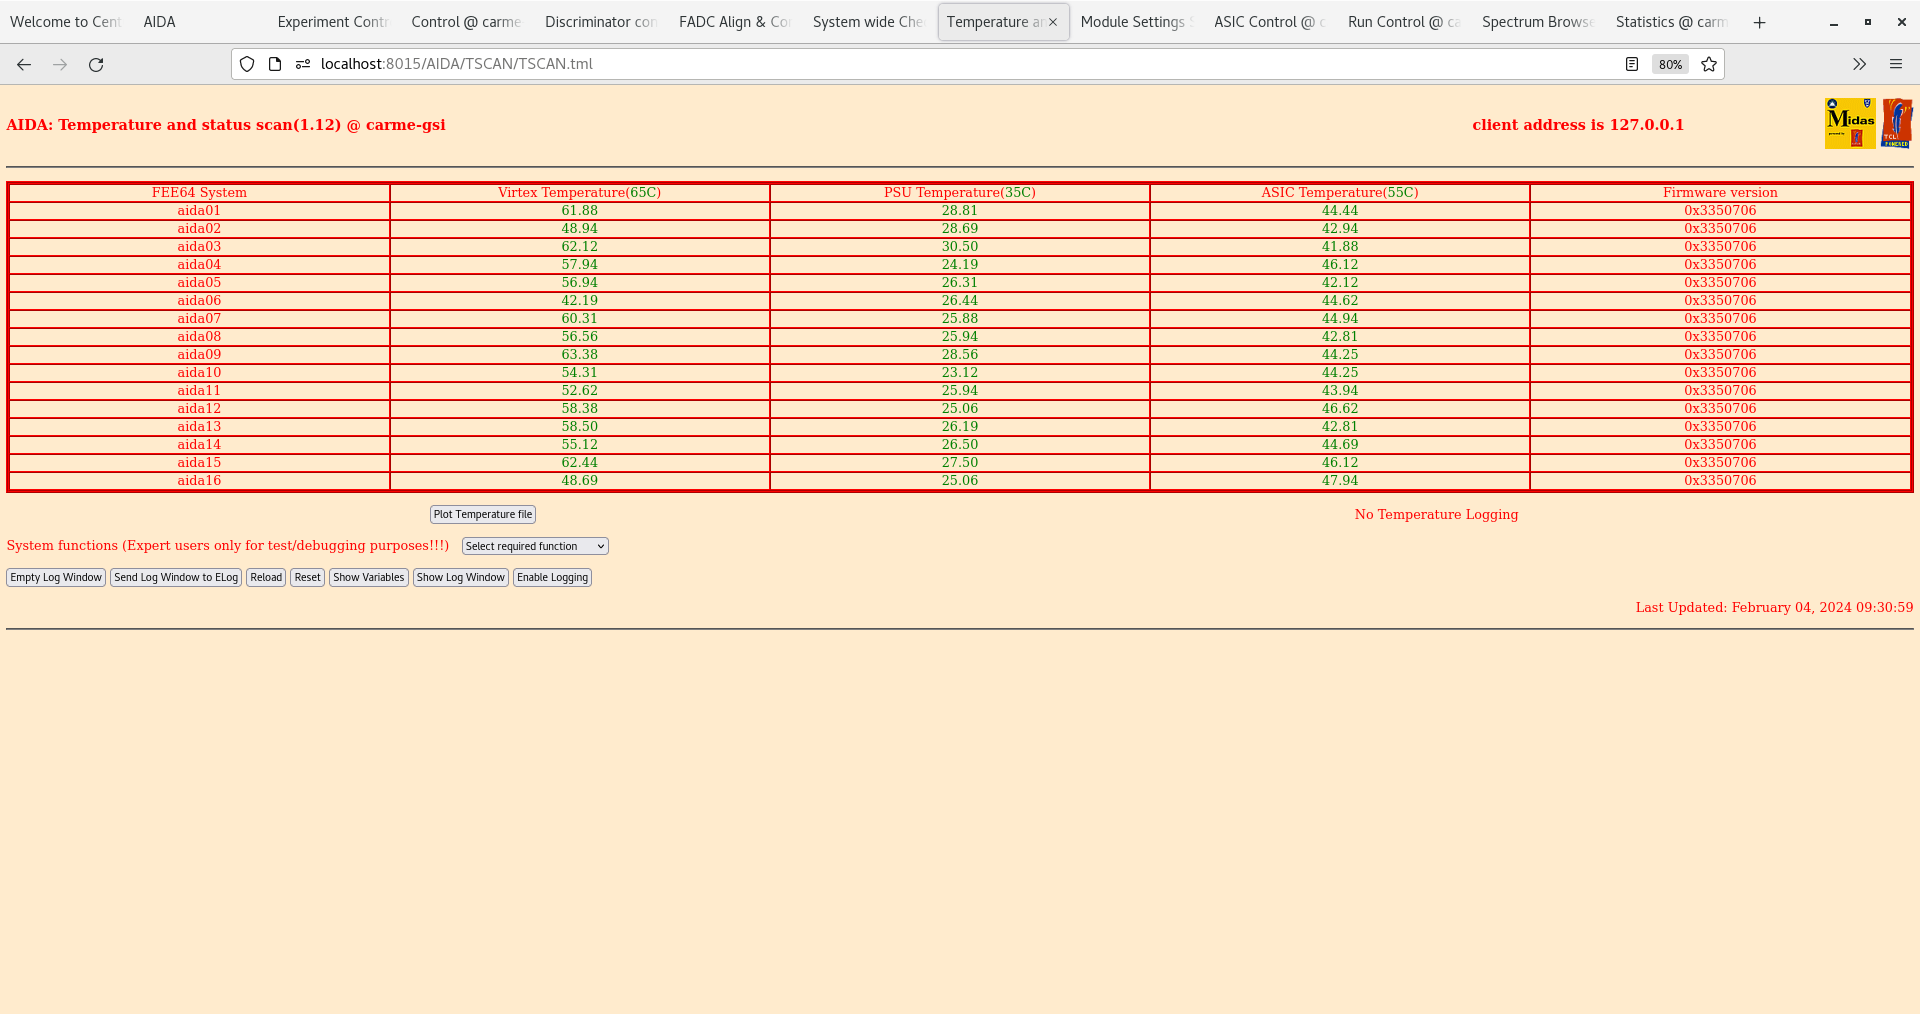
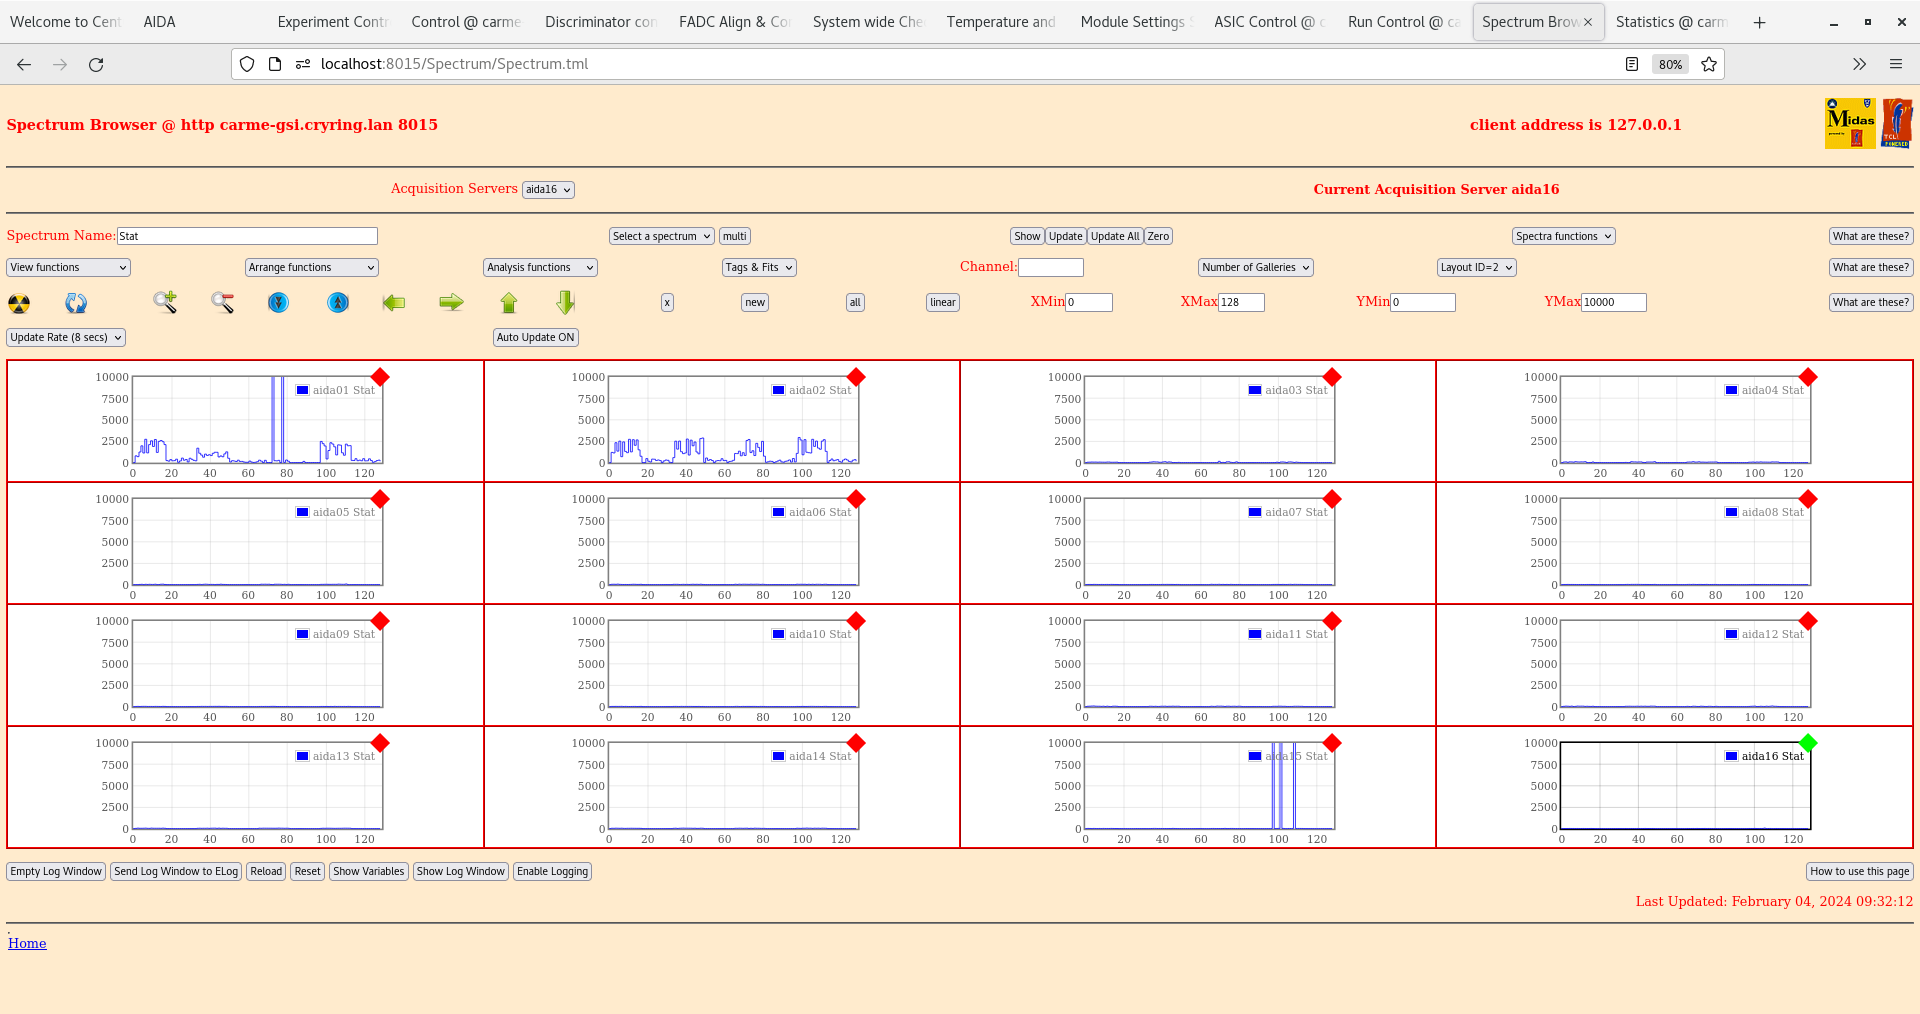
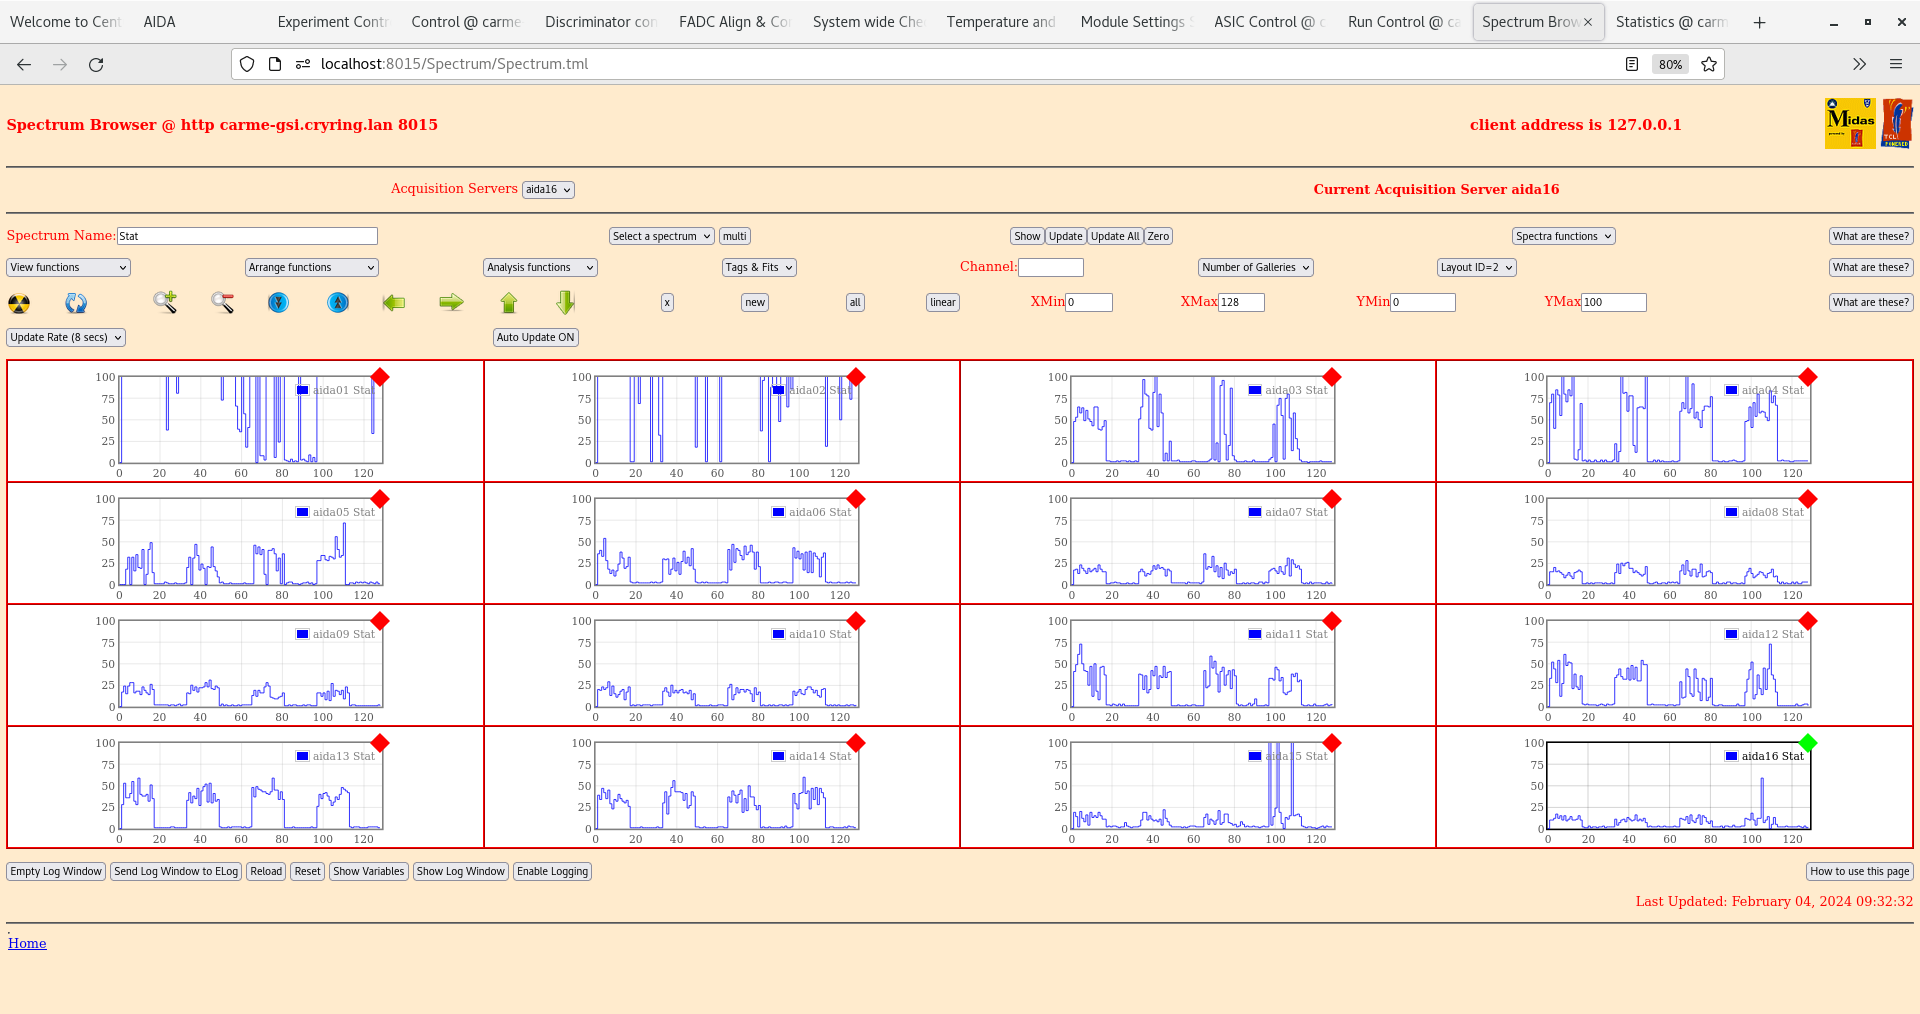
09.30 DAQ continues file G22-88/R3_17

      DSSSD bias OK - attachment 1
      ambient temperature 16.8 deg C

      FEE64 temperatures OK - attachment 2

      ADC data item stats - attachment 3
       aida15 rate c. 25k ( 2x 'hot' channels, 1x channel missing, all other channels OK )
       aida01 rate c. 45k ( 2x 'hot' channels )

      per FEE64 Stat spectra - attachments 4-5

      per FEE64 1.8.L spectra - attachments 6-7

      per FEE64 1.8.W spectra - 20us FSR - attachments 8-9

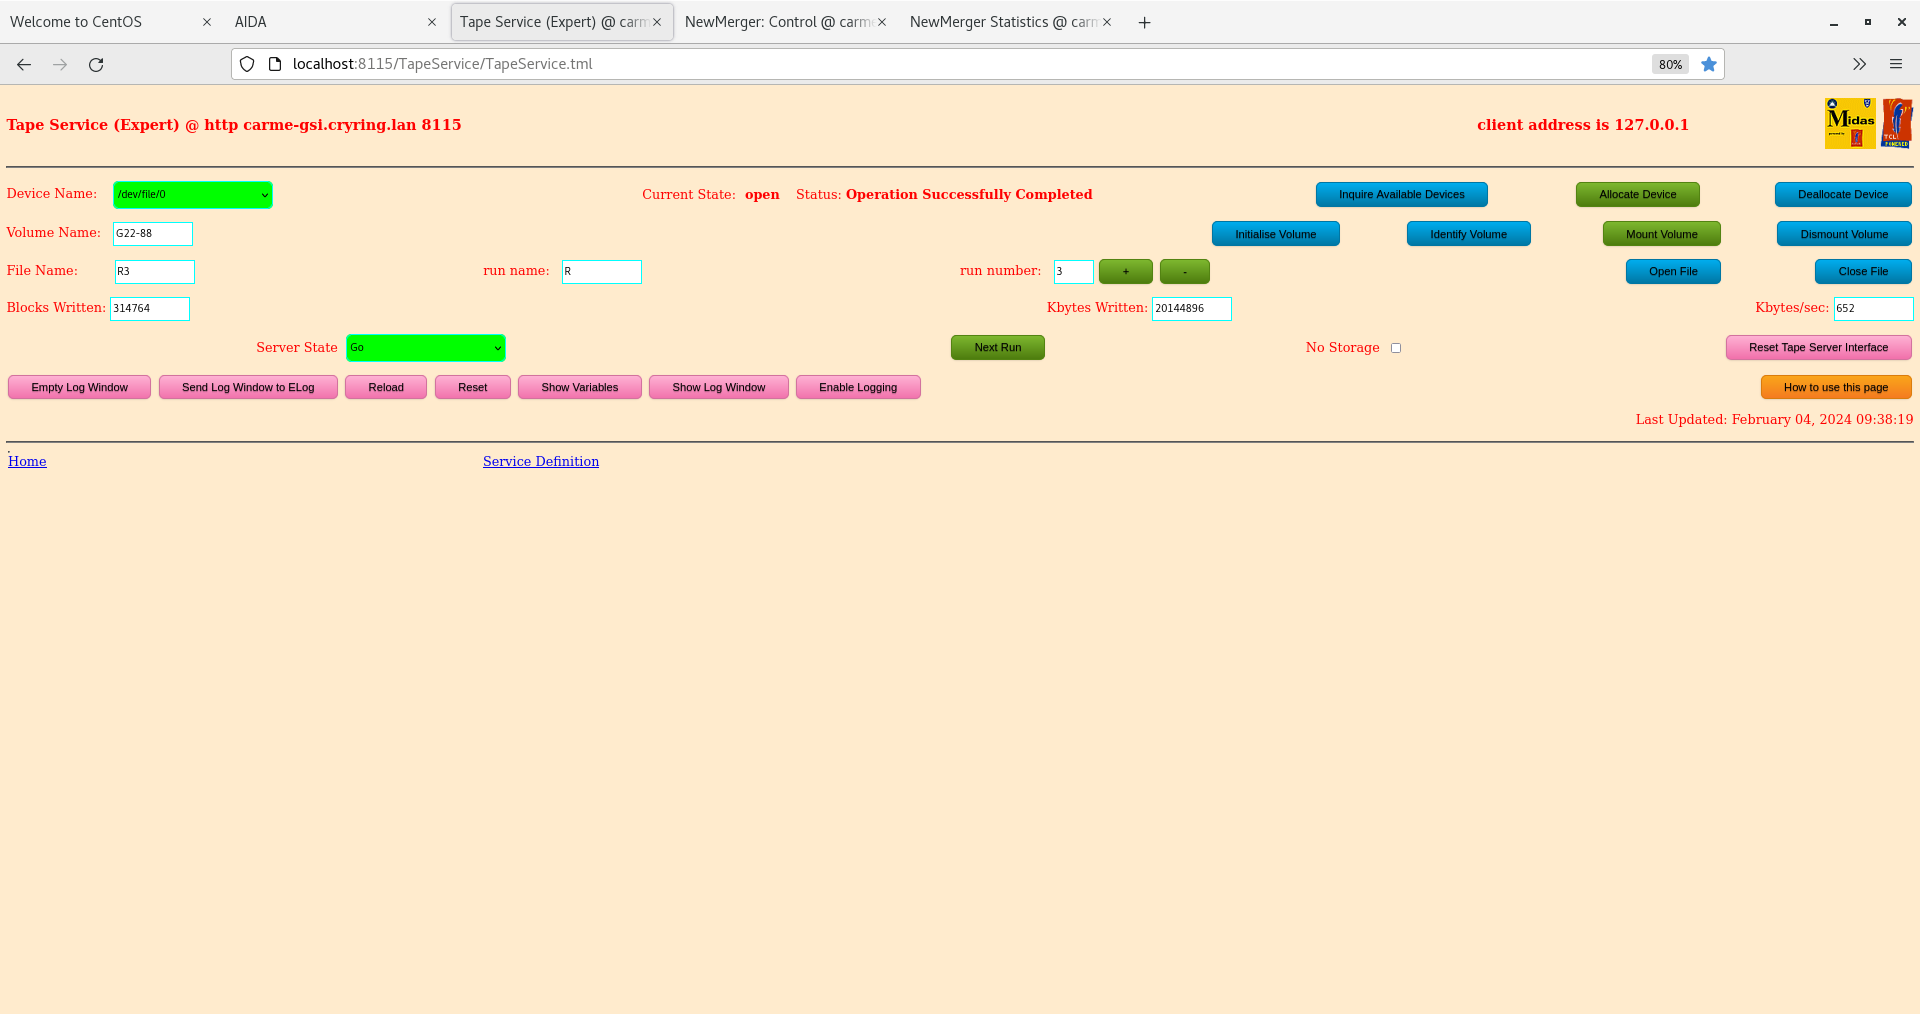
      Merger and TapeServer - attachments 10-11

09.36 Check ASIC load
      No change to aida01 ADC data item rate

      Last access times of data files indicate that data rate changed c. 05.00 - 06.00 this am.
      No obvious vacuum/temperature transients in last six hours.

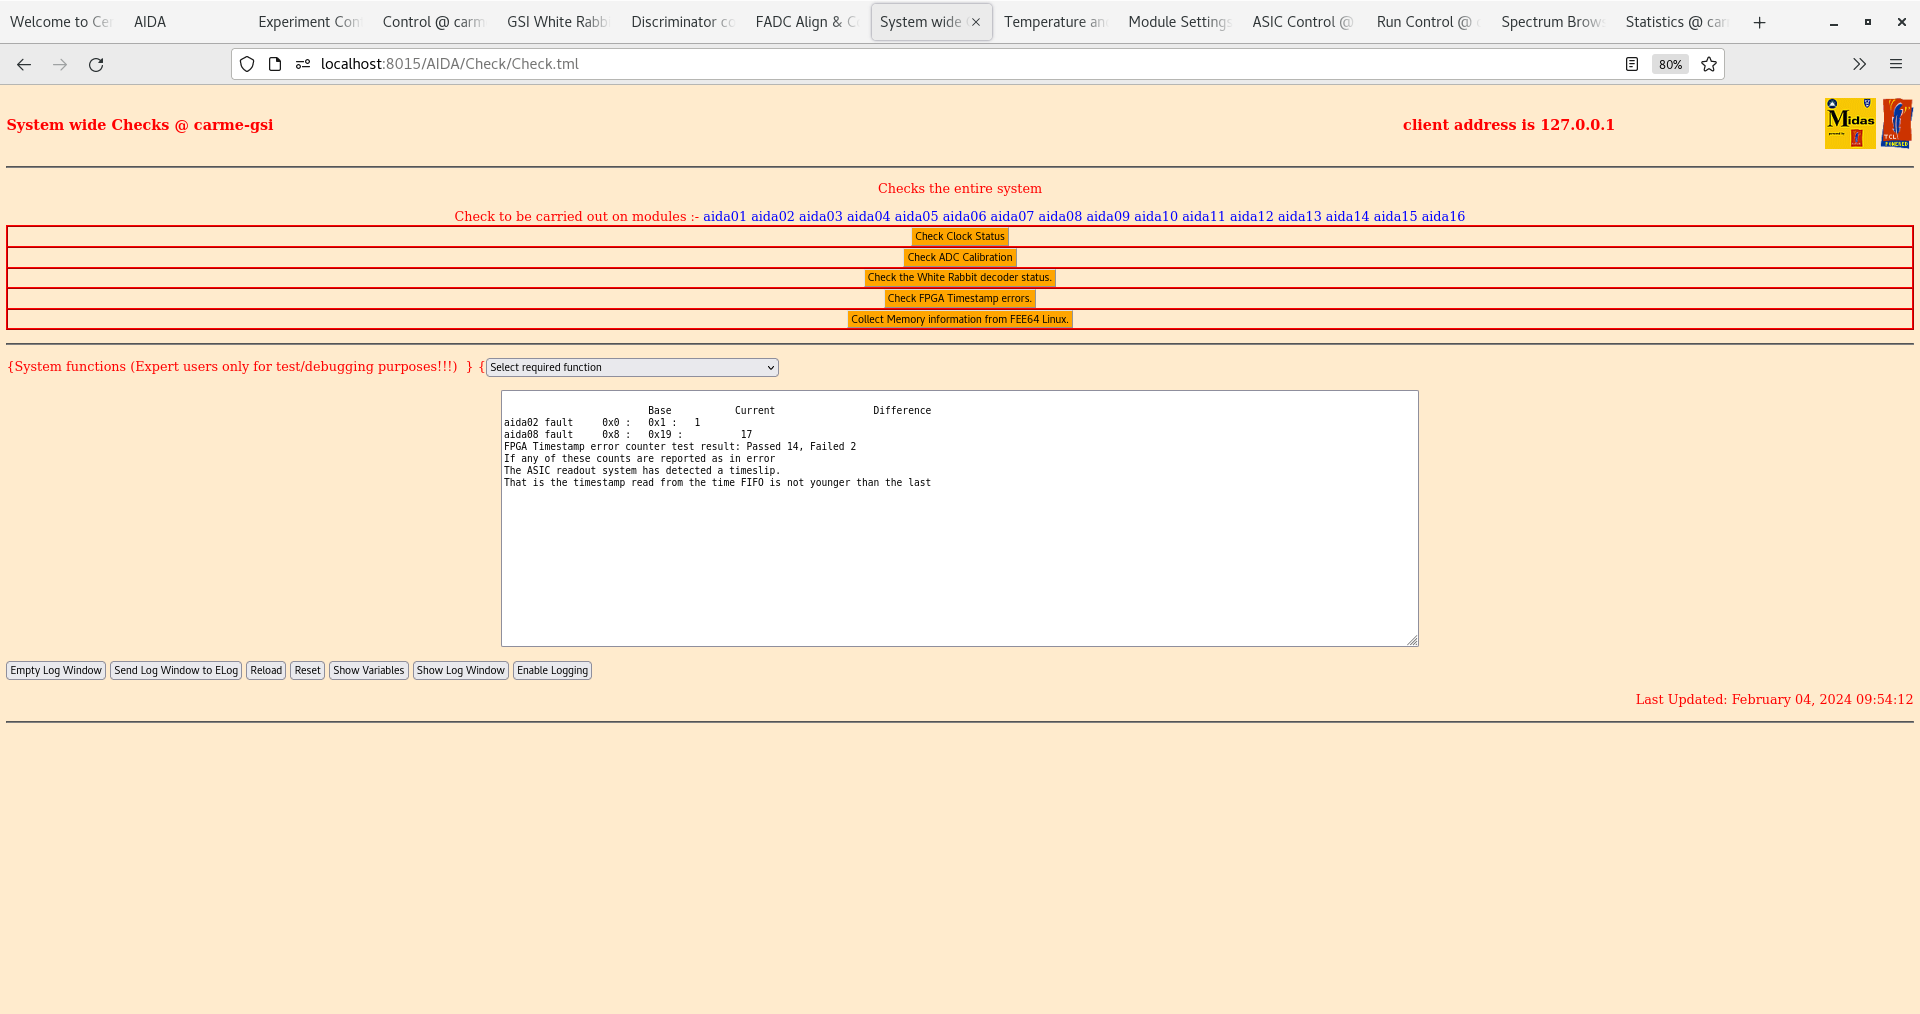
09.55 All system wide checks OK except
       FPGA timestamp errors - attachment 12
      WR timestamps OK - attachment 13

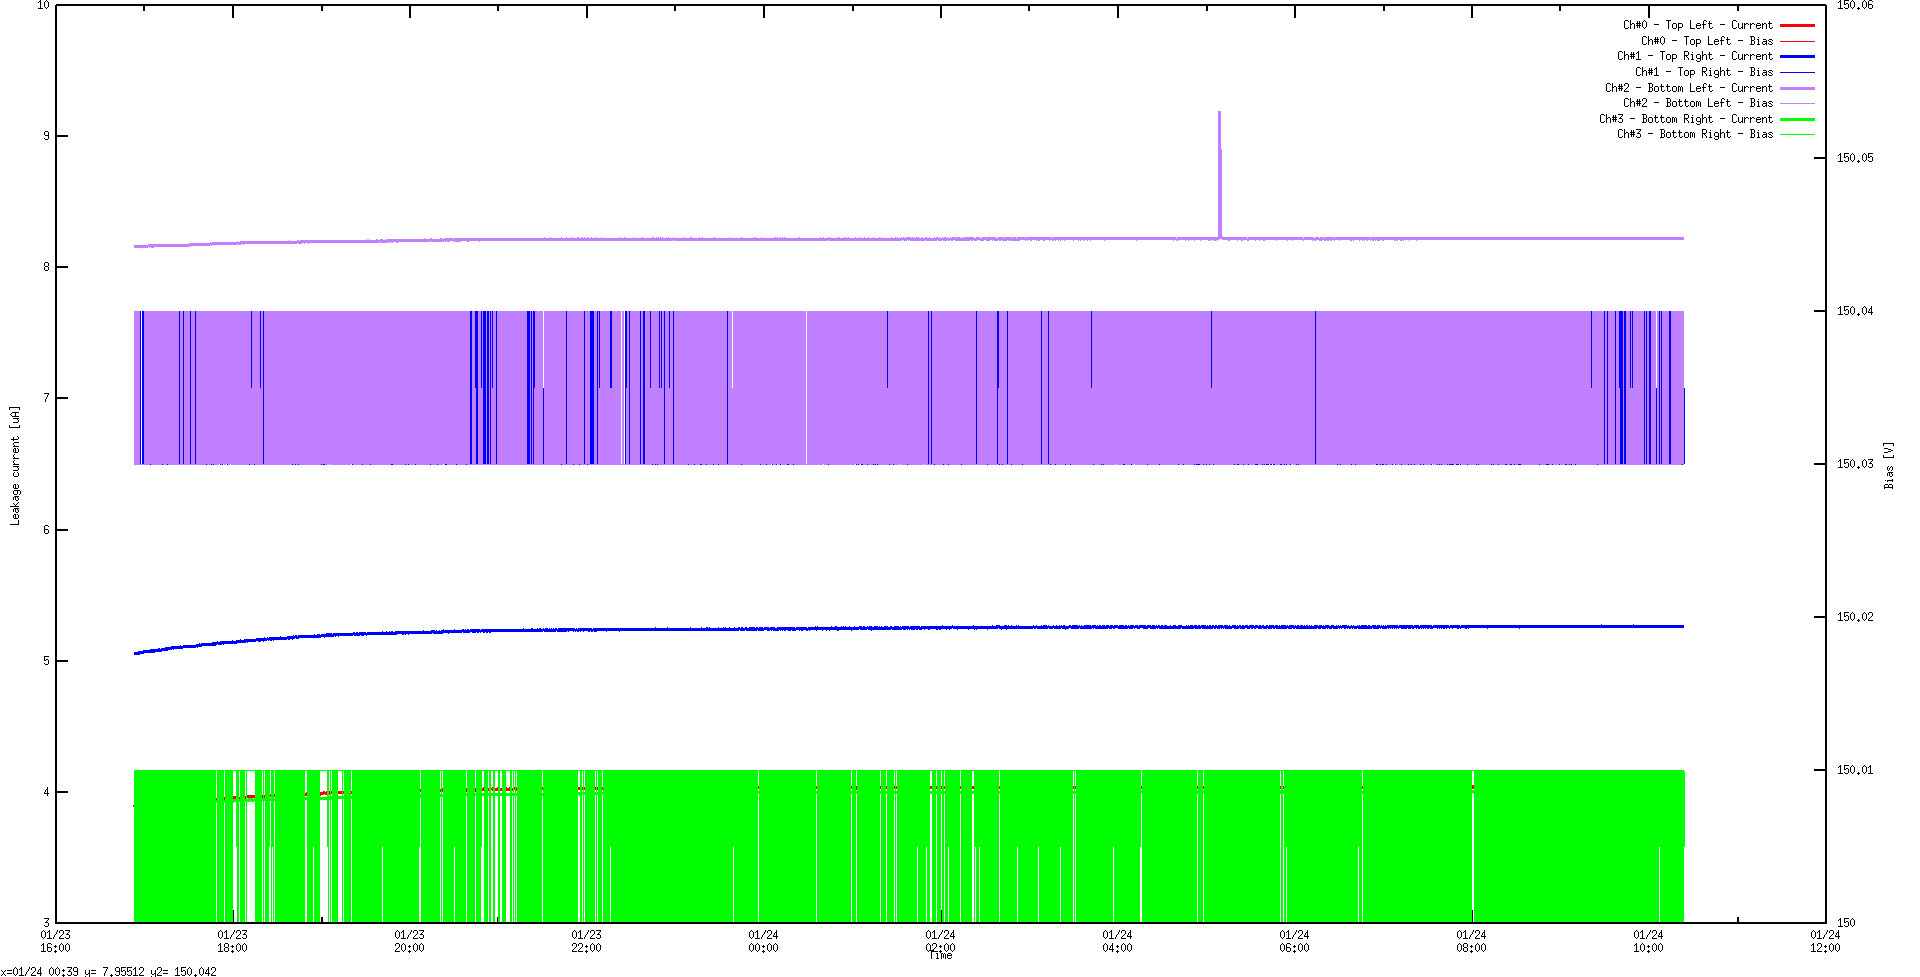
10:06 V-I plot overnight - attach 14.

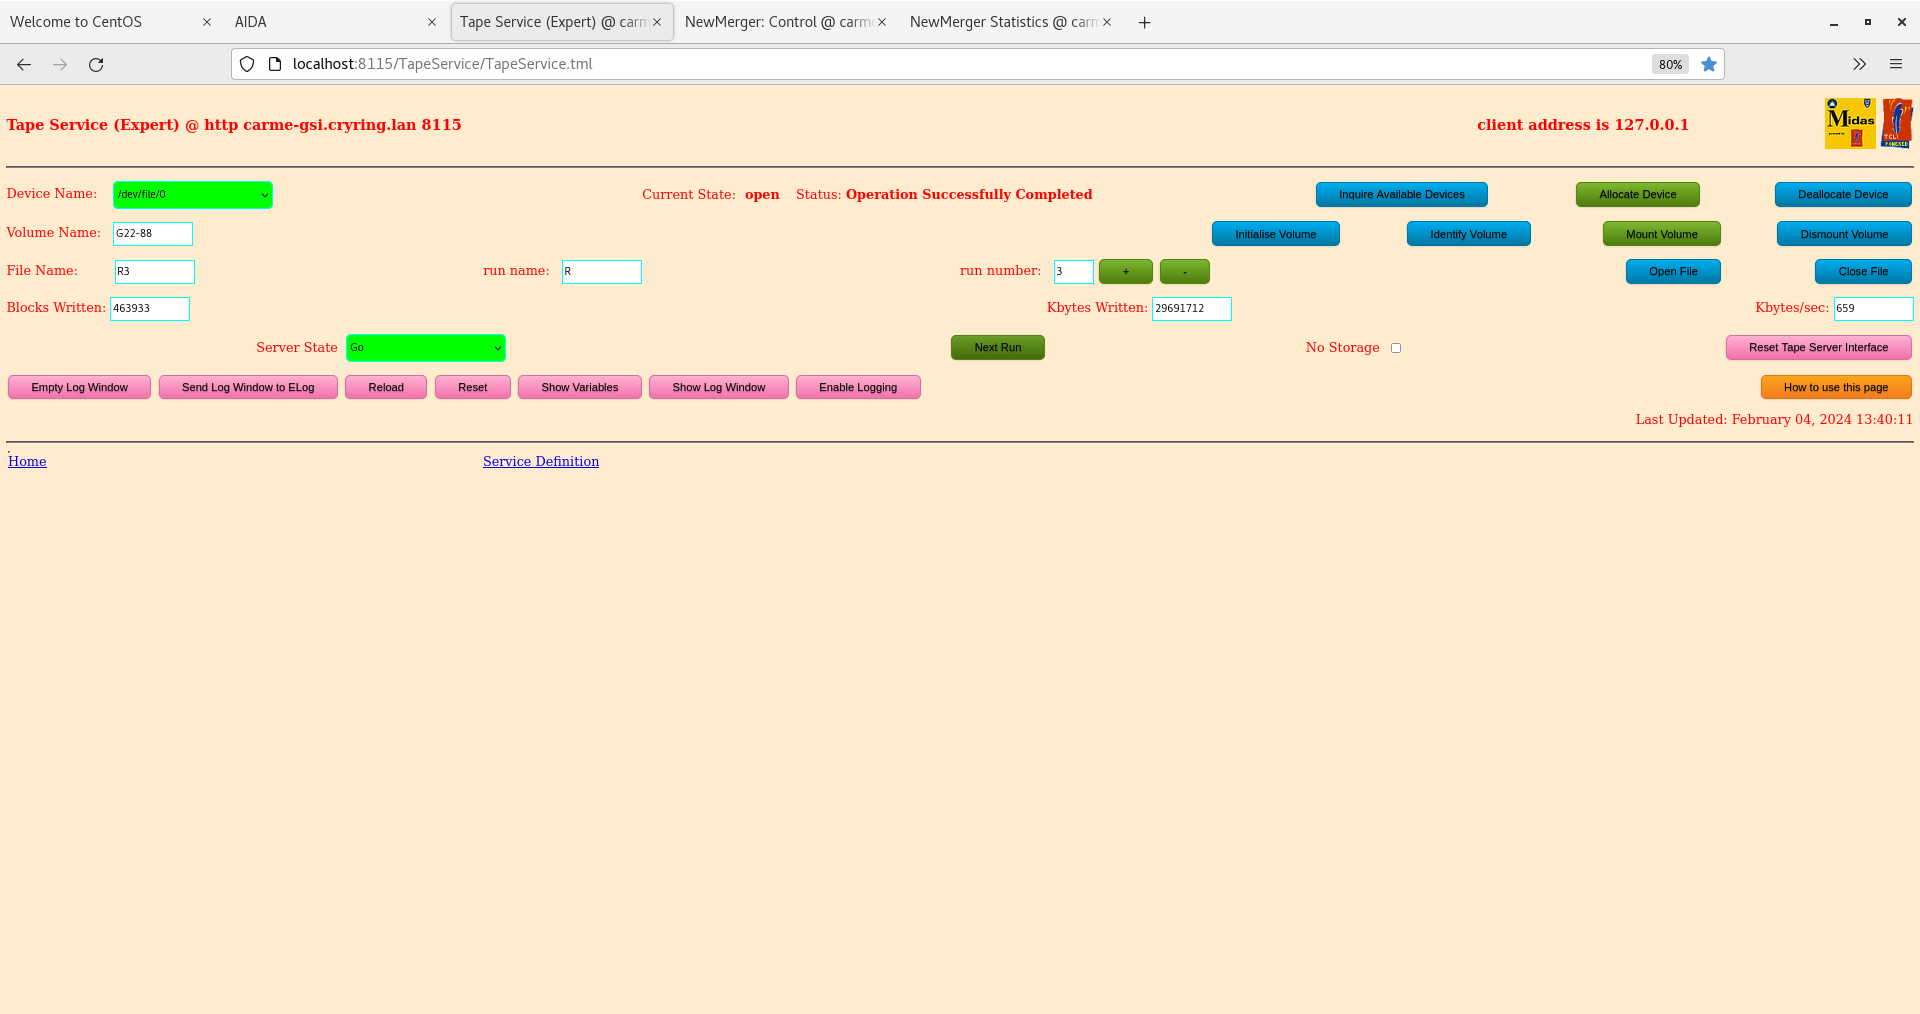
13.35 DAQ continues file G22-88/R3_22

      DSSSD bias OK - attachment 15
      ambient temperature 16.8 deg C

      FEE64 temperatures OK - attachment 16

      ADC data item stats - attachment 17
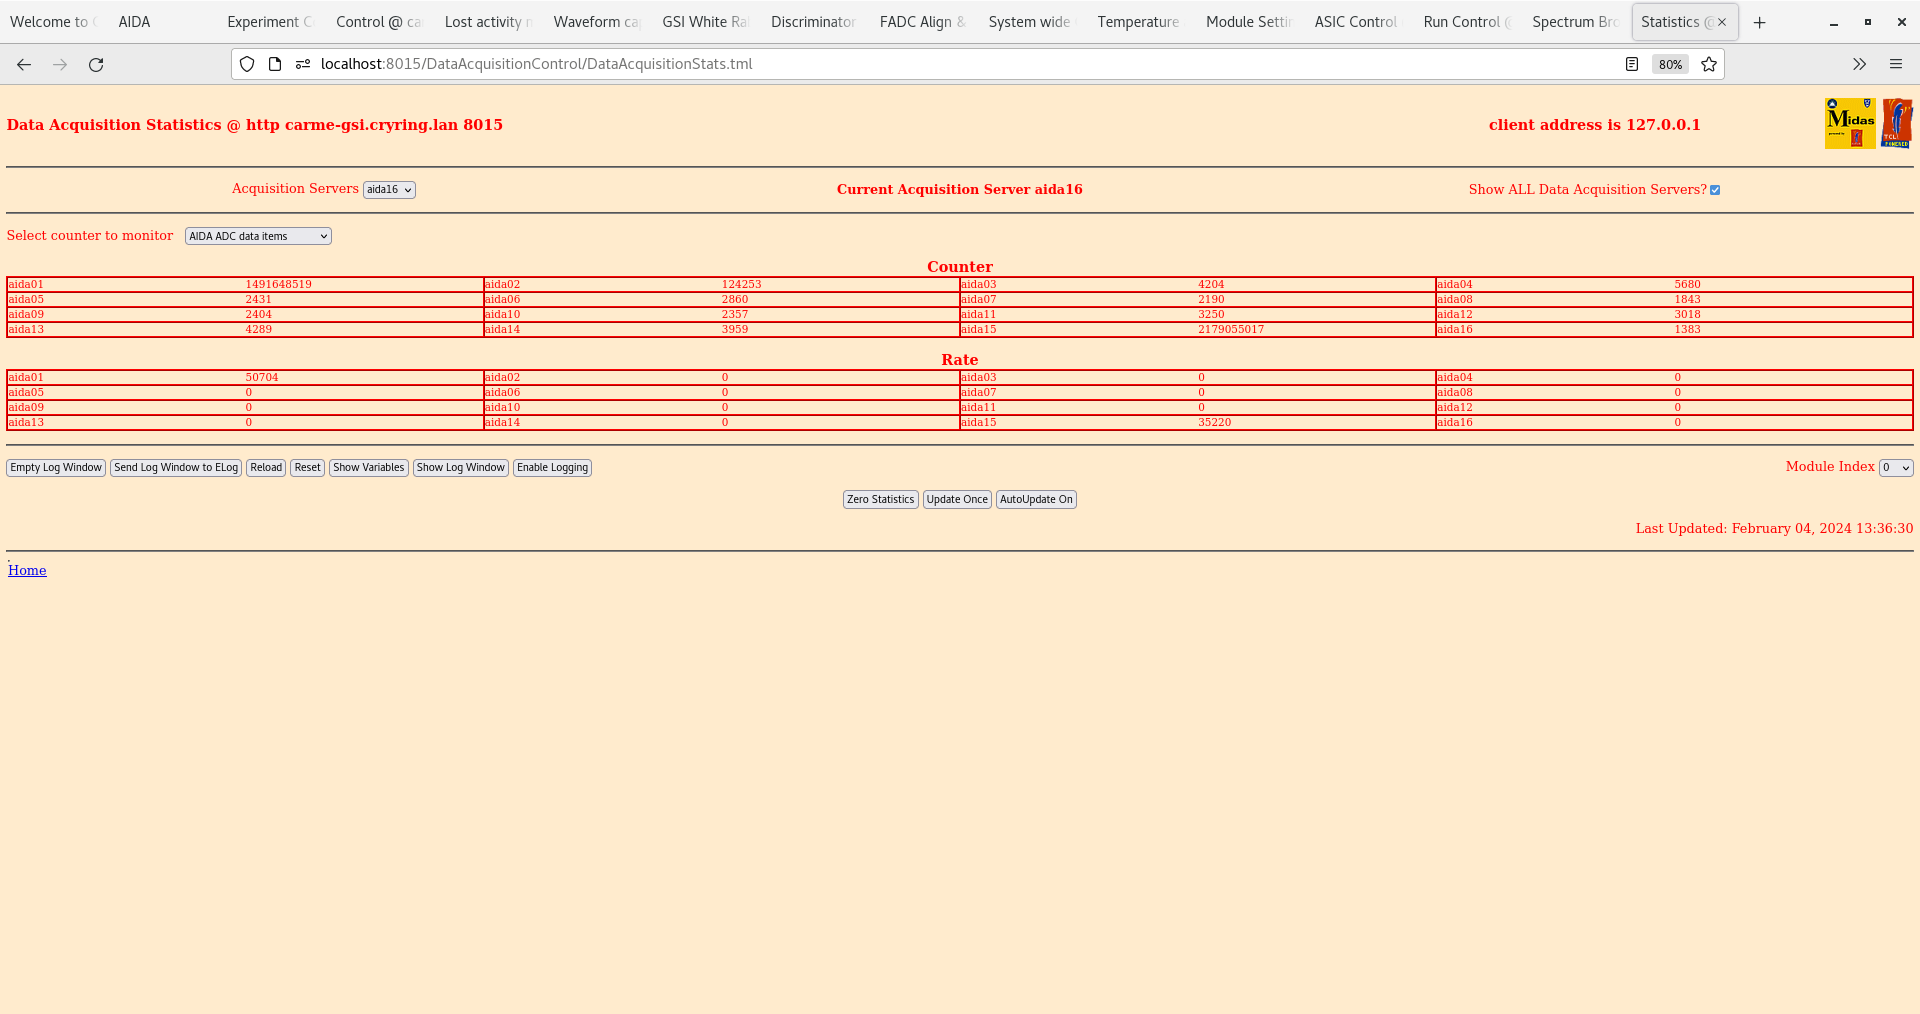
       aida15 rate c. 35k ( 2x 'hot' channels, 1x channel missing, all other channels OK )
       aida01 rate c. 51k ( 2x 'hot' channels )

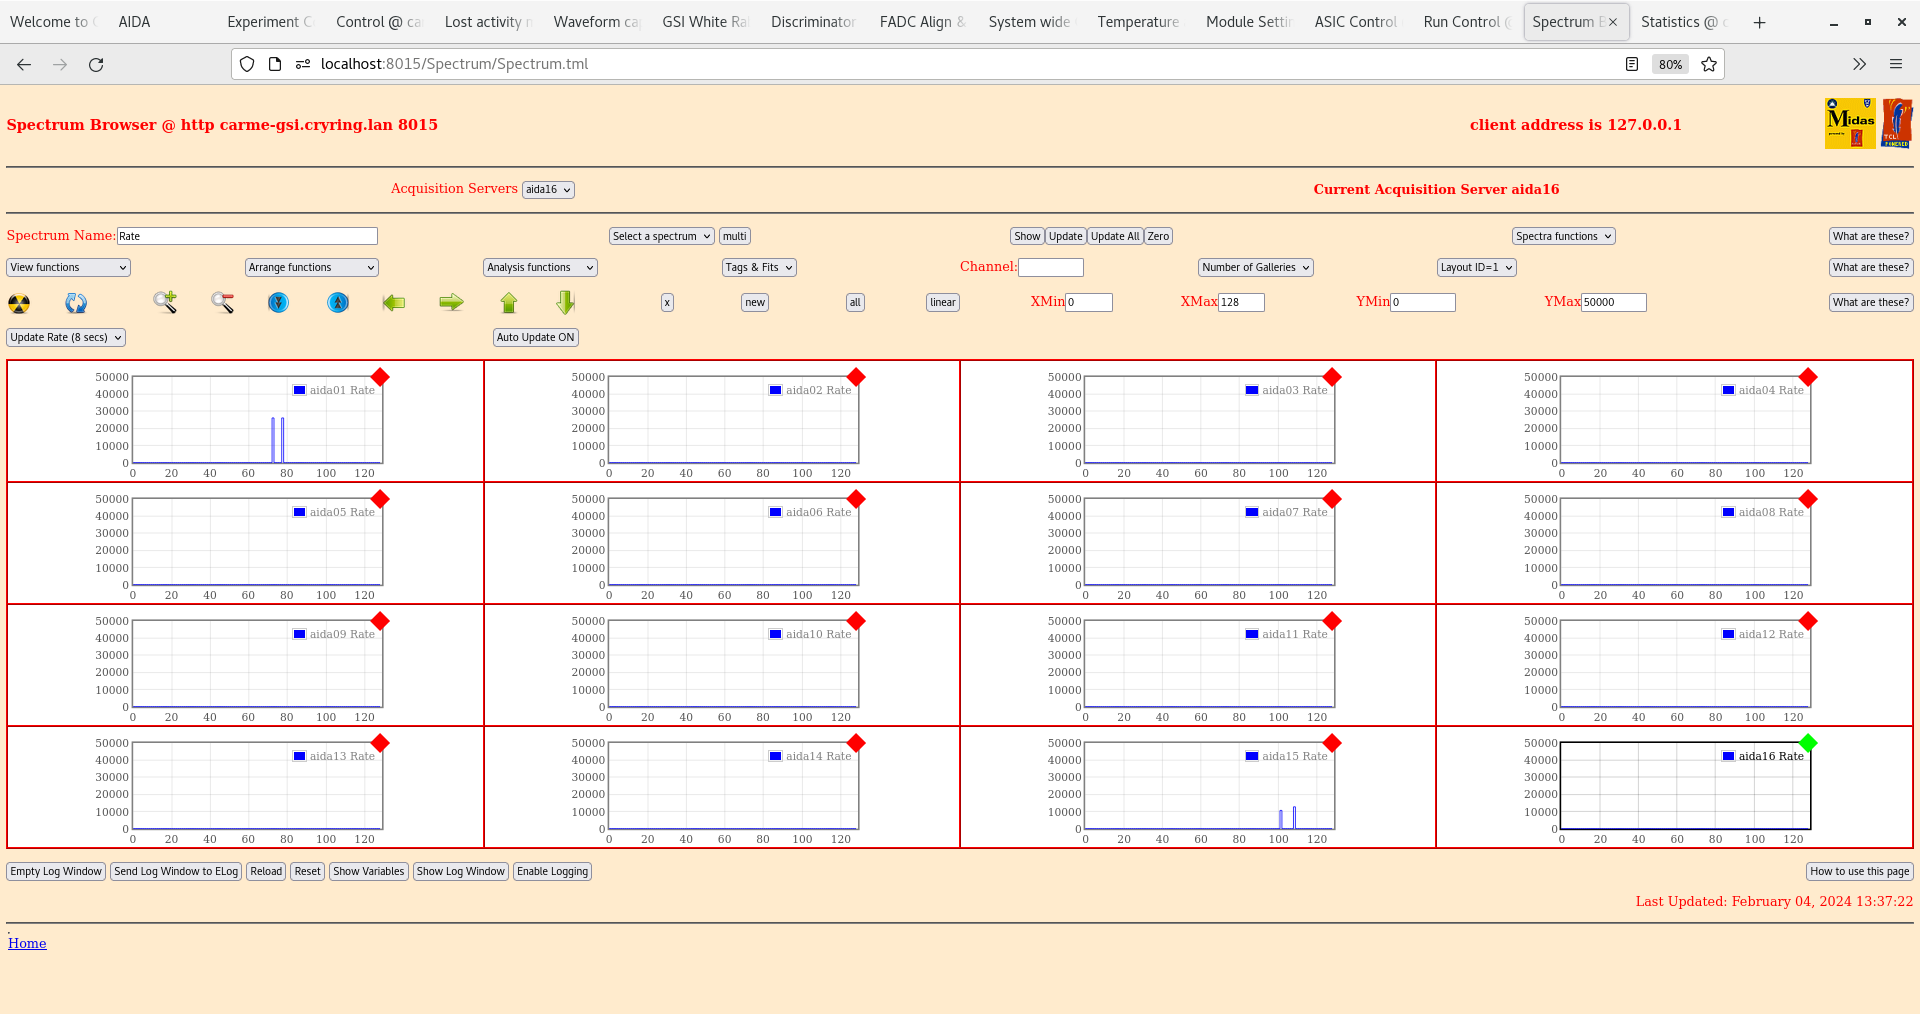
      per FEE64 Rate spectra - attachments 18

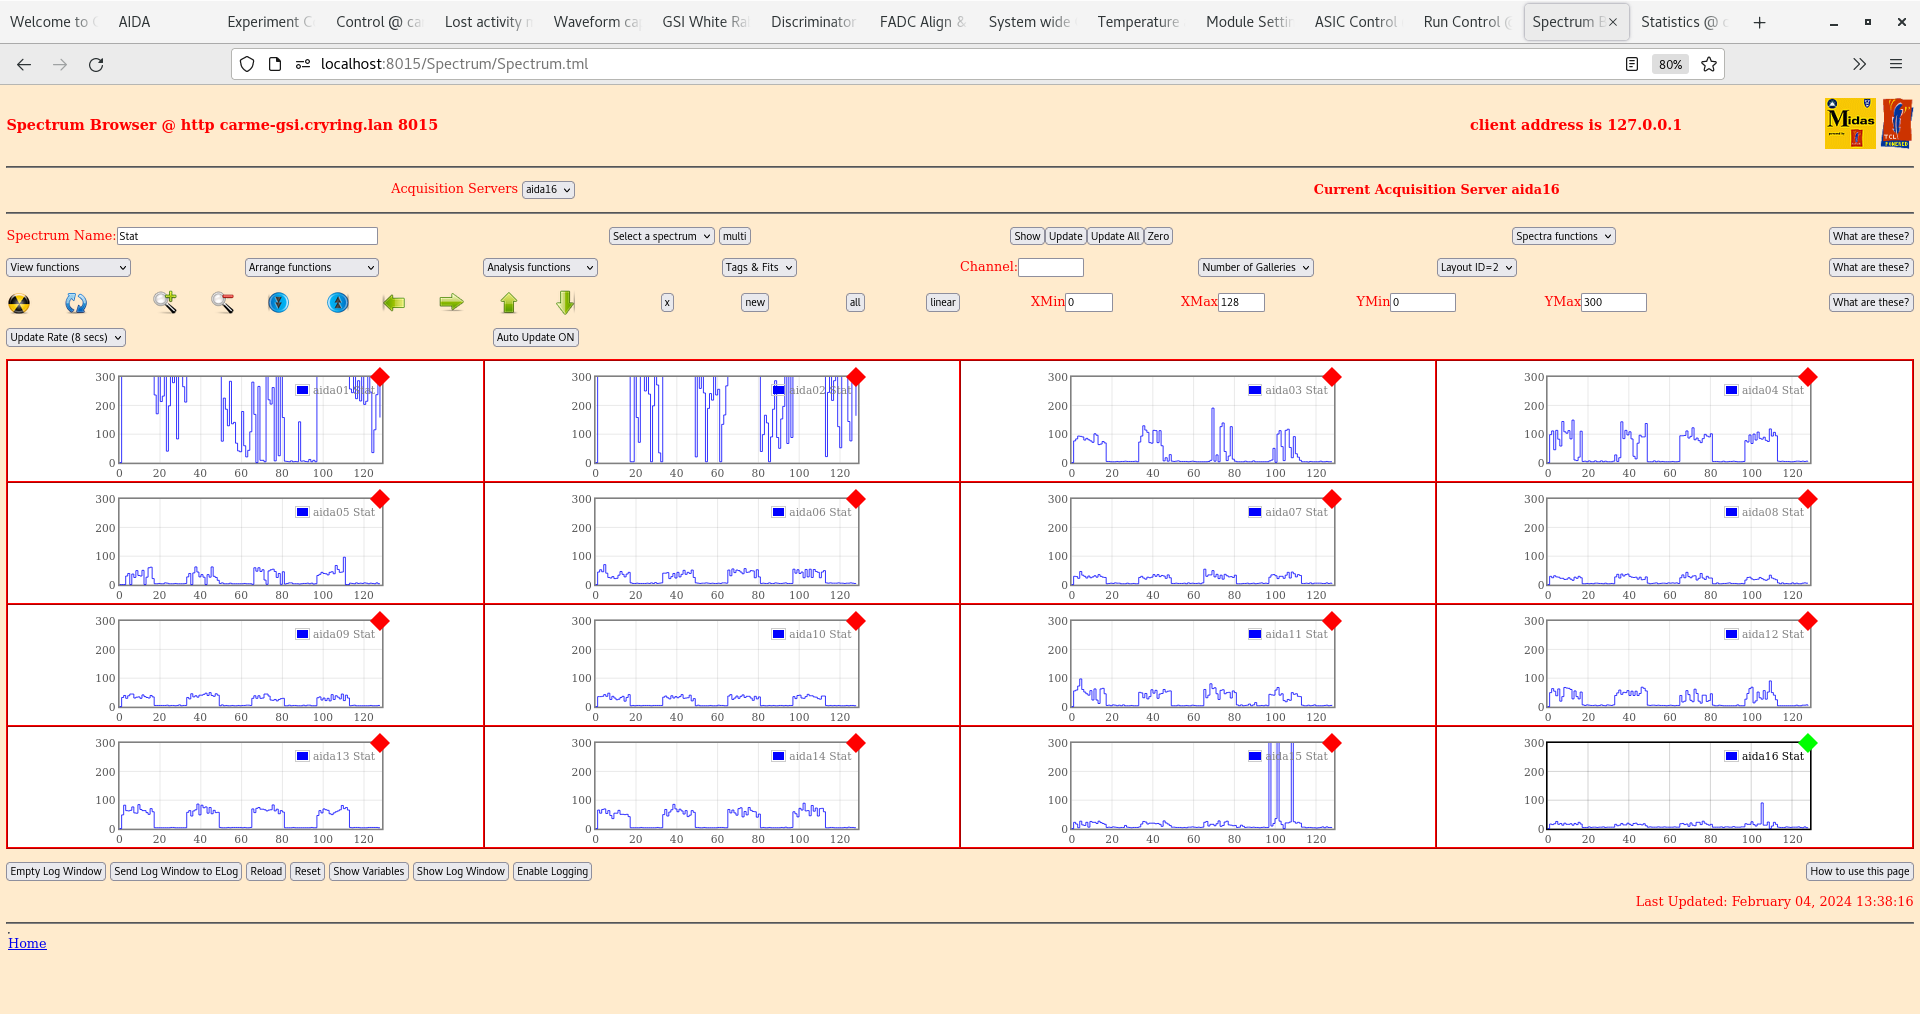
      per FEE64 Stat spectra - attachments 19-20

Merger and TapeServer - attachments 21-22 |
| Attachment 1: Screenshot_from_2024-02-04_09-30-41.png
|

|
| Attachment 2: Screenshot_from_2024-02-04_09-31-07.png
|
|
| Attachment 3: Screenshot_from_2024-02-04_09-31-40.png
|

|
| Attachment 4: Screenshot_from_2024-02-04_09-32-26.png
|
|
| Attachment 5: Screenshot_from_2024-02-04_09-32-42.png
|
|
| Attachment 6: Screenshot_from_2024-02-04_09-33-23.png
|

|
| Attachment 7: Screenshot_from_2024-02-04_09-34-00.png
|

|
| Attachment 8: Screenshot_from_2024-02-04_09-34-37.png
|

|
| Attachment 9: Screenshot_from_2024-02-04_09-35-21.png
|

|
| Attachment 10: Screenshot_from_2024-02-04_09-37-23.png
|

|
| Attachment 11: Screenshot_from_2024-02-04_09-38-28.png
|
|
| Attachment 12: Screenshot_from_2024-02-04_09-55-02.png
|
|
| Attachment 13: Screenshot_from_2024-02-04_09-55-18.png
|

|
| Attachment 14: Screenshot_from_2024-02-04_10-05-07.png
|
|
| Attachment 15: Screenshot_from_2024-02-04_13-35-51.png
|

|
| Attachment 16: Screenshot_from_2024-02-04_13-36-21.png
|

|
| Attachment 17: Screenshot_from_2024-02-04_13-36-41.png
|
|
| Attachment 18: Screenshot_from_2024-02-04_13-37-35.png
|
|
| Attachment 19: Screenshot_from_2024-02-04_13-38-27.png
|
|
| Attachment 20: Screenshot_from_2024-02-04_13-38-52.png
|

|
| Attachment 21: Screenshot_from_2024-02-04_13-40-02.png
|

|
| Attachment 22: Screenshot_from_2024-02-04_13-40-20.png
|
|
|
489
|
Sat Feb 3 15:05:10 2024 |
CB, TD | [How To] Restart Anydesk |
1. Check Proxy server is correct
localhost : 8080
incoming connections 7070
Establish port
ssh -L 8080:proxy.gsi.de:8080 carme@atppc025
2. Check a password for remote access has been set up
3. Close anydesk and check it is *really* closed using
ps -o pid= -C anydesk
kill -9 any process (as root)
4 Restart AnyDesk
systemctl restart anydesk (as npg)
|
|
488
|
Sat Feb 3 00:13:03 2024 |
CB TD | Run1 end - R3 start |
01.07 DAQ continues file G22-88/R1_46
      background alpha

      DSSSD bias OK - attachment 1
      FEE64 temps OK - attachment 2
      ADC data item stats - attachment 3
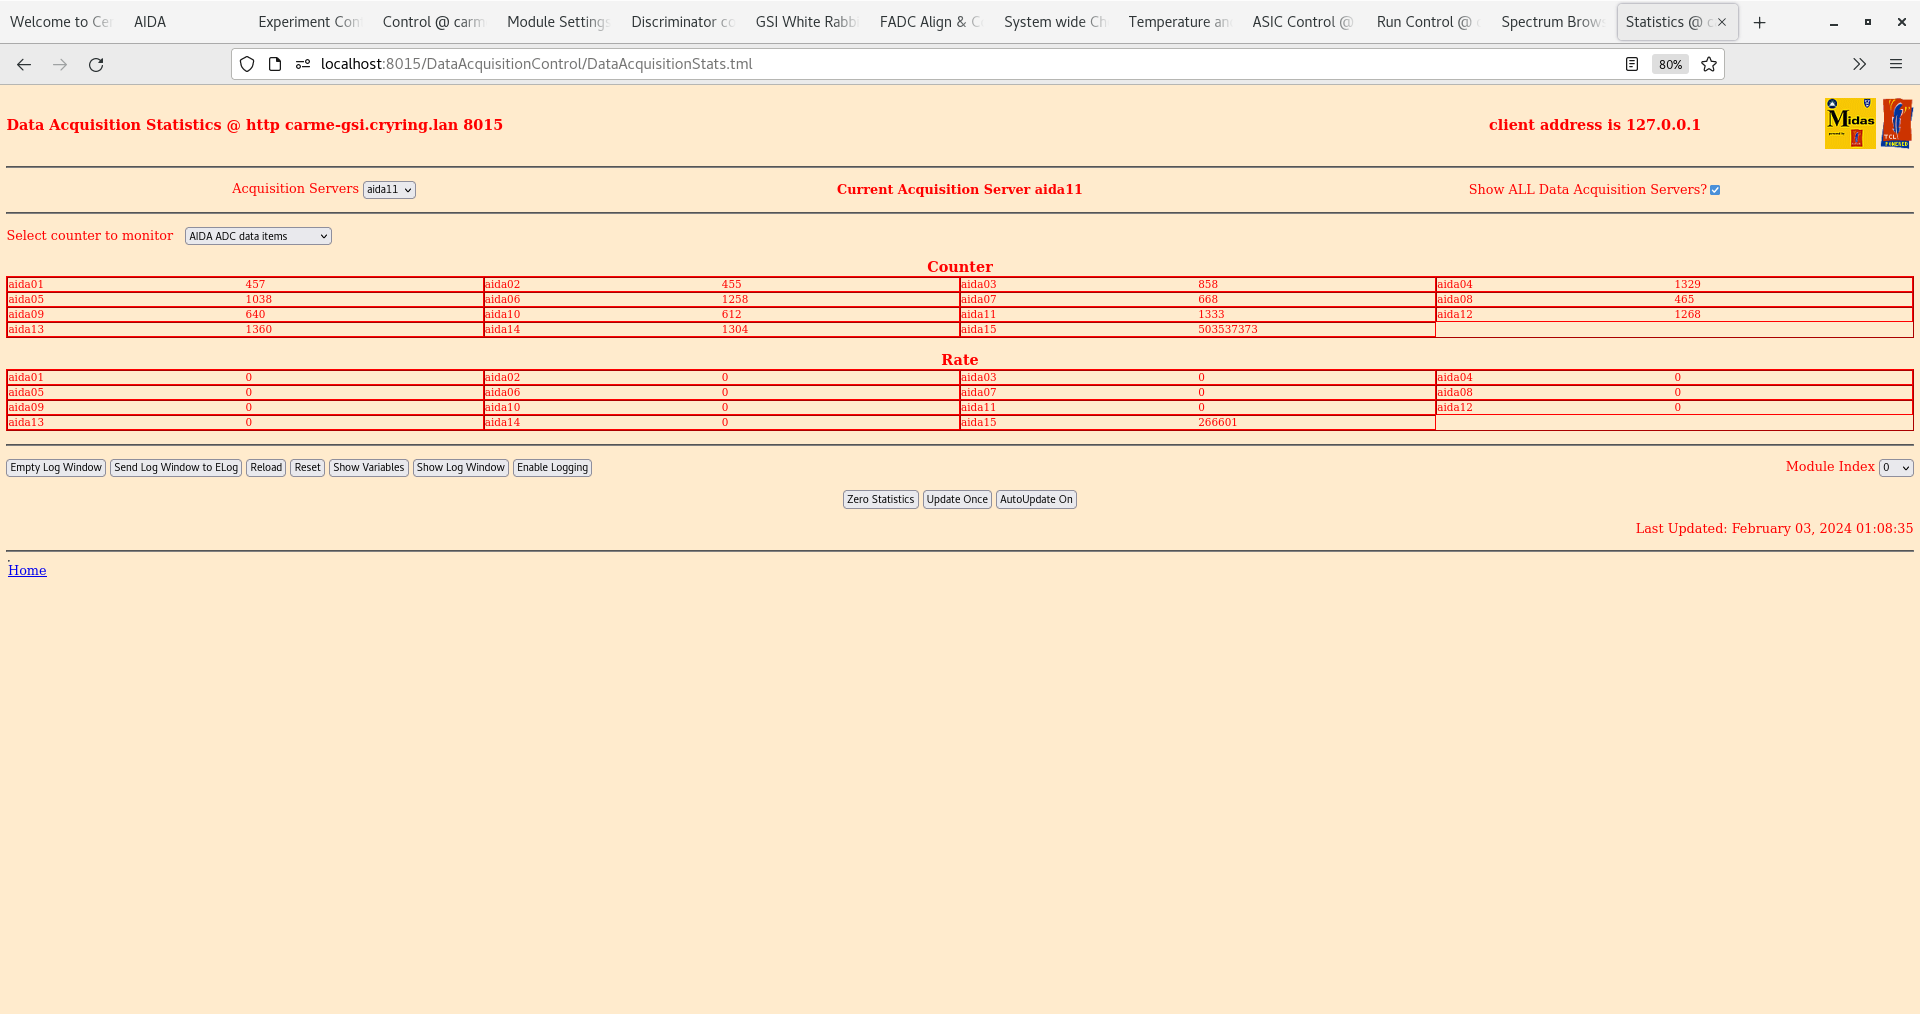
       aida15 asic #2 u/s - rate c. 266k

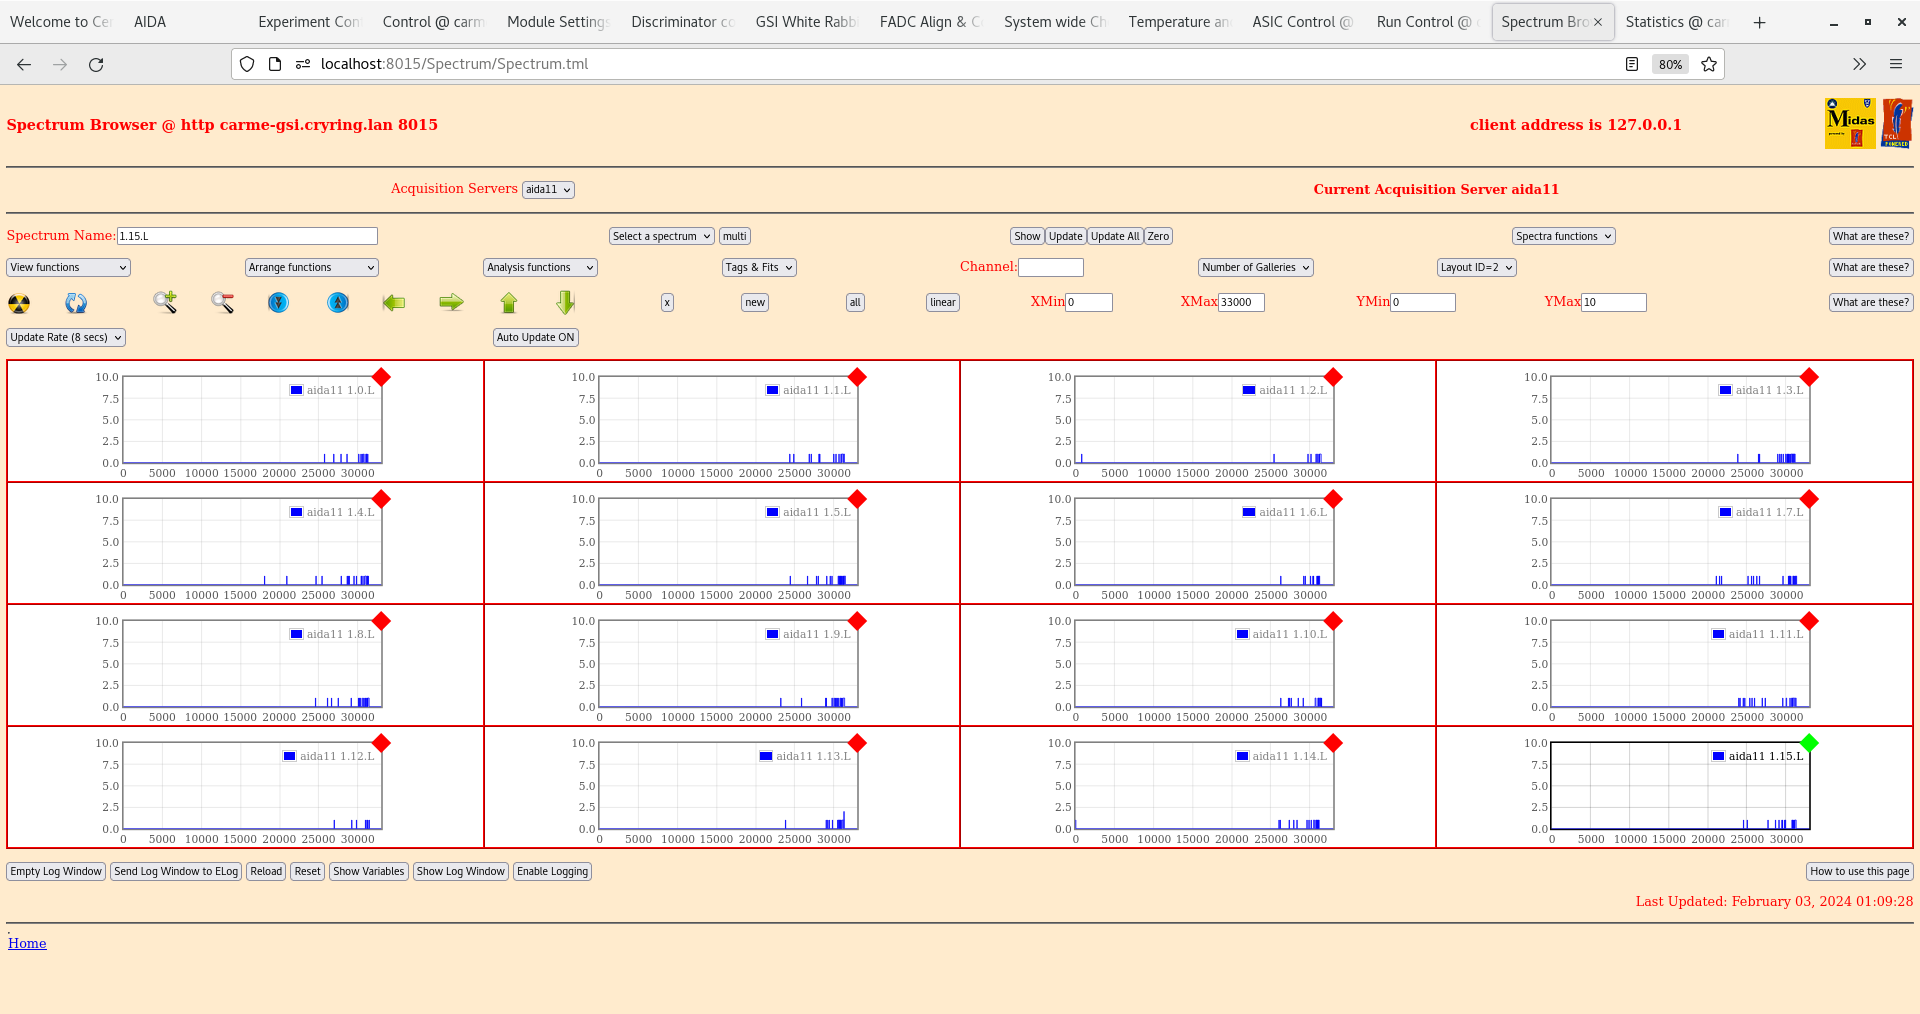
      aida11 1*L spectra - attachment 4

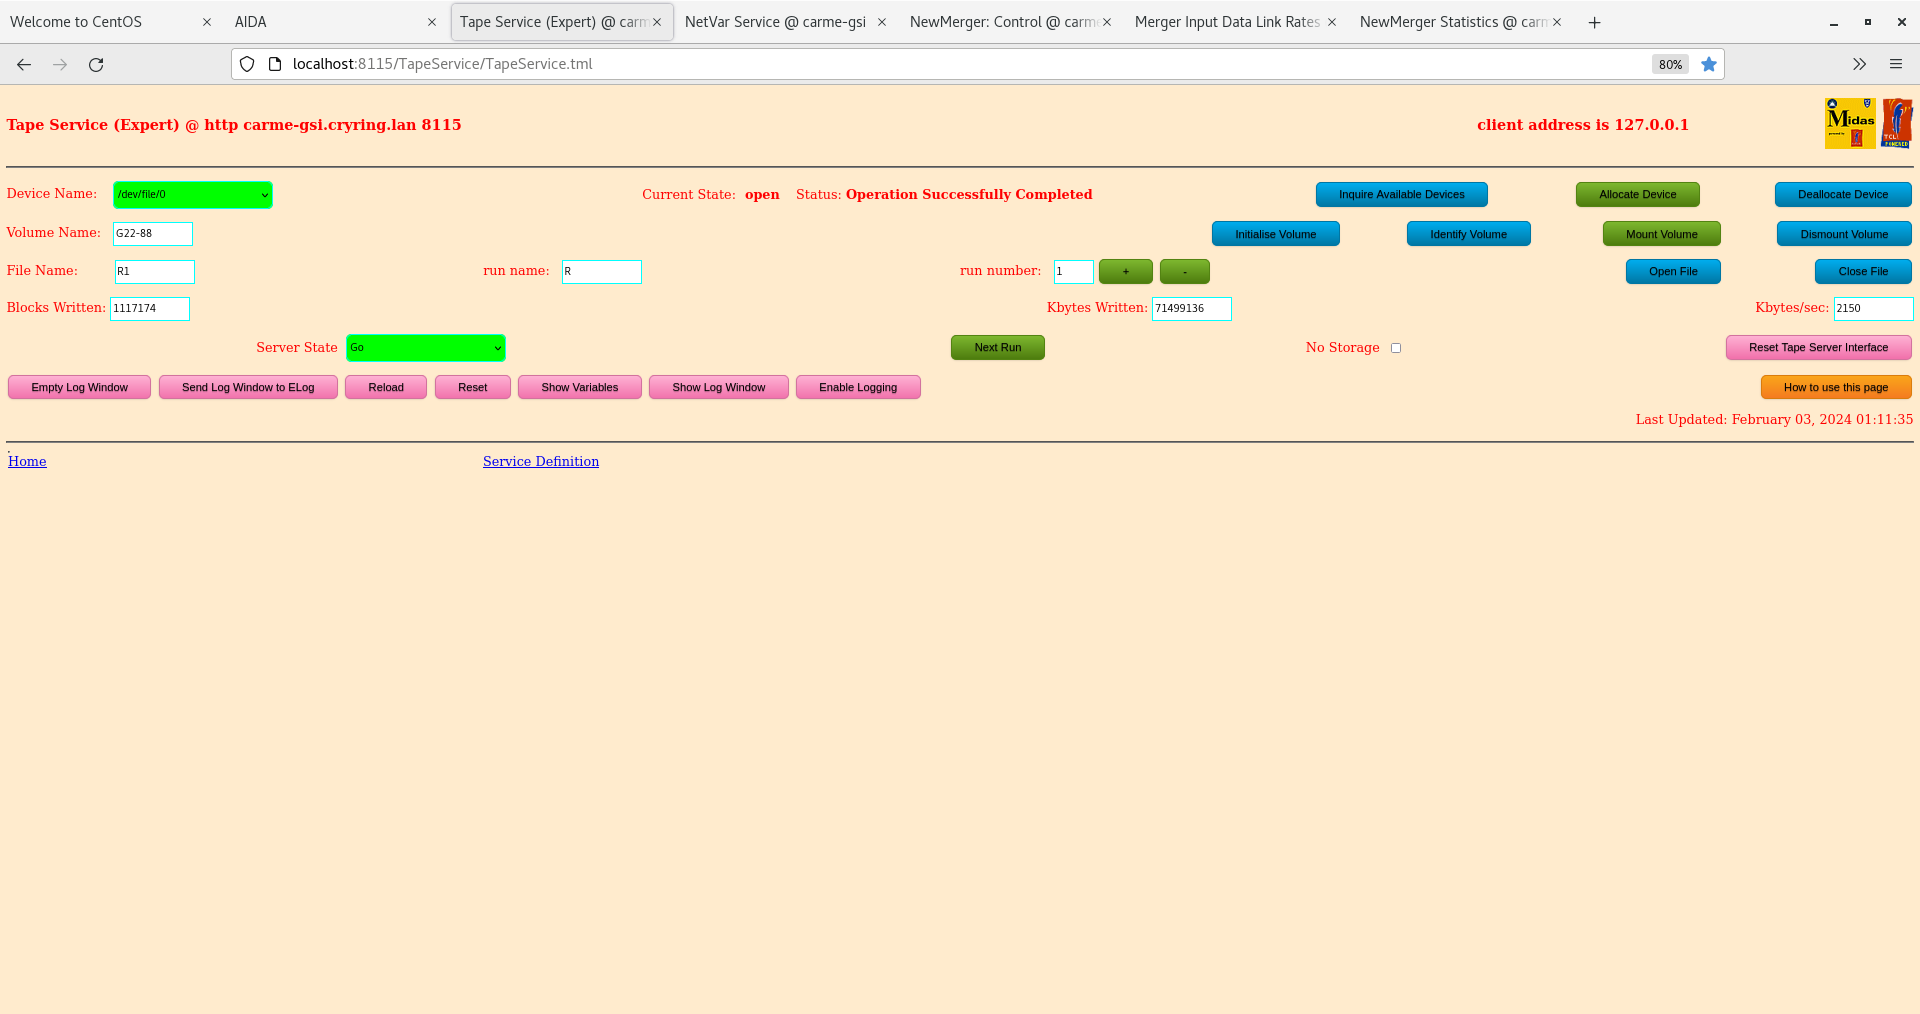
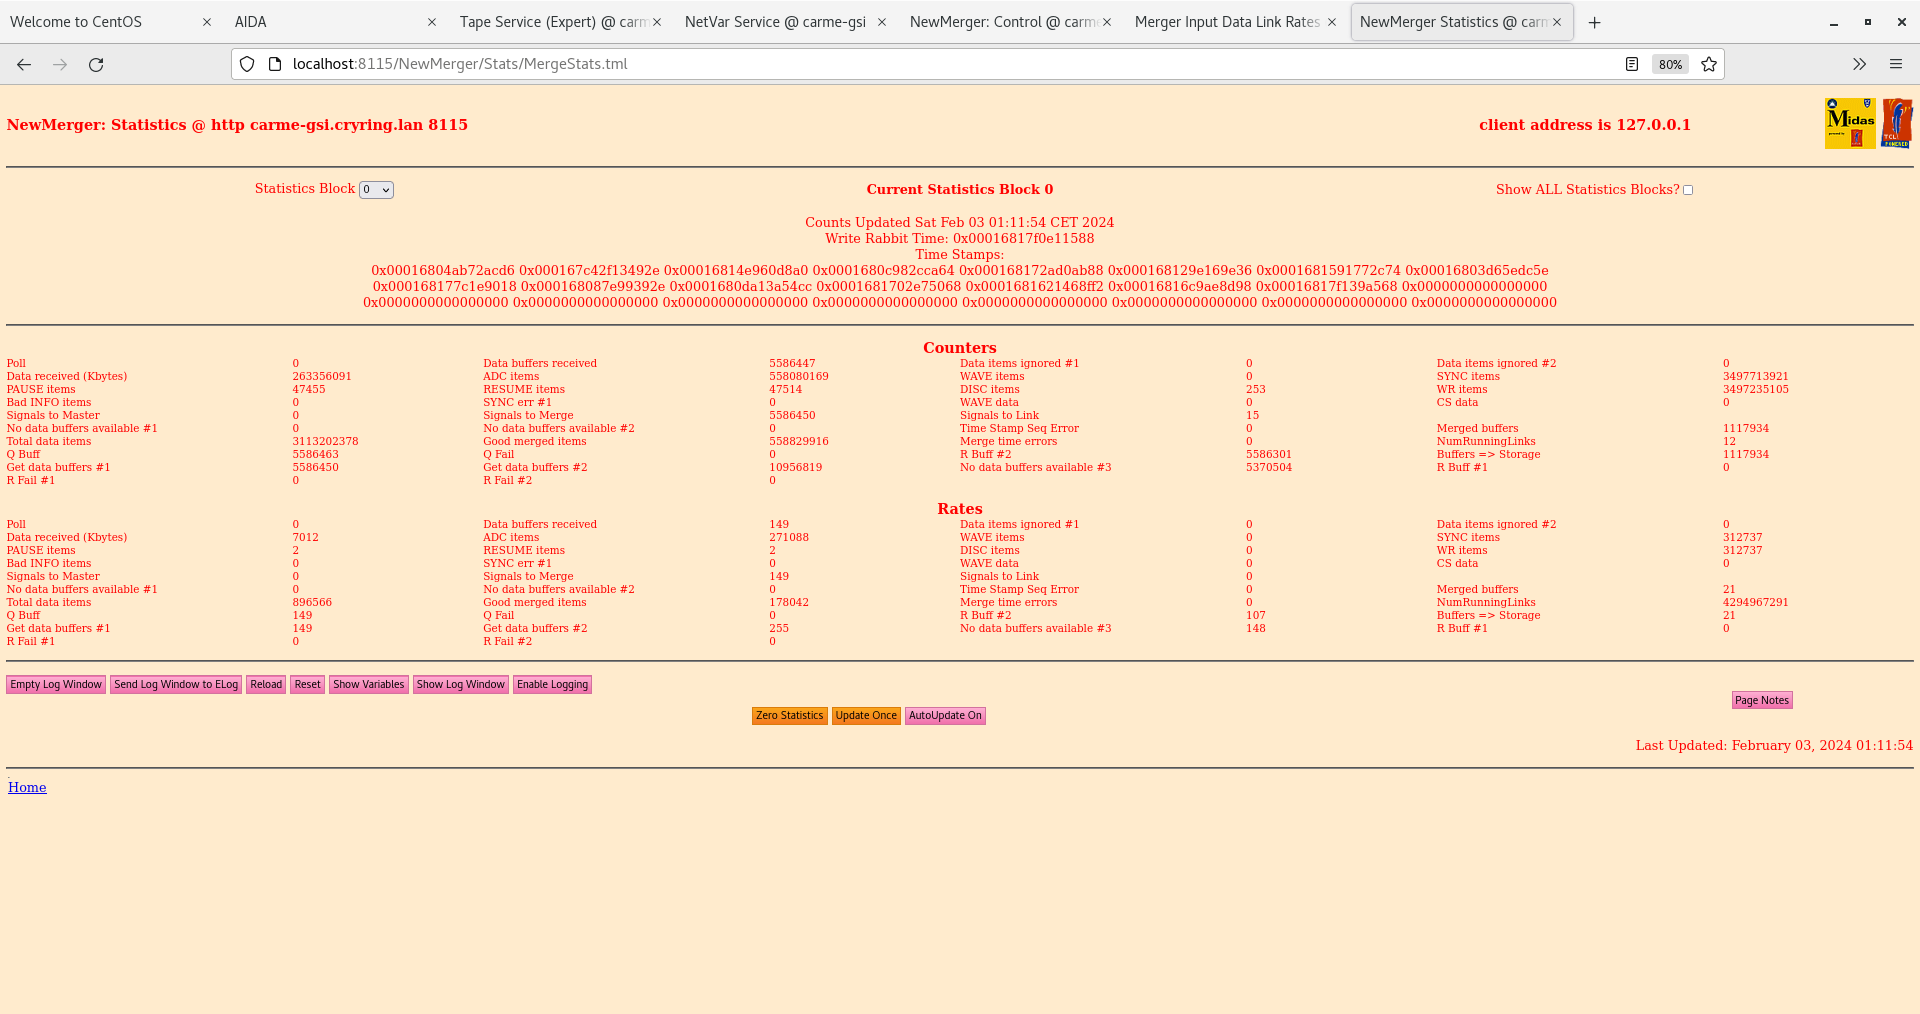
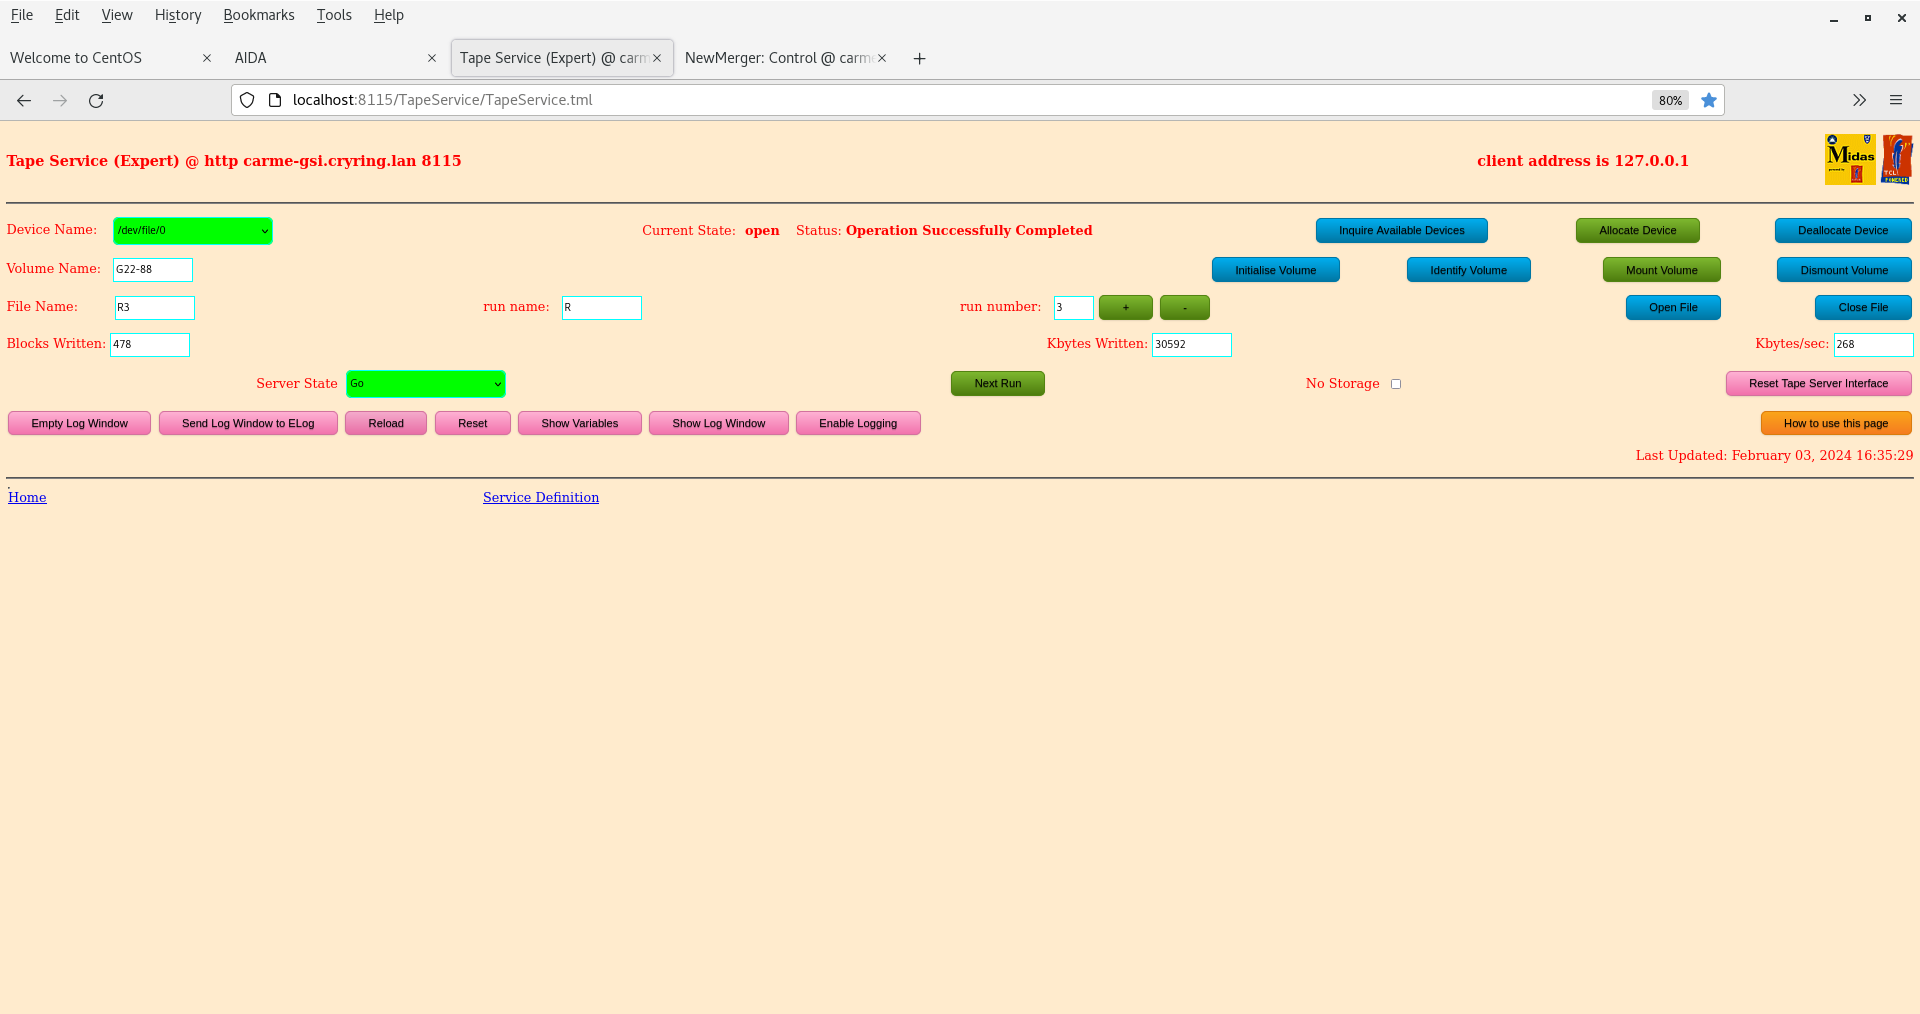
      ADC data items/s Merger, Tape Server & Merger stats - attachments 5-7
       data rate to disk c. 2Mb/s dominated by aida15 asic 2


10.05 DAQ continues file G22-88/R1_79
      background alpha

      DSSSD bias OK - attachment 8
       ambient temperature 16.8 deg C
      FEE64 temps OK - attachment 9
      ADC data item stats - attachment 10
       aida15 asic #2 u/s - rate c. 266k

      aida11 1*L spectra - attachment 11

      ADC data items/s Merger, Tape Server & Merger stats - attachments 12-14
       data rate to disk c. 2Mb/s dominated by aida15 asic 2

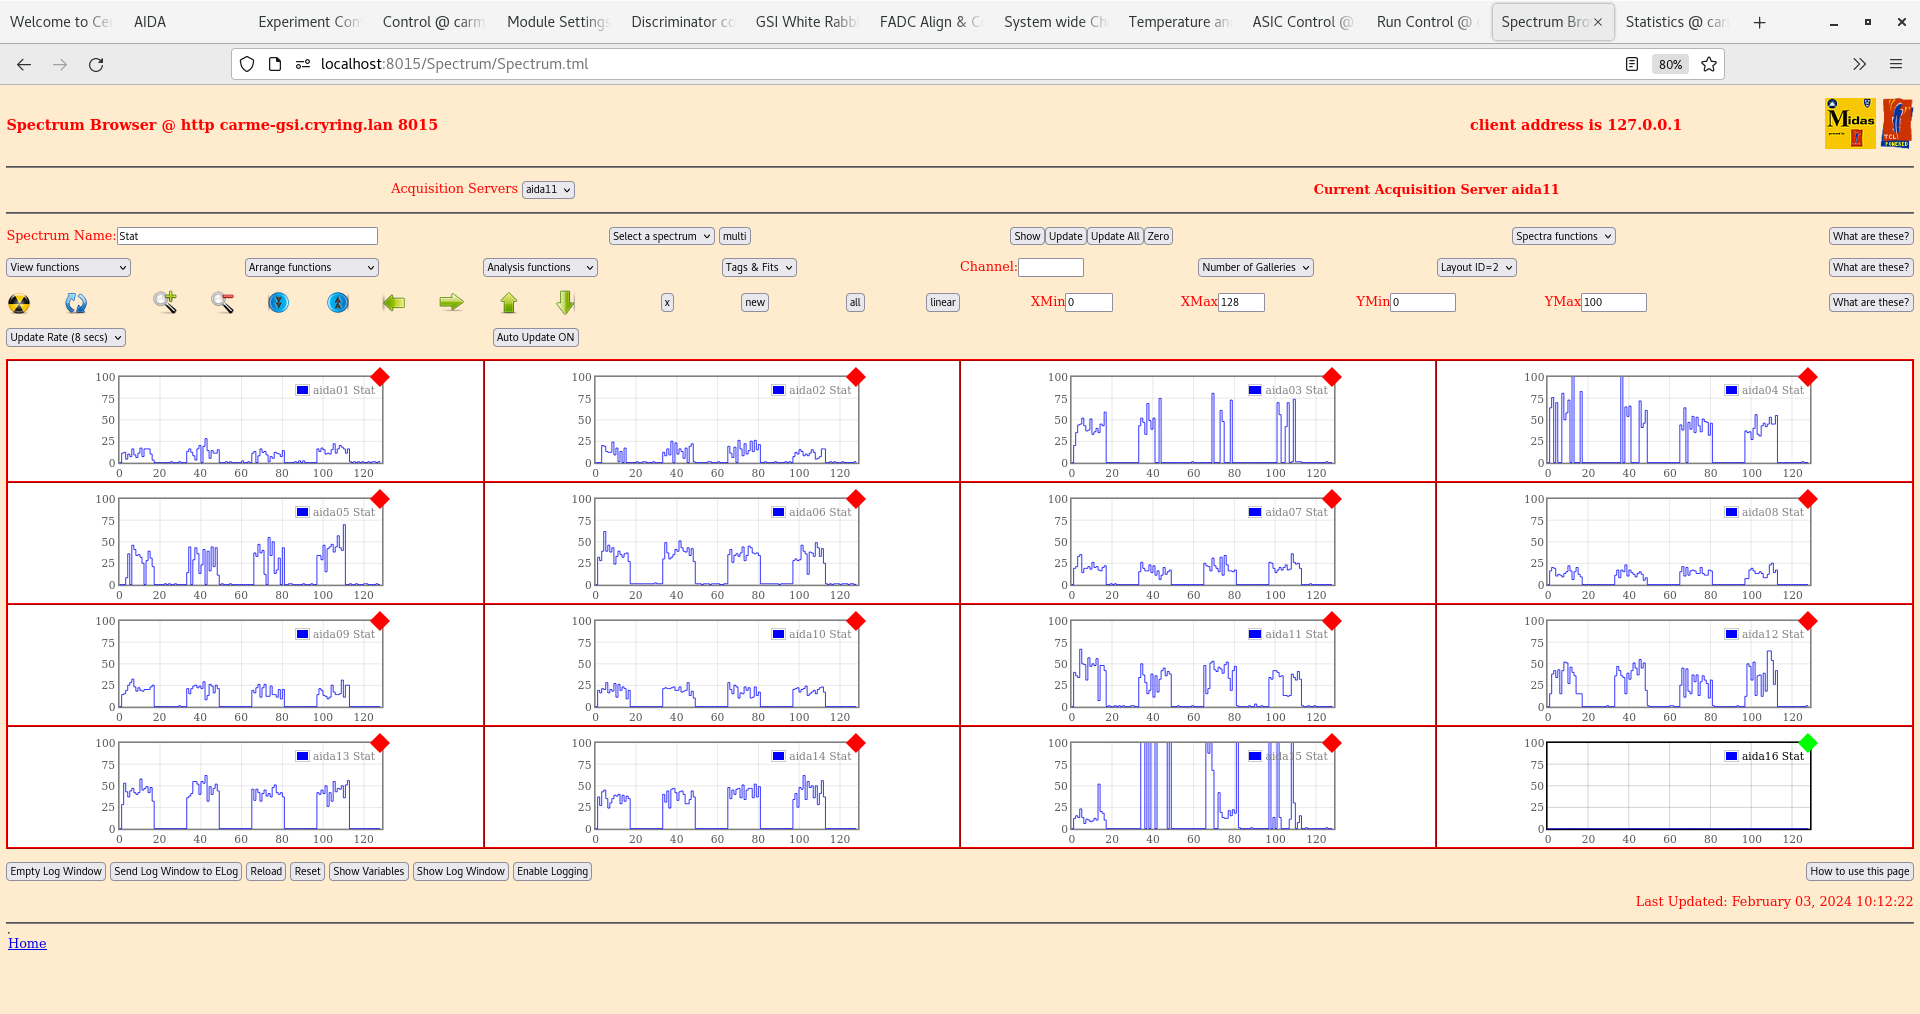
10.12 per FEE64 Stat spectra - attachment 15
      missing channels aida03, aida04, aida05 & aida15
      Check ASIC load aida03, aida04, aida05 & aida15

13:25 Overnight leakage current plot - att 16


13.38 DAQ continues file G22-88/R1_92
      background alpha

      DSSSD bias OK - attachment 17
       ambient temperature 16.8 deg C
      FEE64 temps OK - attachment 18
      ADC data item stats - attachment 19
       aida15 asic #2 u/s - rate c. 266k

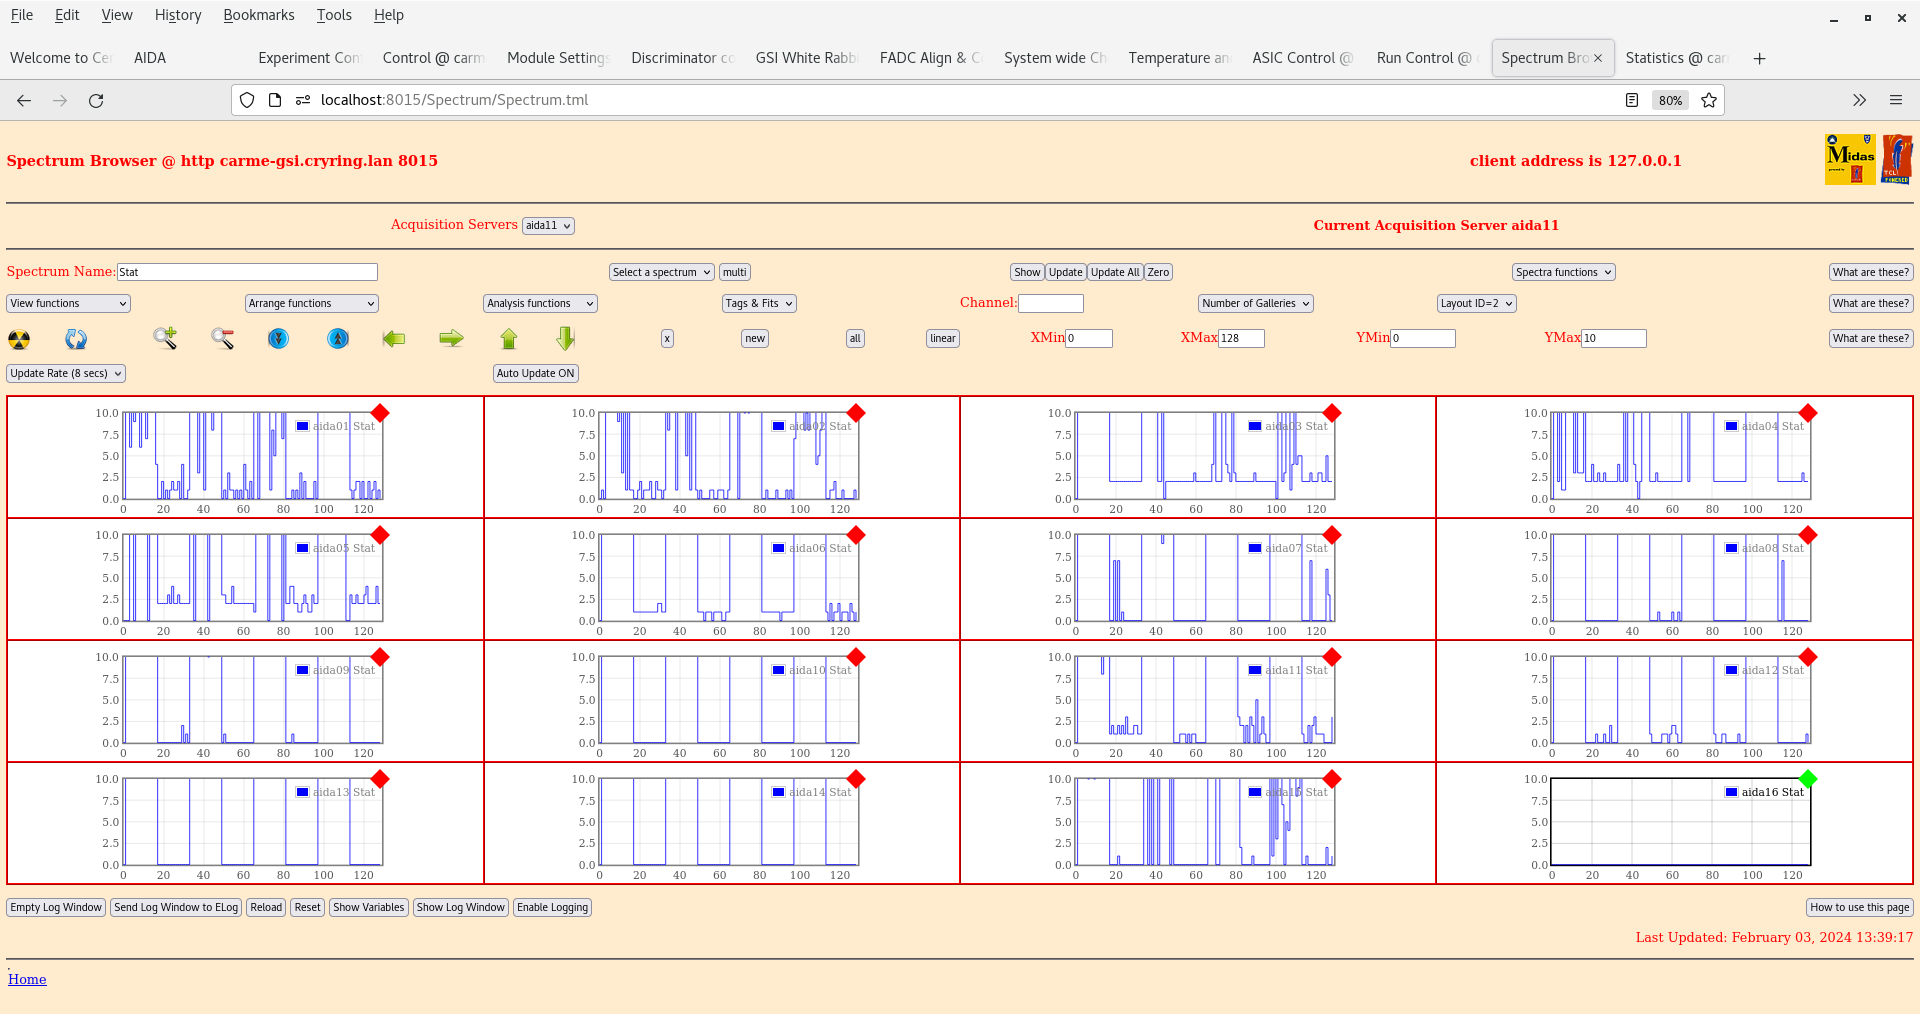
      aida11 1*L spectra - attachment 20
       ASIC check load at 10.12 should result in 1-2 hits per channel in the Stat spectra aida03, aida04, aida05 and aida15
       Channels which continue to show zero counts likely indicate a FEE64-adaptor PCB connection issue
       Channels which now show 1, or more, counts cf. attachment 15 likely correspond to channels now working following the check ASIC load

      ADC data items/s Merger, Tape Server & Merger stats - attachments 21-23
       data rate to disk c. 2Mb/s dominated by aida15 asic 2

13.48 Stopped DAQ file G22-88/R1_93

      DSSSD bias OFF
      FEE64 power OFF


16.00 Installed FEE64 power cable to aida16
      Replaced aida15 with new FEE64 MAC 41:f6:5a

      Update dhcpd.conf
      Update MIDAS config to include aida16

      FEE64 power ON

      All system wide checks OK

      DSSSD bias OK - attachment 24

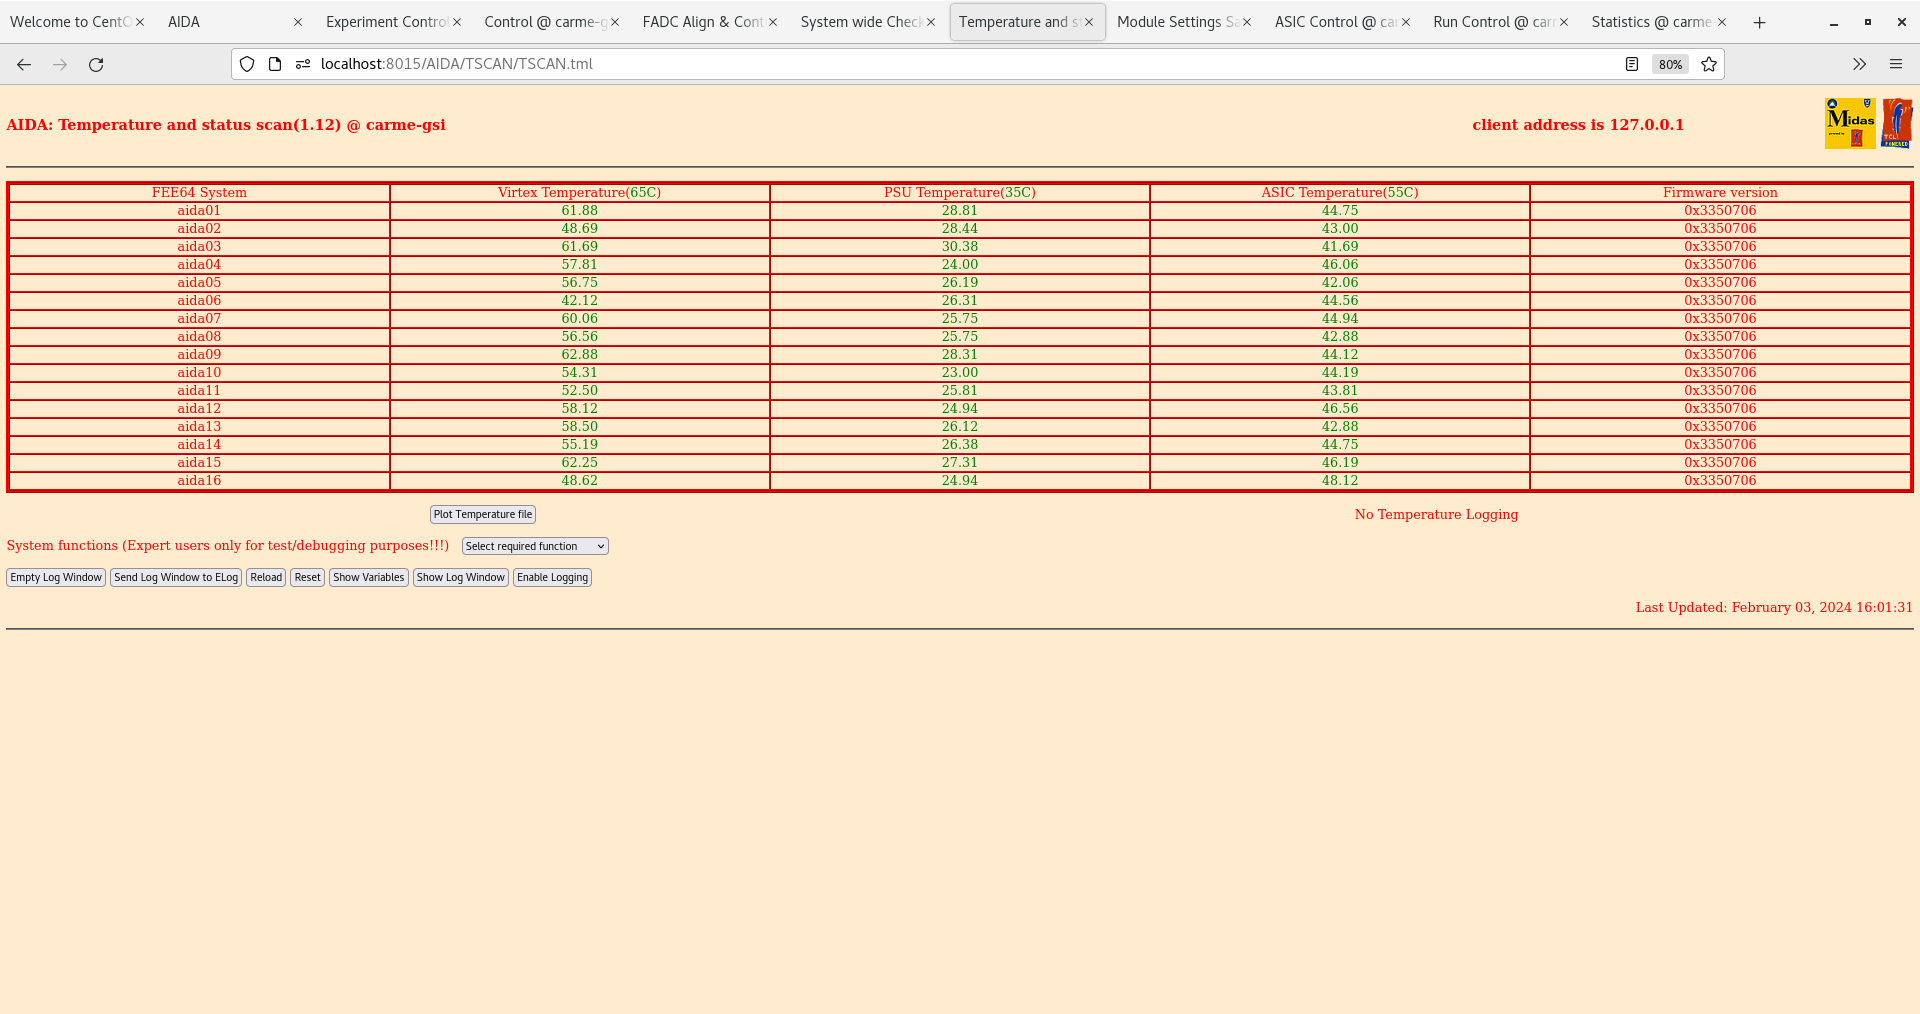
      FEE64 temperatures OK - attachment 25

      ADC data item stats - attachment 26
       aida15 rate changes from c. 260k to c. 25k ( 2x 'hot' channels, 1x channel missing, all other channels OK )

      per FEE64 Rate spectra - attachment 27

      per FEE64 1.8.L spectra - attachments 28-29
       pulser peak width aida11 44 ch FWHM, aida14 57 ch FWHM

      per FEE64 1.8.W spectra - 20us FSR - attachments 30-31


     Update NewMerger startup script and Options for 16x FEE64s - see attachments 32-33


16.20 file G22-88/R2
      Pulser 50Hz

16.28 DAQ stop

      Pulser OFF

      All histograms zero'd

16.33 DAQ starts file G22-88/R3
      alpha background

      ADC data item stats OK - attachment 34

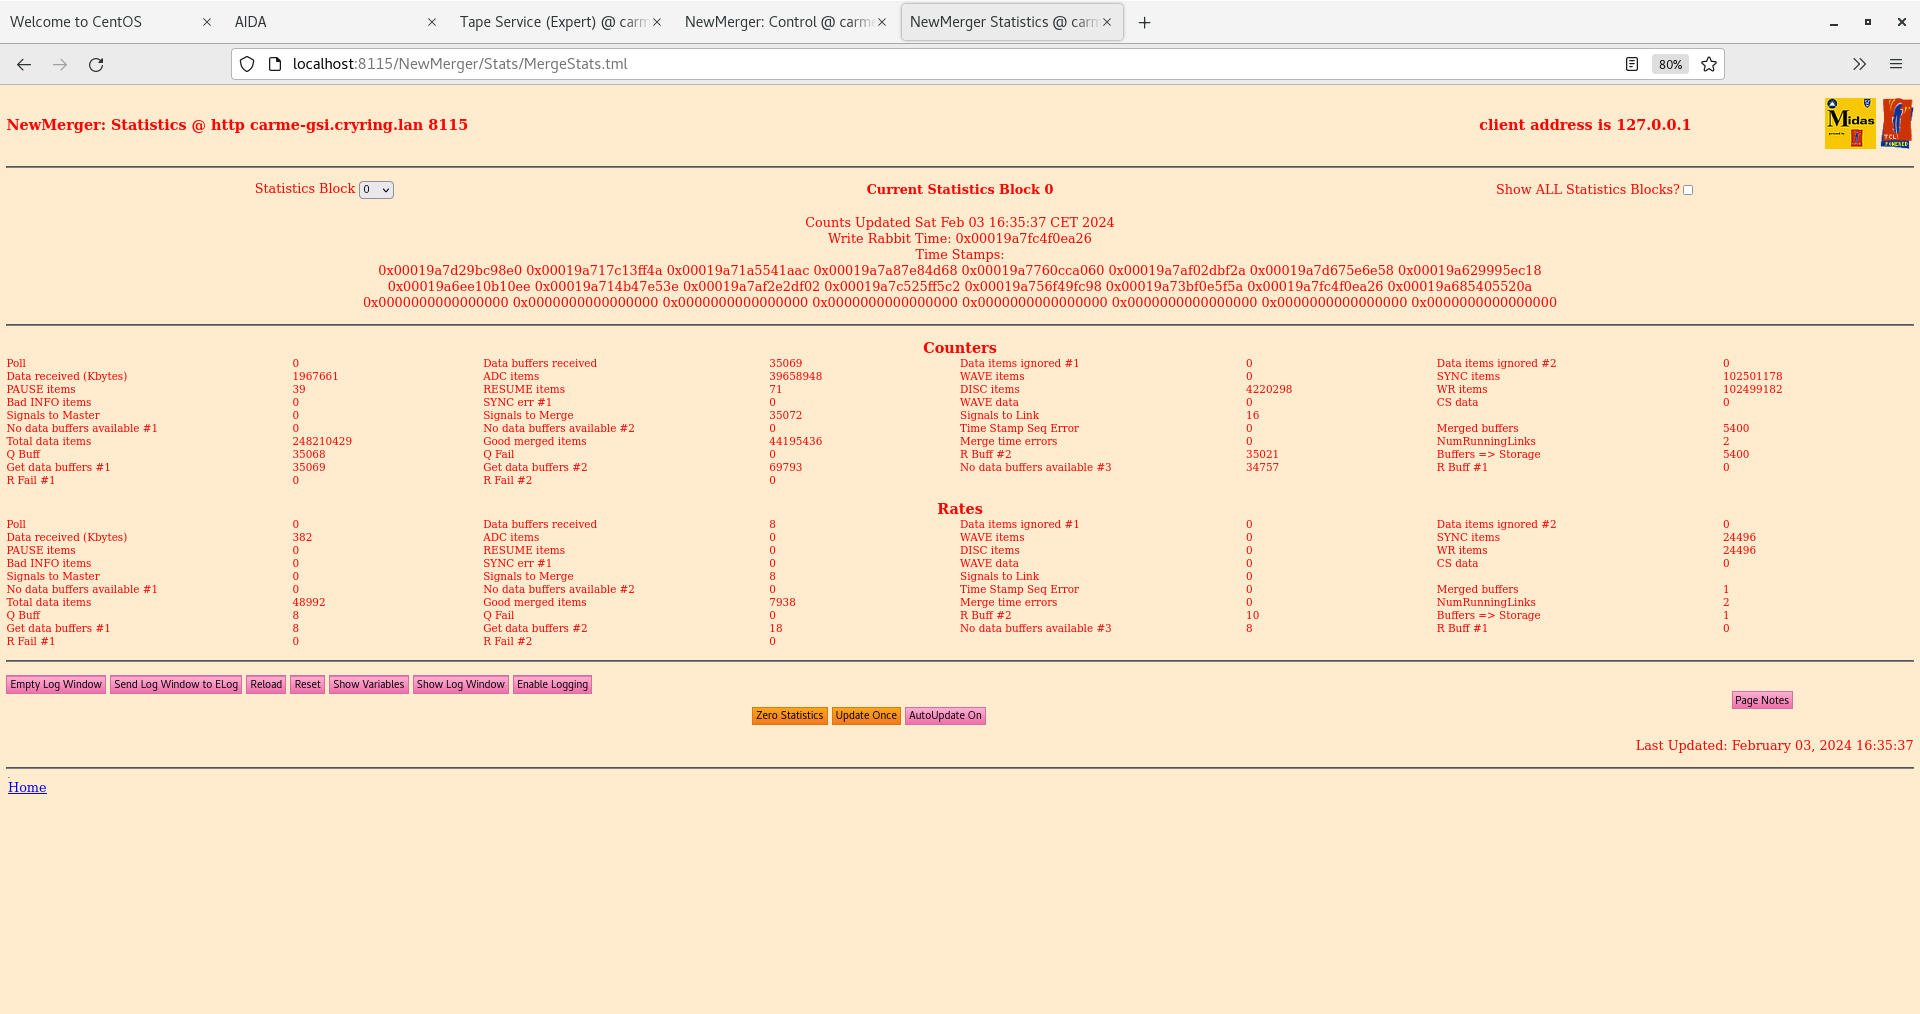
      NewMerger, TapeServer and Merger stats - attachments 35-38

16.50 Pulser peak width spreadsheet for file R2 - attachment 39

20.32 DAQ continues file G22-88/R3_9

      DSSSD bias OK - attachment 40

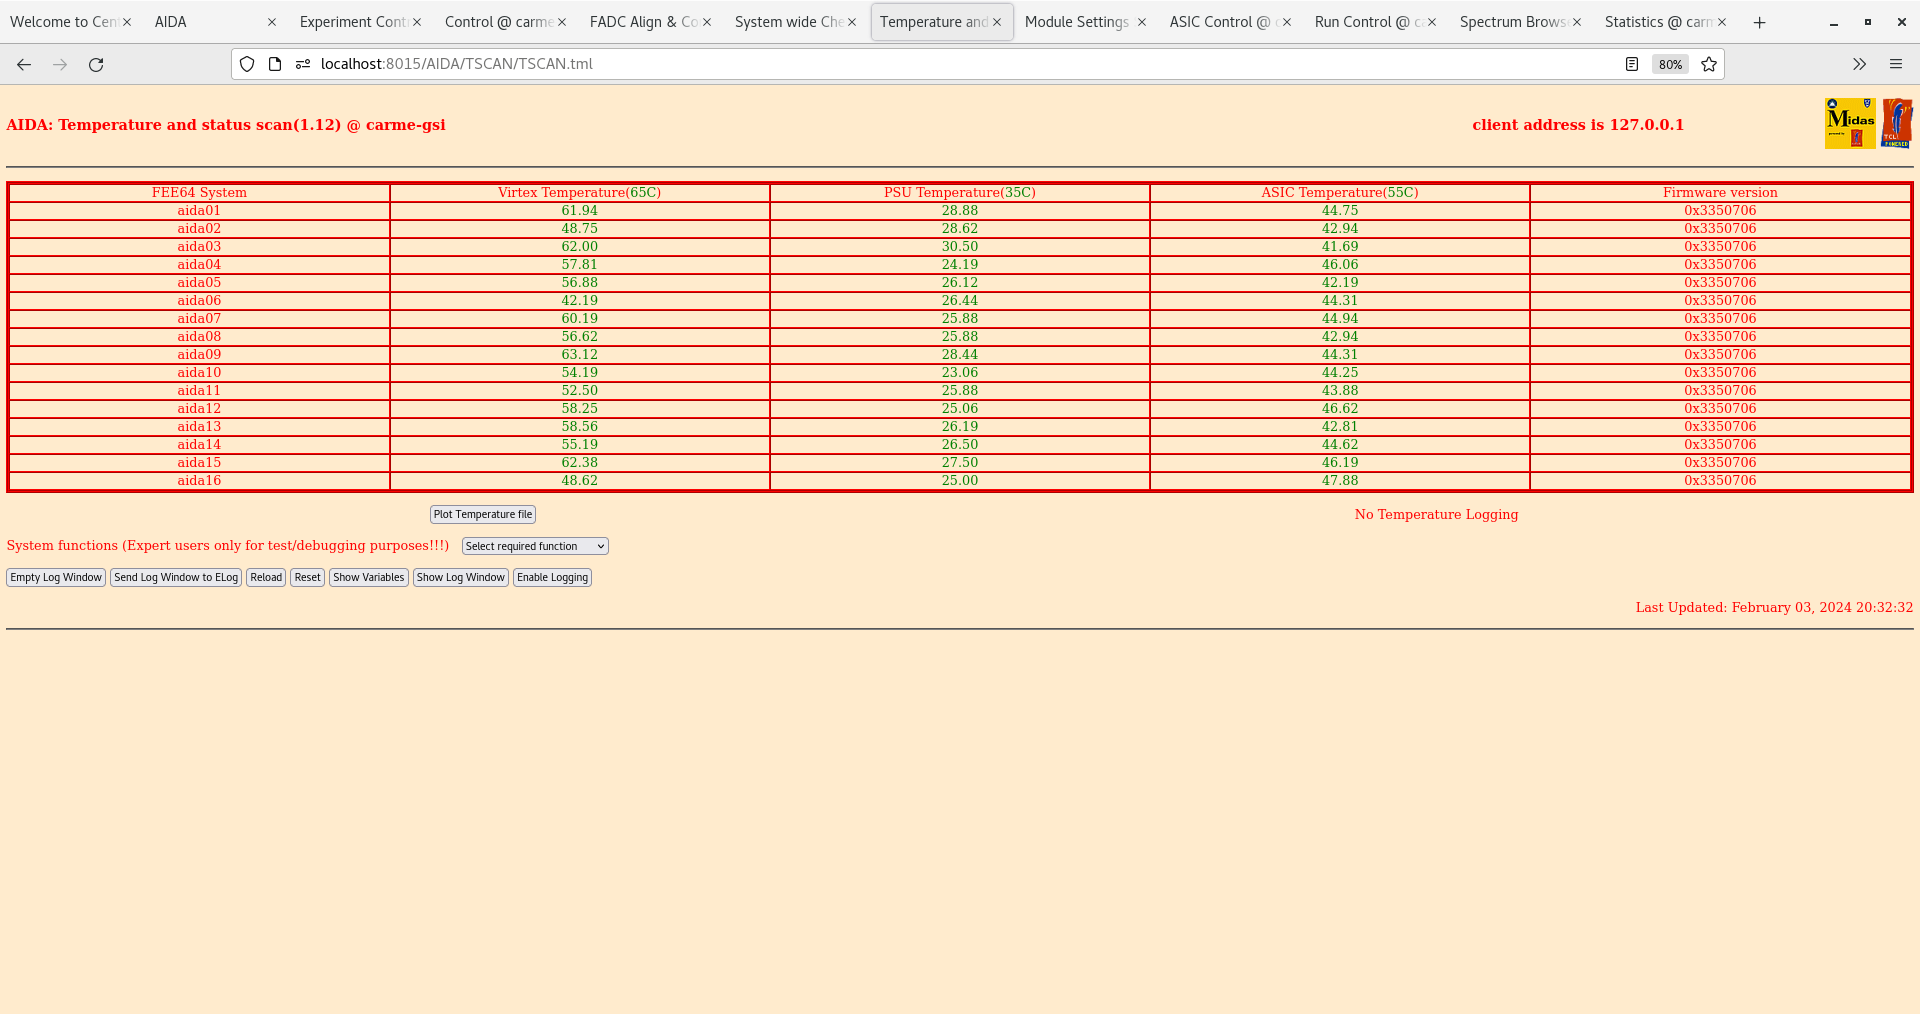
      FEE64 temperatures OK - attachment 41

      ADC data item stats - attachment 42
       aida15 rate c. 25k ( 2x 'hot' channels, 1x channel missing, all other channels OK )

      per FEE64 Stat spectra - attachment 43

      Merger, Merger stats and TapServer - attachments 44-46

      Disc data items - attachment 47
       aida15 disc rate c. 8k
      Disable aida15 disc ( fast comparator ) outputs for asic#3 - attachment 48
      Disc data items- attachment 49
       all FEE64s rate << 1Hz

Update NewMerger startup script and Options for 16x FEE64s - see attachments 32-33 |
| Attachment 1: Screenshot_from_2024-02-03_01-07-28.png
|

|
| Attachment 2: Screenshot_from_2024-02-03_01-08-15.png
|

|
| Attachment 3: Screenshot_from_2024-02-03_01-09-00.png
|
|
| Attachment 4: Screenshot_from_2024-02-03_01-09-39.png
|
|
| Attachment 5: Screenshot_from_2024-02-03_01-10-20.png
|

|
| Attachment 6: Screenshot_from_2024-02-03_01-11-45.png
|
|
| Attachment 7: Screenshot_from_2024-02-03_01-12-23.png
|
|
| Attachment 8: Screenshot_from_2024-02-03_10-02-22.png
|

|
| Attachment 9: Screenshot_from_2024-02-03_10-02-50.png
|

|
| Attachment 10: Screenshot_from_2024-02-03_10-03-29.png
|

|
| Attachment 11: Screenshot_from_2024-02-03_10-04-15.png
|

|
| Attachment 12: Screenshot_from_2024-02-03_10-04-46.png
|

|
| Attachment 13: Screenshot_from_2024-02-03_10-05-09.png
|

|
| Attachment 14: Screenshot_from_2024-02-03_10-05-48.png
|

|
| Attachment 15: Screenshot_from_2024-02-03_10-12-32.png
|
|
| Attachment 16: Screenshot_from_2024-02-03_13-24-46.png
|

|
| Attachment 17: Screenshot_from_2024-02-03_13-38-40.png
|

|
| Attachment 18: Screenshot_from_2024-02-03_13-38-47.png
|

|
| Attachment 19: Screenshot_from_2024-02-03_13-39-04.png
|

|
| Attachment 20: Screenshot_from_2024-02-03_13-40-06.png
|
|
| Attachment 21: Screenshot_from_2024-02-03_13-40-43.png
|

|
| Attachment 22: Screenshot_from_2024-02-03_13-41-00.png
|

|
| Attachment 23: Screenshot_from_2024-02-03_13-41-06.png
|

|
| Attachment 24: Screenshot_from_2024-02-03_16-01-18.png
|

|
| Attachment 25: Screenshot_from_2024-02-03_16-01-33.png
|
|
| Attachment 26: Screenshot_from_2024-02-03_16-01-42.png
|

|
| Attachment 27: Screenshot_from_2024-02-03_16-02-27.png
|

|
| Attachment 28: Screenshot_from_2024-02-03_16-03-16.png
|

|
| Attachment 29: Screenshot_from_2024-02-03_16-06-11.png
|

|
| Attachment 30: Screenshot_from_2024-02-03_16-07-05.png
|

|
| Attachment 31: Screenshot_from_2024-02-03_16-07-35.png
|

|
| Attachment 32: CONTENTS
|
0x0006dead string 0x0000
MERGE.LinksAvailable string 16
Index string MERGE.LinksAvailable&&0x0006dead&&MERGE.RunOptions&&MERGE.LinksInUse
Merge.LinksInUse string 1%1%1%1%1%1%1%1%1%1%1%1%1%1%1%1%0%0%0%0%0%0%0%0%0%0%0%0%0%0%0%0%0%0%0%0%0%0%0%0%0%0%0%0%0%0%0%0%0%0%0%0%0%0%0%0%0%0%0%0%0%0%0%0%
MERGE.LinksInUse string 1%1%1%1%1%1%1%1%1%1%1%1%1%1%1%1%
MERGE.RunOptions string 3
|
| Attachment 33: NewMerger
|
#!/bin/csh -f

echo "Tidy up"

killall -s9 MERGE
killall -s9 merge64.AD

killall -s9 master64
killall -s9 link64
killall -s9 merge64
killall -s9 statrate64

echo "Starting New Merger"

/bin/echo -e "\033];New Merger\007"

  if (! $?MIDASBASE) setenv MIDASBASE /MIDAS

#
#

   setenv PATH ${MIDASBASE}/Linux/bin64:${PATH}
   setenv LD_LIBRARY_PATH ${MIDASBASE}/TclHttpd/Linux64:${MIDASBASE}/Linux/lib64:${MIDASBASE}/lib_Linux64

netint MERGE_SyncStep 0x0000000

cd ${MIDASBASE}/NewMerger/MergeServer/bin64
./master64 -i 16 -l 16 -p 11001  &

sleep 100000000000

#
echo startup complete
#
|
| Attachment 34: Screenshot_from_2024-02-03_16-35-07.png
|

|
| Attachment 35: Screenshot_from_2024-02-03_16-35-20.png
|

|
| Attachment 36: Screenshot_from_2024-02-03_16-35-24.png
|

|
| Attachment 37: Screenshot_from_2024-02-03_16-35-31.png
|
|
| Attachment 38: Screenshot_from_2024-02-03_16-35-40.png
|
|
| Attachment 39: Pulser-widths-carme-2024.xlsx
|
| Attachment 40: Screenshot_from_2024-02-03_20-32-07.png
|

|
| Attachment 41: Screenshot_from_2024-02-03_20-32-40.png
|
|
| Attachment 42: Screenshot_from_2024-02-03_20-33-01.png
|

|
| Attachment 43: Screenshot_from_2024-02-03_20-33-24.png
|

|
| Attachment 44: Screenshot_from_2024-02-03_20-34-17.png
|

|
| Attachment 45: Screenshot_from_2024-02-03_20-34-40.png
|

|
| Attachment 46: Screenshot_from_2024-02-03_20-35-02.png
|

|
| Attachment 47: Screenshot_from_2024-02-03_20-35-52.png
|

|
| Attachment 48: Screenshot_from_2024-02-03_20-36-55.png
|

|
| Attachment 49: Screenshot_from_2024-02-03_20-37-14.png
|

|
| Attachment 50: Screenshot_from_2024-02-04_09-55-02.png
|

|
|
487
|
Fri Feb 2 09:58:58 2024 |
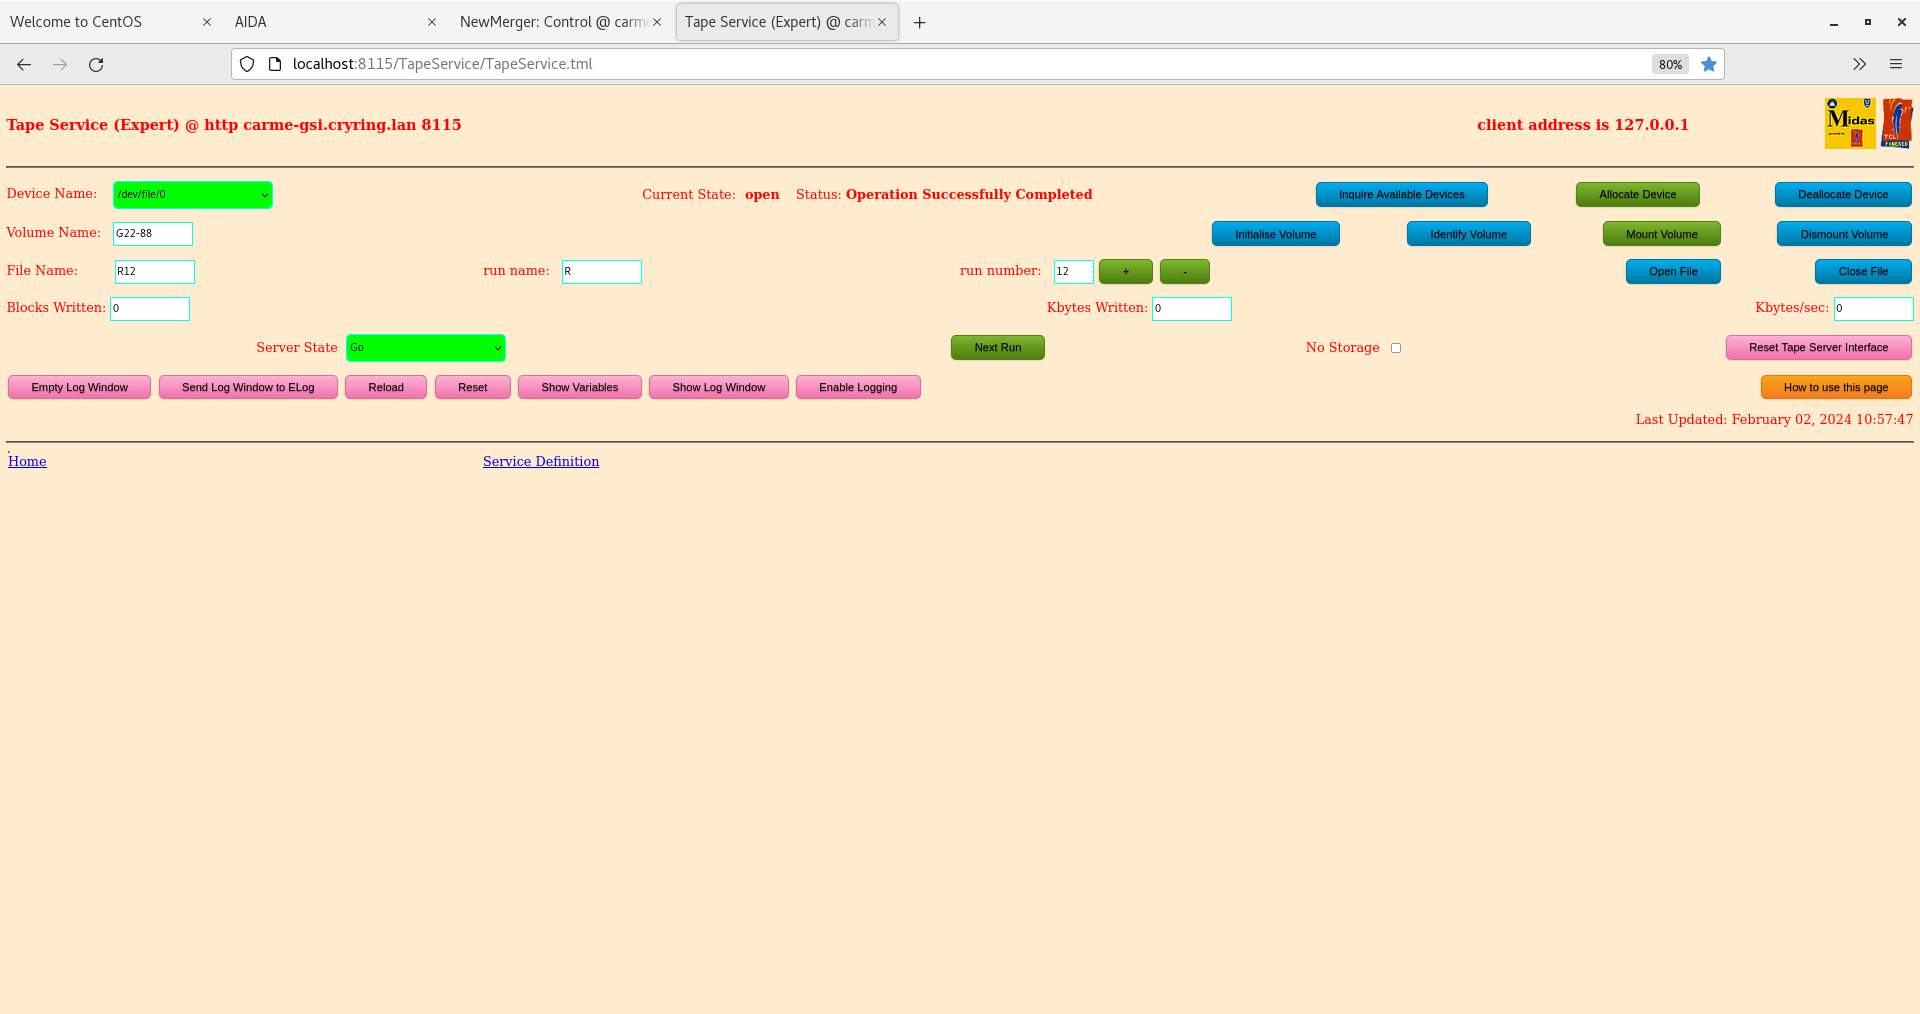
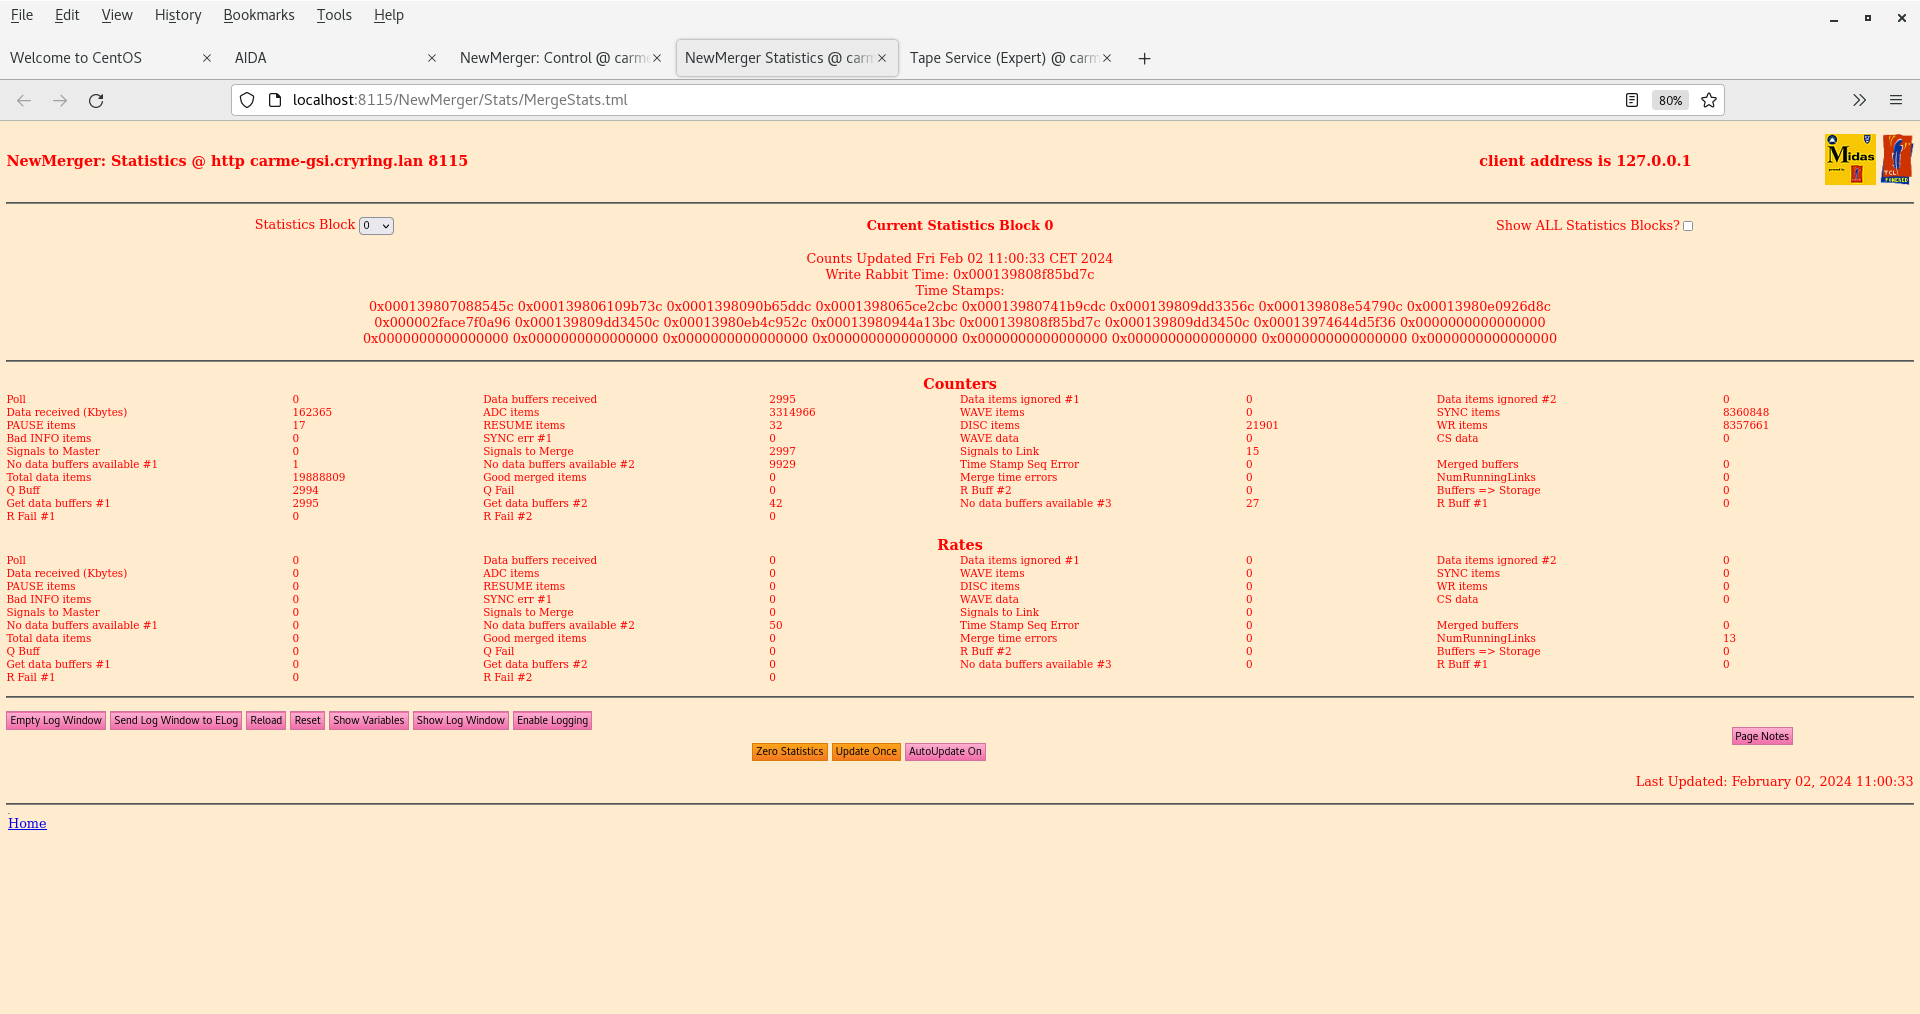
TD | TapeServer not writng data to disk - plus fix |
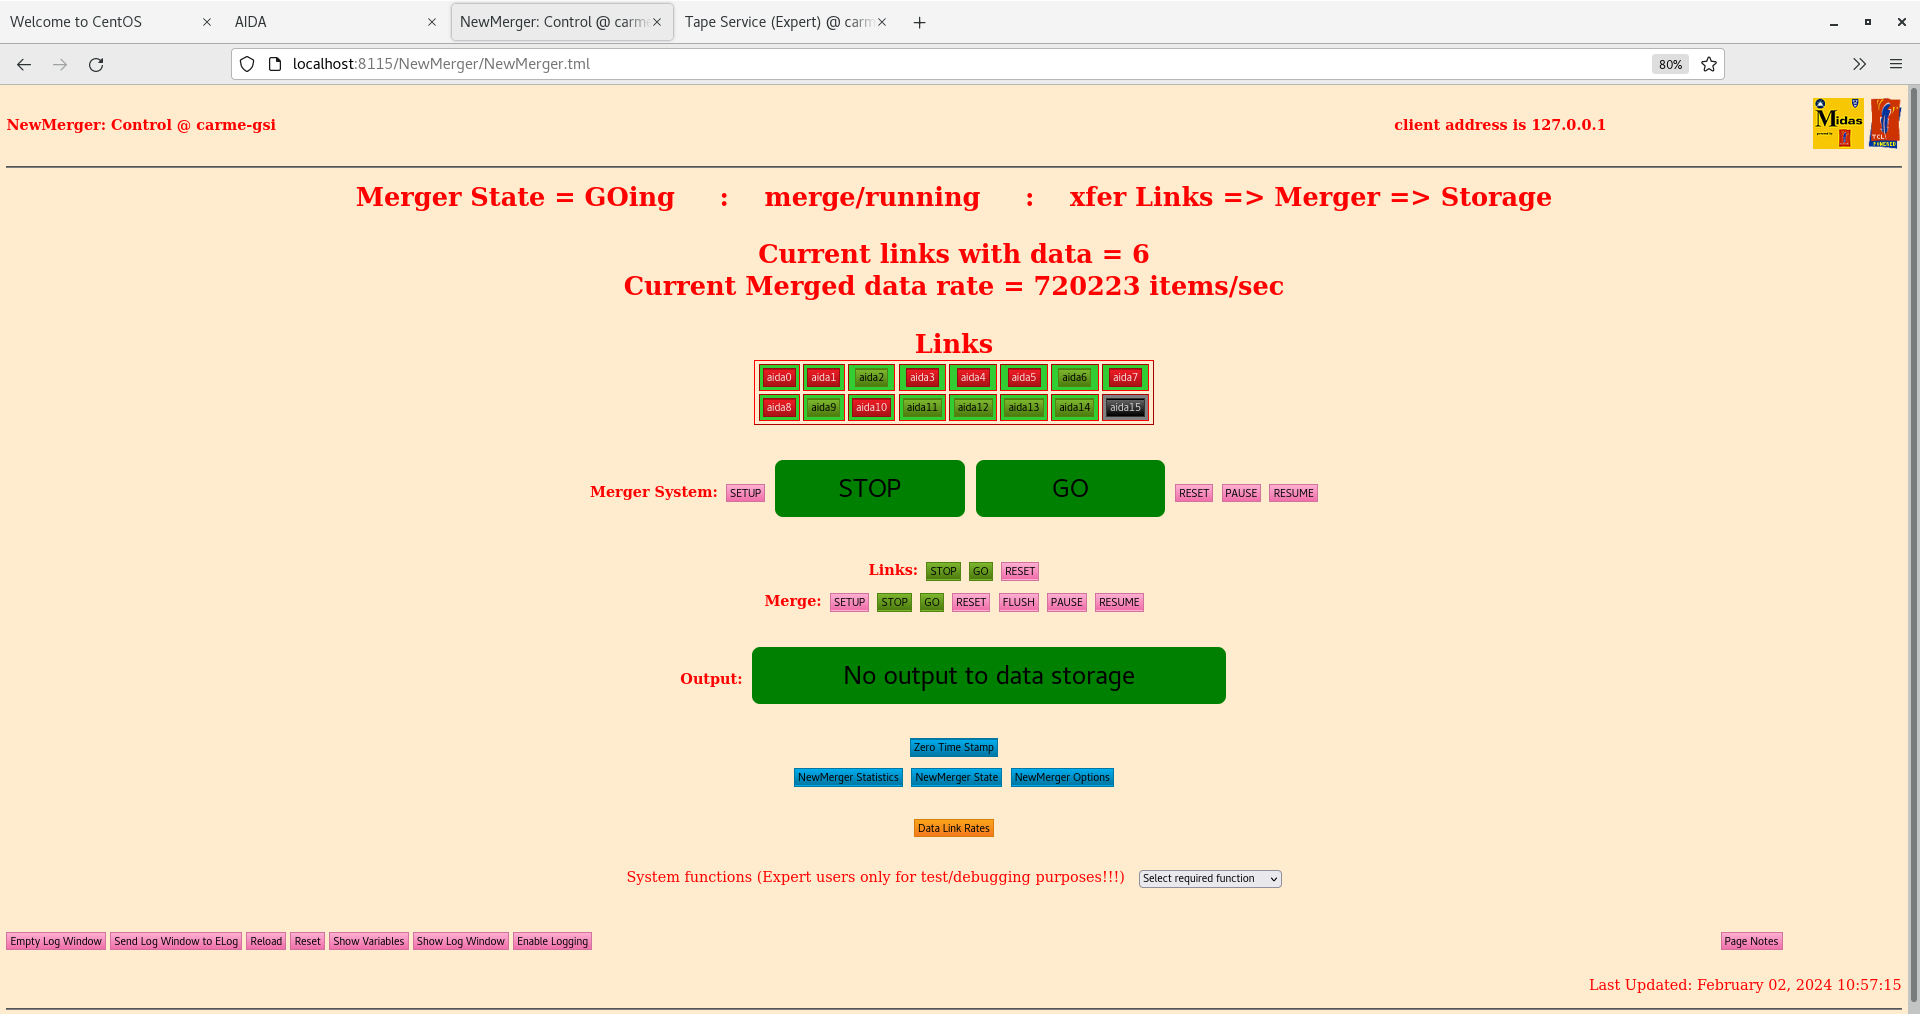
DAQ and NewMerger appear to be cofigured correctly.

Can allocate device, create volume and open file with TapeServer but cannot write data.

See attachmnents 1-3


Noted aida09 WR timestamp issue in attachment 3 - FEE64 Reboot fixed aida09 WR timestamp issue

Restarted DAQ/Merger/TapeServer - still cannot write to disk


14.30 CU provides the following list of NetVar variables used by the Merger

"MERGE_PID"
"MERGE_ID"
"MERGE_Action"
"MERGE_Signal"
   "MERGE_Parameter"
   "MERGE_Response"
   "MERGE_State"
   "MERGE_Trace"
   "MERGE_Paused"
   "MERGE_RunOptions"
   "MERGE_HardwareVersion"
   "MERGE_LinksAvailable"
   "MERGE_TestMode"
   "MERGE_PollTicks"
   "MERGE_LinksInUse"
   "MERGE_LinksAlive"
   "MERGE_StatsTime"
   "MERGE_Command"
   "MERGE_ZeroStats"
   "MERGE_SyncStep"
   "MERGE_InitialTimeStamp"
"MERGE_LinkState"
"MERGE_LinkStatus"
"MERGE_LinkAlive"
"MERGE_LinkInUse"

15.30 Changed Merger startup and NetVars files ( attachments 6 & 7 )

      Change server command line from

./master64 -i 16 -l 16 -p 11001  &

to

./master64 -i 15 -l 15 -p 11001  &


i.e. *exactly* matches number of FEE64s currently in use ( 15x FEE64s, aida01-aida15 )

      Change NetVars from

MERGE.LinksInUse string 1%1%1%1%1%1%1%1%1%1%1%1%1%1%1%0%

to

MERGE.LinksInUse string 1%1%1%1%1%1%1%1%1%1%1%1%1%1%1%

i.e. string has 15x 1% strings *not* 15x 1% *plus 1x 0% string

With *both* changes we are now able to write to disk.

N.B. We did not test the above changes individually - it is possible/probable that just one of the changes above fixes the problem. |
| Attachment 1: Screenshot_from_2024-02-02_10-57-18.png
|
|
| Attachment 2: Screenshot_from_2024-02-02_10-57-51.png
|
|
| Attachment 3: Screenshot_from_2024-02-02_10-58-23.png
|

|
| Attachment 4: Screenshot_from_2024-02-02_11-01-22.png
|
|
| Attachment 5: Screenshot_from_2024-02-02_11-18-45.png
|

|
| Attachment 6: NewMerger
|
#!/bin/csh -f

echo "Tidy up"

killall -s9 MERGE
killall -s9 merge64.AD

killall -s9 master64
killall -s9 link64
killall -s9 merge64
killall -s9 statrate64

echo "Starting New Merger"

/bin/echo -e "\033];New Merger\007"

  if (! $?MIDASBASE) setenv MIDASBASE /MIDAS

#
#

   setenv PATH ${MIDASBASE}/Linux/bin64:${PATH}
   setenv LD_LIBRARY_PATH ${MIDASBASE}/TclHttpd/Linux64:${MIDASBASE}/Linux/lib64:${MIDASBASE}/lib_Linux64

netint MERGE_SyncStep 0x0000000

cd ${MIDASBASE}/NewMerger/MergeServer/bin64
./master64 -i 15 -l 15 -p 11001  &

sleep 100000000000

#
echo startup complete
#
|
| Attachment 7: CONTENTS
|
0x0006dead string 0x0000
MERGE.LinksAvailable string 15
Index string MERGE.LinksAvailable&&0x0006dead&&MERGE.RunOptions&&MERGE.LinksInUse
Merge.LinksInUse string 1%1%1%1%1%1%1%1%1%1%1%1%1%1%1%0%0%0%0%0%0%0%0%0%0%0%0%0%0%0%0%0%0%0%0%0%0%0%0%0%0%0%0%0%0%0%0%0%0%0%0%0%0%0%0%0%0%0%0%0%0%0%0%0%
MERGE.LinksInUse string 1%1%1%1%1%1%1%1%1%1%1%1%1%1%1%
MERGE.RunOptions string 3
|
|
486
|
Fri Feb 2 08:59:36 2024 |
JM, TD, CB | Run1 start - pulser widths spreadsheet |
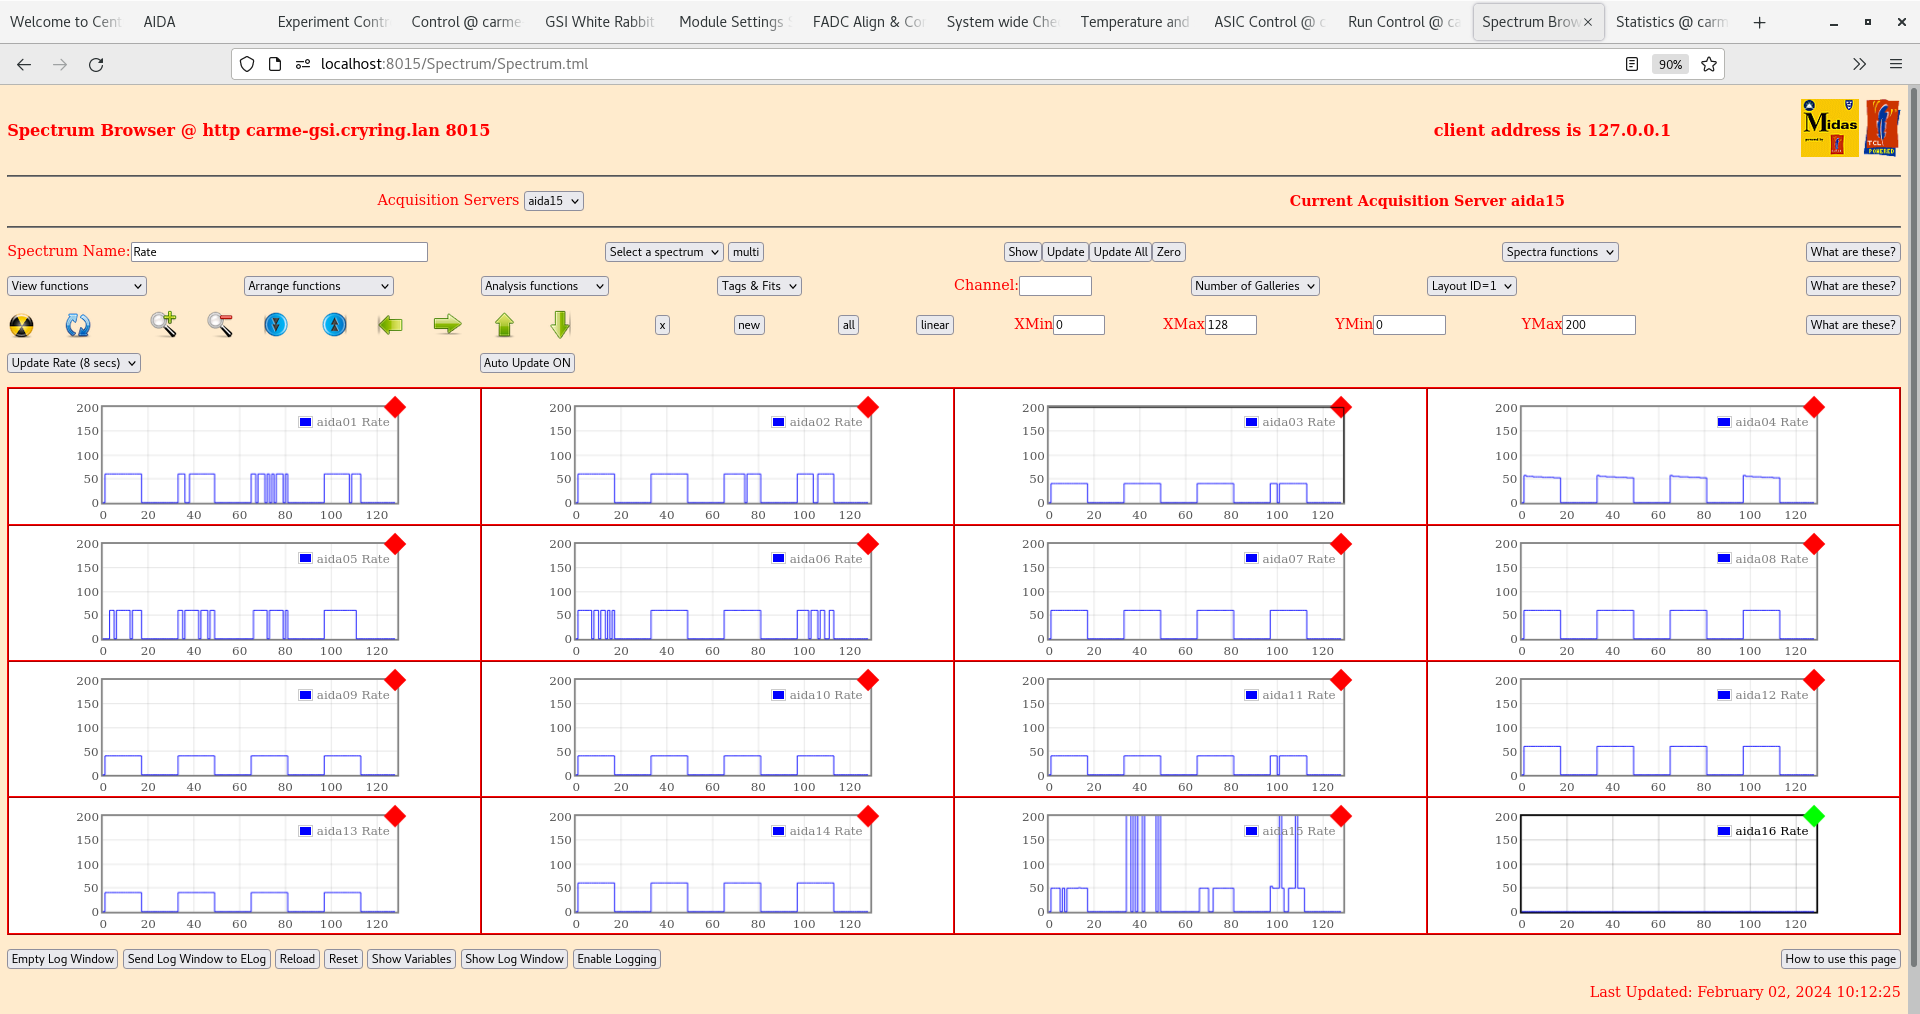
Current pulser widths excel spreadsheet attached

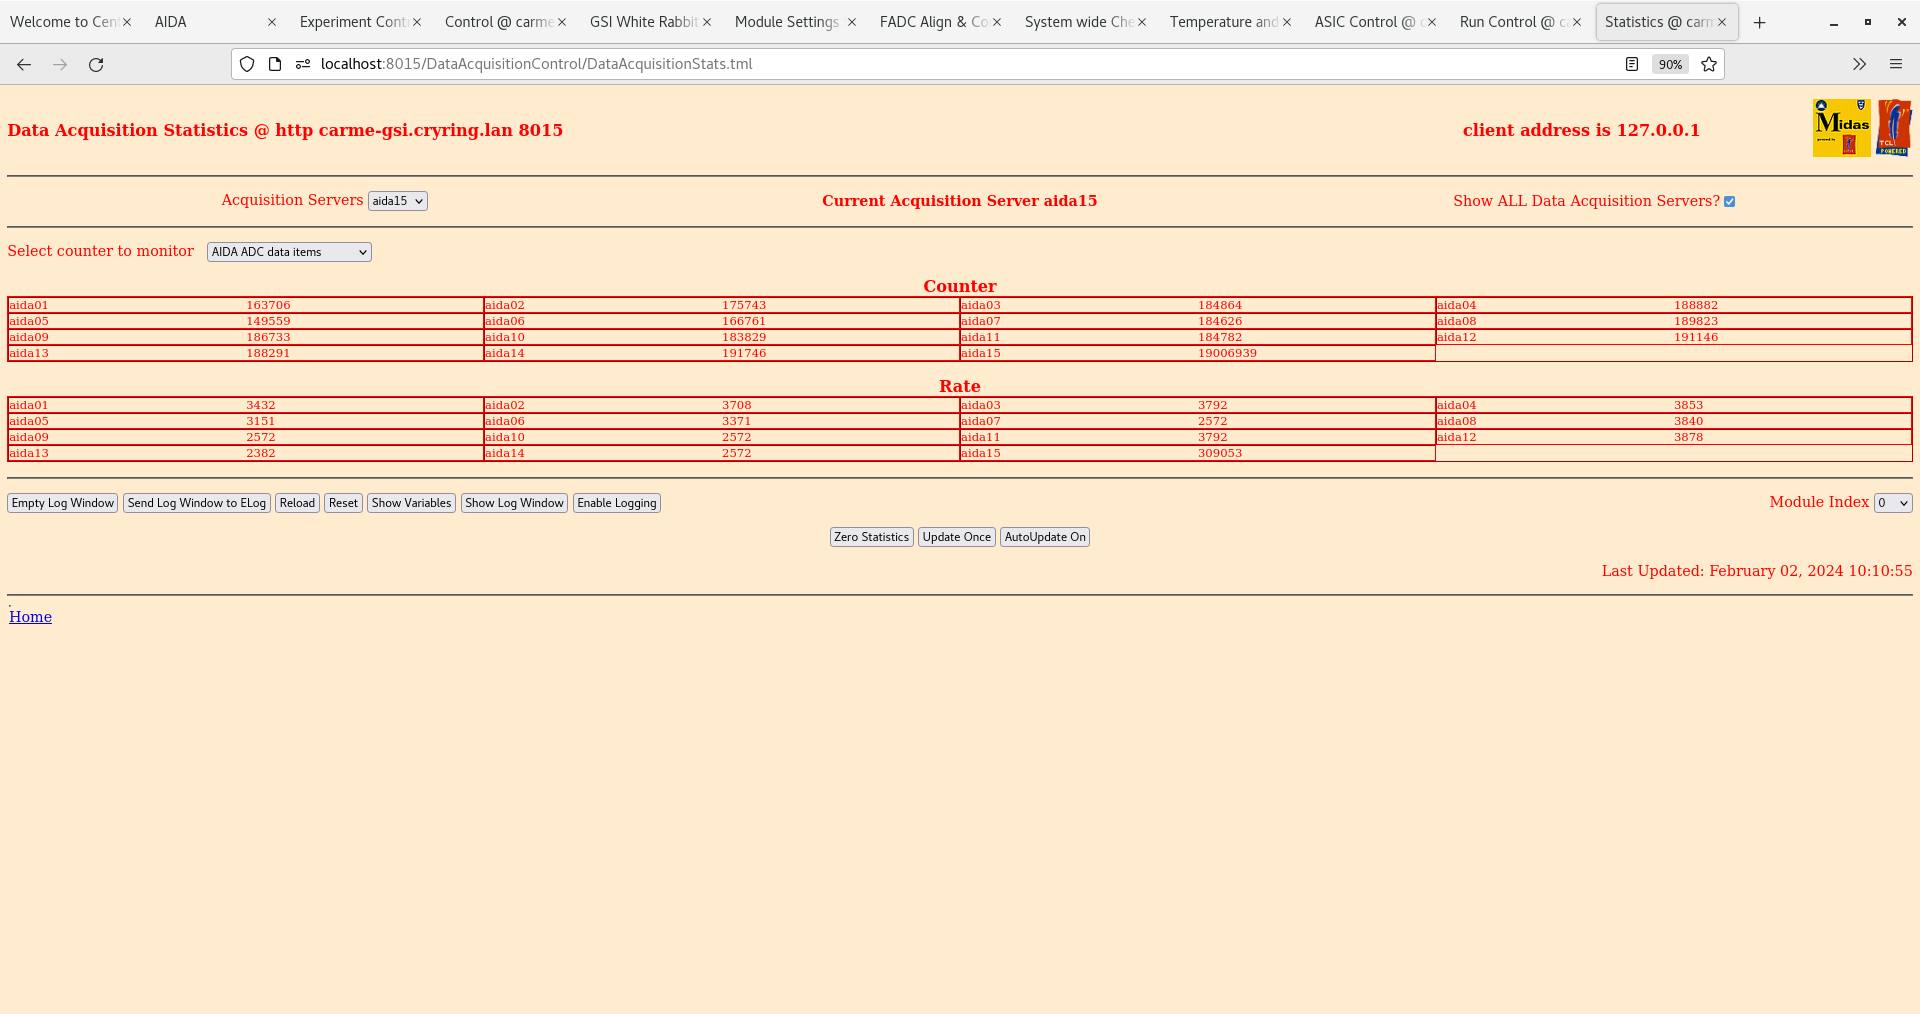
09.58 DSSSD bias OK - attachment 1

Ambient temperature +16.1 deg C FEE64 temps OK - attachment 2

ADC data item stats OK - attachment 3
 aida15 asic #2 high rate - asic u/s

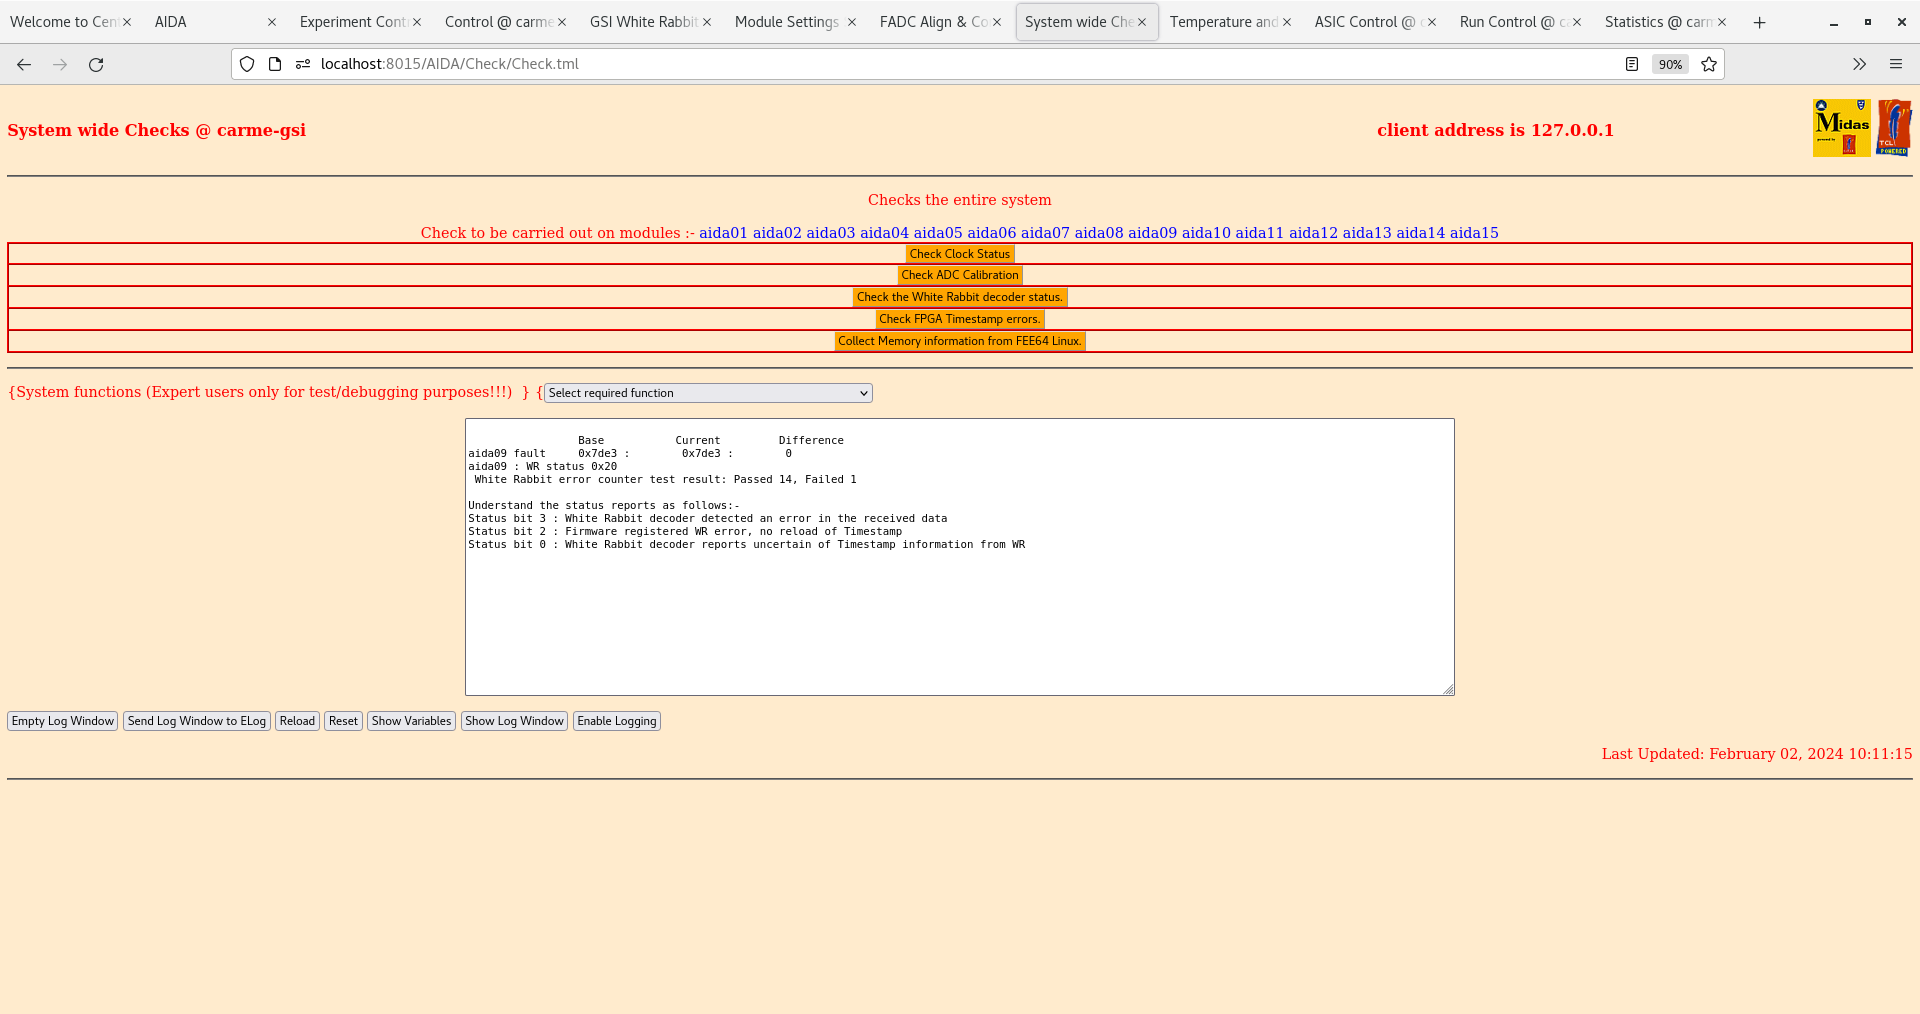
system wide tests OK *except* aida09 - attachments 4-5
 aida09 WR status 0x20 aida09 WR timestamp incorrect cf. all other FEE64s

per FEE64 Rate spectra - attachment 6

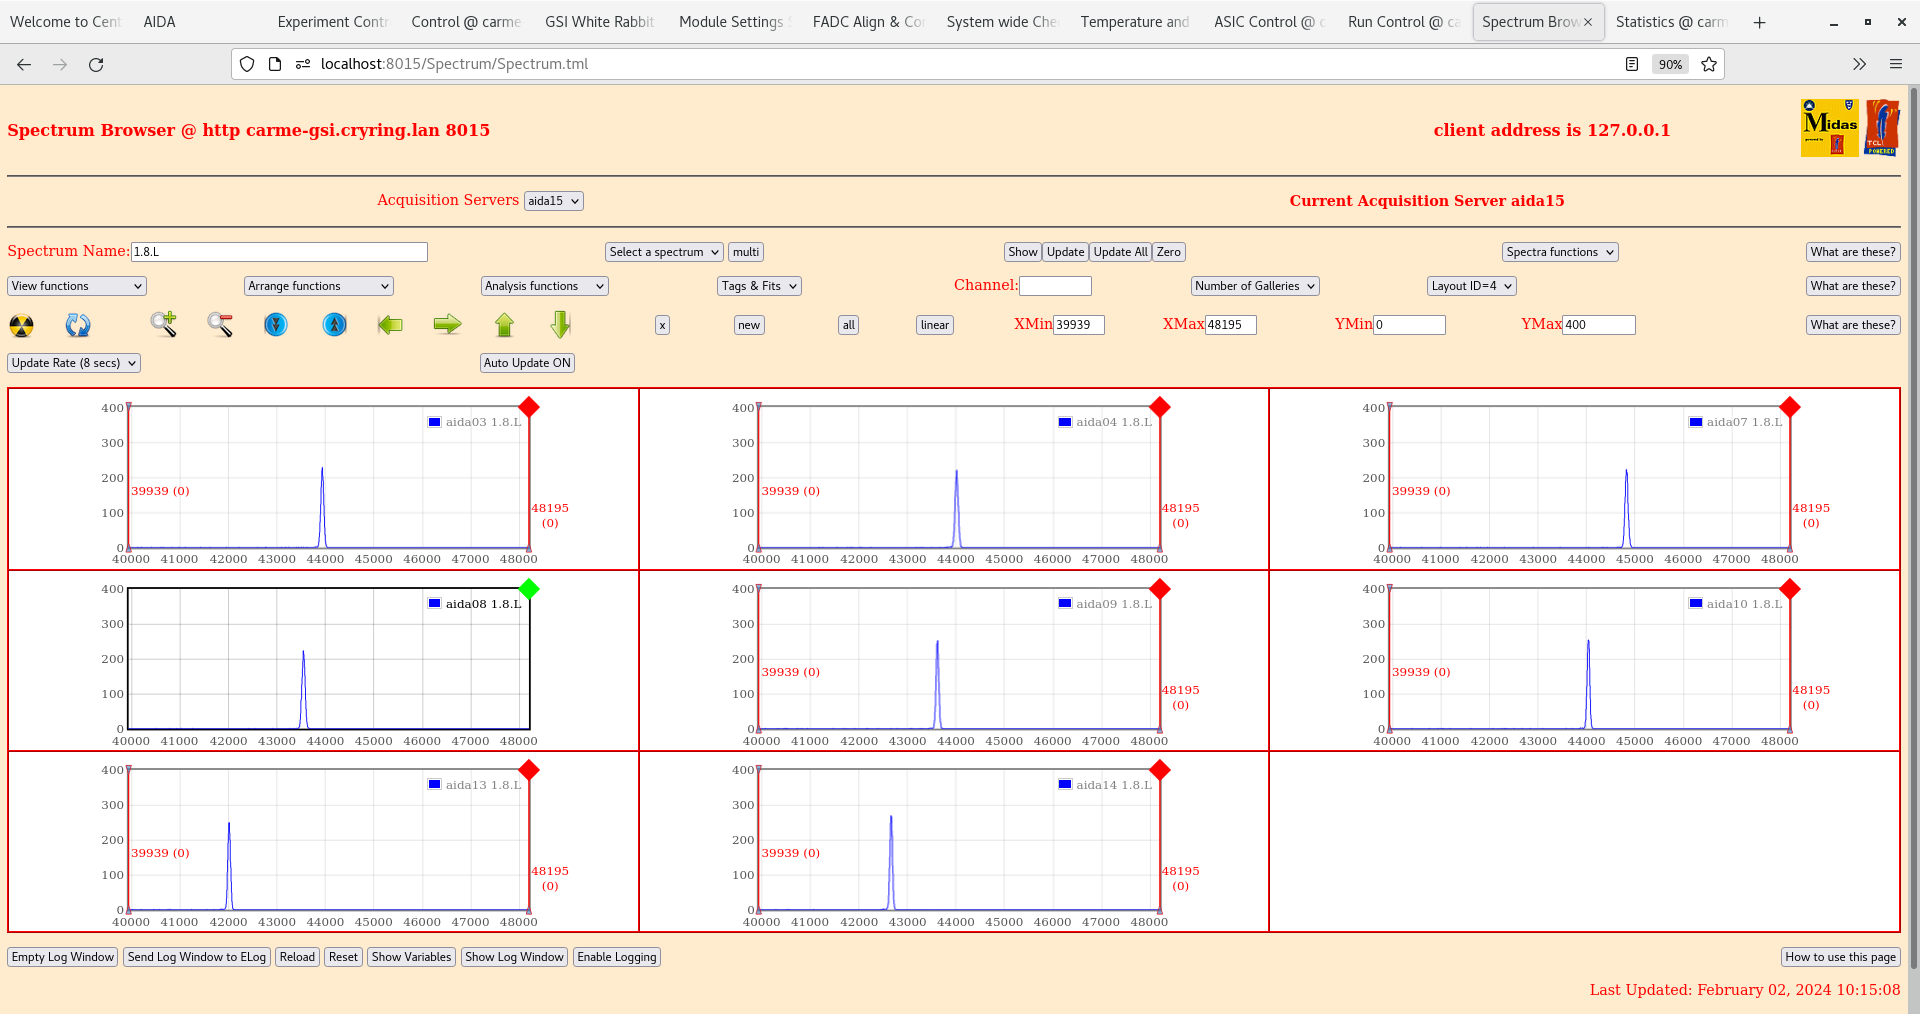
per FEE64 1.8.L spectra - attachments 7-8
 aida14 pulse peak witdh 58 ch FWHM
 aida11 pulse peak witdh 48 ch FWHM

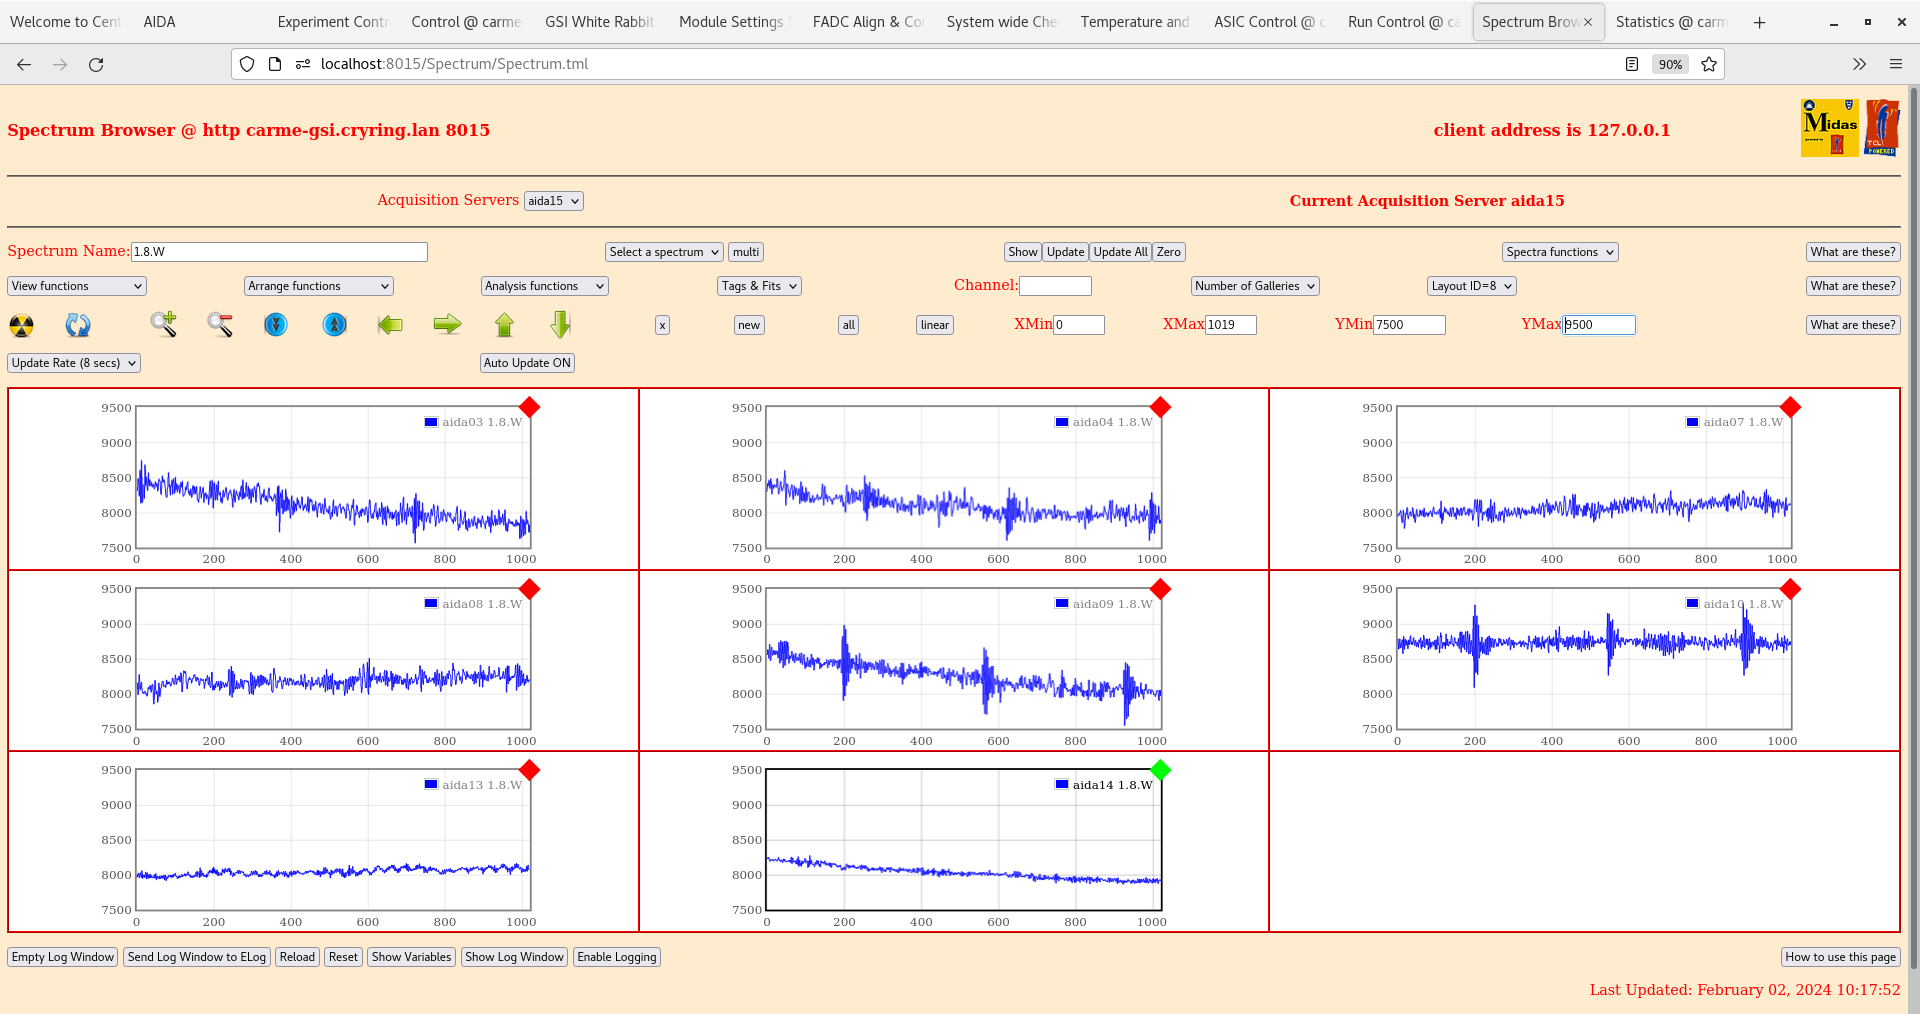
per FEE64 1.8.W spetra - 20us FSR - attachments 9-10


12.00

aida09 WR timestamp issue resolved by FEE64 reboot


14.10

Safety pins removed from detector motion system. CB performs one, complete DSSSD movement cycle. Zero all histogram and stats per FEE64 Stat spectra ( log scale ) and
ADC
data item stats for the complete DSSSD movement cycle - attachments 11-12
No change observed in DSSSD leakage currents during DSSSD movement cycle.

15.35

Resolved issue from previous elog. Begin background run writing data to disk.
ASIC check load
Start DAQ G22-88/R1 background alpha
EG&G Ortec 448 Pulser OFF
ASIC settings 2024Jan20-12.02.08
slow comparator 0x64 ( all FEE64s *except aida15 asic #2 0xff )
All histograms set to zero

DSSSD bias OK - attachment 13
FEE64 temps OK - attachment 14

WR timestamps OK - attachment 15

ADC data item stats - attachment 16
aida15 asic #2 u/s - rate c. 250k

ADC data items/s Merger, Tape Server & Merger stats - attachments 17-19
data rate to disk c. 2Mb/s dominated by aida15 asic 2 |
| Attachment 1: Screenshot_from_2024-02-02_09-59-10.png
|

|
| Attachment 2: Screenshot_from_2024-02-02_10-10-46.png
|

|
| Attachment 3: Screenshot_from_2024-02-02_10-10-59.png
|
|
| Attachment 4: Screenshot_from_2024-02-02_10-11-18.png
|
|
| Attachment 5: Screenshot_from_2024-02-02_10-11-37.png
|

|
| Attachment 6: Screenshot_from_2024-02-02_10-12-32.png
|
|
| Attachment 7: Screenshot_from_2024-02-02_10-13-17.png
|

|
| Attachment 8: Screenshot_from_2024-02-02_10-15-11.png
|
|
| Attachment 9: Screenshot_from_2024-02-02_10-16-33.png
|

|
| Attachment 10: Screenshot_from_2024-02-02_10-18-01.png
|
|
| Attachment 11: Screenshot_from_2024-02-02_14-09-42.png
|

|
| Attachment 12: Screenshot_from_2024-02-02_14-09-46.png
|

|
| Attachment 13: Screenshot_from_2024-02-02_15-41-14.png
|

|
| Attachment 14: Screenshot_from_2024-02-02_15-41-35.png
|

|
| Attachment 15: Screenshot_from_2024-02-02_15-42-14.png
|

|
| Attachment 16: Screenshot_from_2024-02-02_15-42-31.png
|

|
| Attachment 17: Screenshot_from_2024-02-02_15-43-02.png
|

|
| Attachment 18: Screenshot_from_2024-02-02_15-43-11.png
|

|
| Attachment 19: Screenshot_from_2024-02-02_15-43-25.png
|

|
| Attachment 20: Pulser-widths-carme-2024.xlsx
|
|
485
|
Thu Feb 1 14:45:09 2024 |
JM, CB | NewMerger setup |
To include alll 16 FEE modules in the NewMerger we edited the file /MIDAS/DB/EXPERIMENTS/MERGE/Options/carme-gsi from MERGE.LinksAvailable string 5 to MERGE.LinksAvailable string 15
We also edited the file /MIDAS/Linux/startup/NewMerger from ./master64 -i 8 -l 16 -p 11001 & to ./master64 -i 16 -l 16 -p 11001 &
We have started the Merger and tape server. The merger settings were 'corrupted' and did not display xfer Links => Merger. We implemented a fix from https://elog.ph.ed.ac.uk/DESPEC/36 and this resolved the issue.
We started the tape server, merger and go on the run control. We observe the merger working and data links to the tape server. A new file is created each time but we observe no data being written to that file. After 5 minutes of no data being written the merger crashed and the fees crashed soon after. We will leave until tomorrow to resolve.
Issue subsequently resolved see elog https://elog.ph.ed.ac.uk/CARME/487 |
|
484
|
Thu Feb 1 10:04:11 2024 |
JM, CB | Shaping time testing |
Arrived at the control room to find we had lost connection to the power relay. We rebooted the nnrpi1 and re-connected according to the steps laid out in elog 471 -> all okay
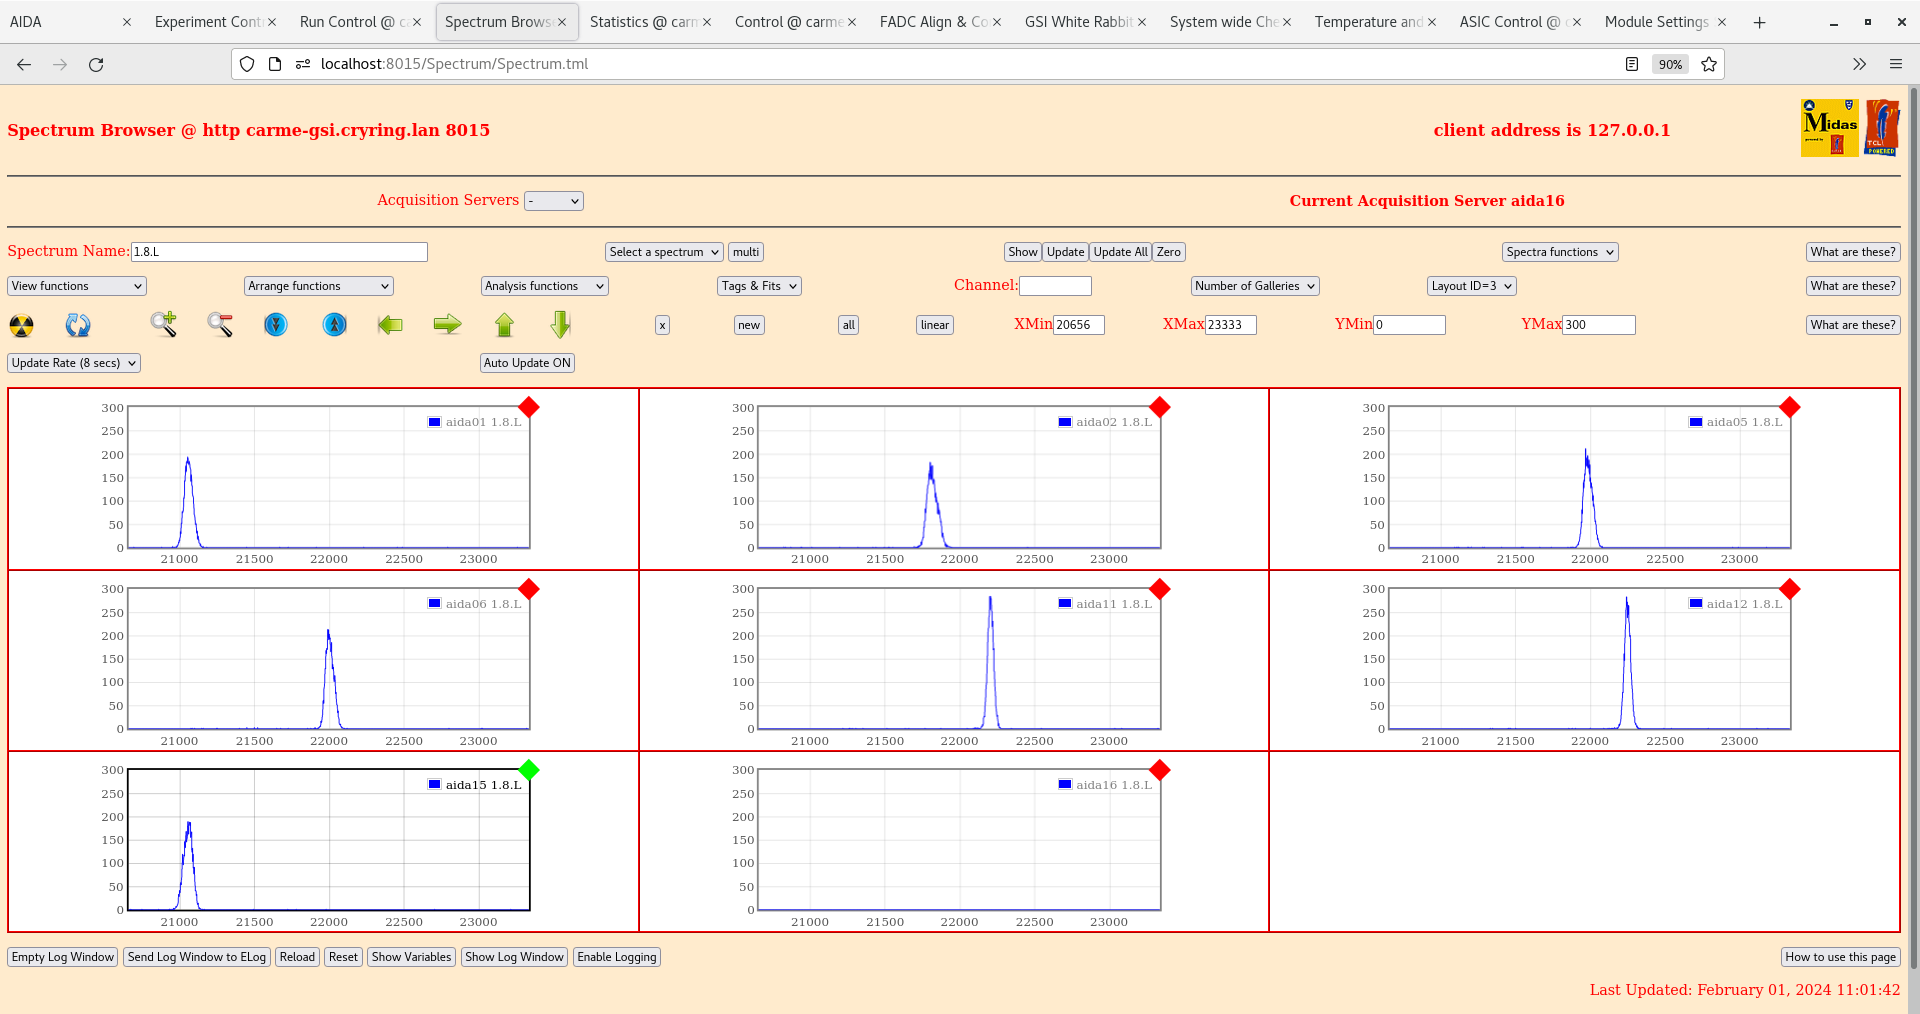
11:00 Restarted daq with no changes to the system from yesterday. Bias consistent with previous days. All pulser peaks are slightly improved (even more for the pn pulser, one goes from 91 chn to 78). No pulser observed in nn FEE modules 9, 10, 13, 14 again.
ADC data items check OK - all ~3k
Rates - all OK - attachment 1
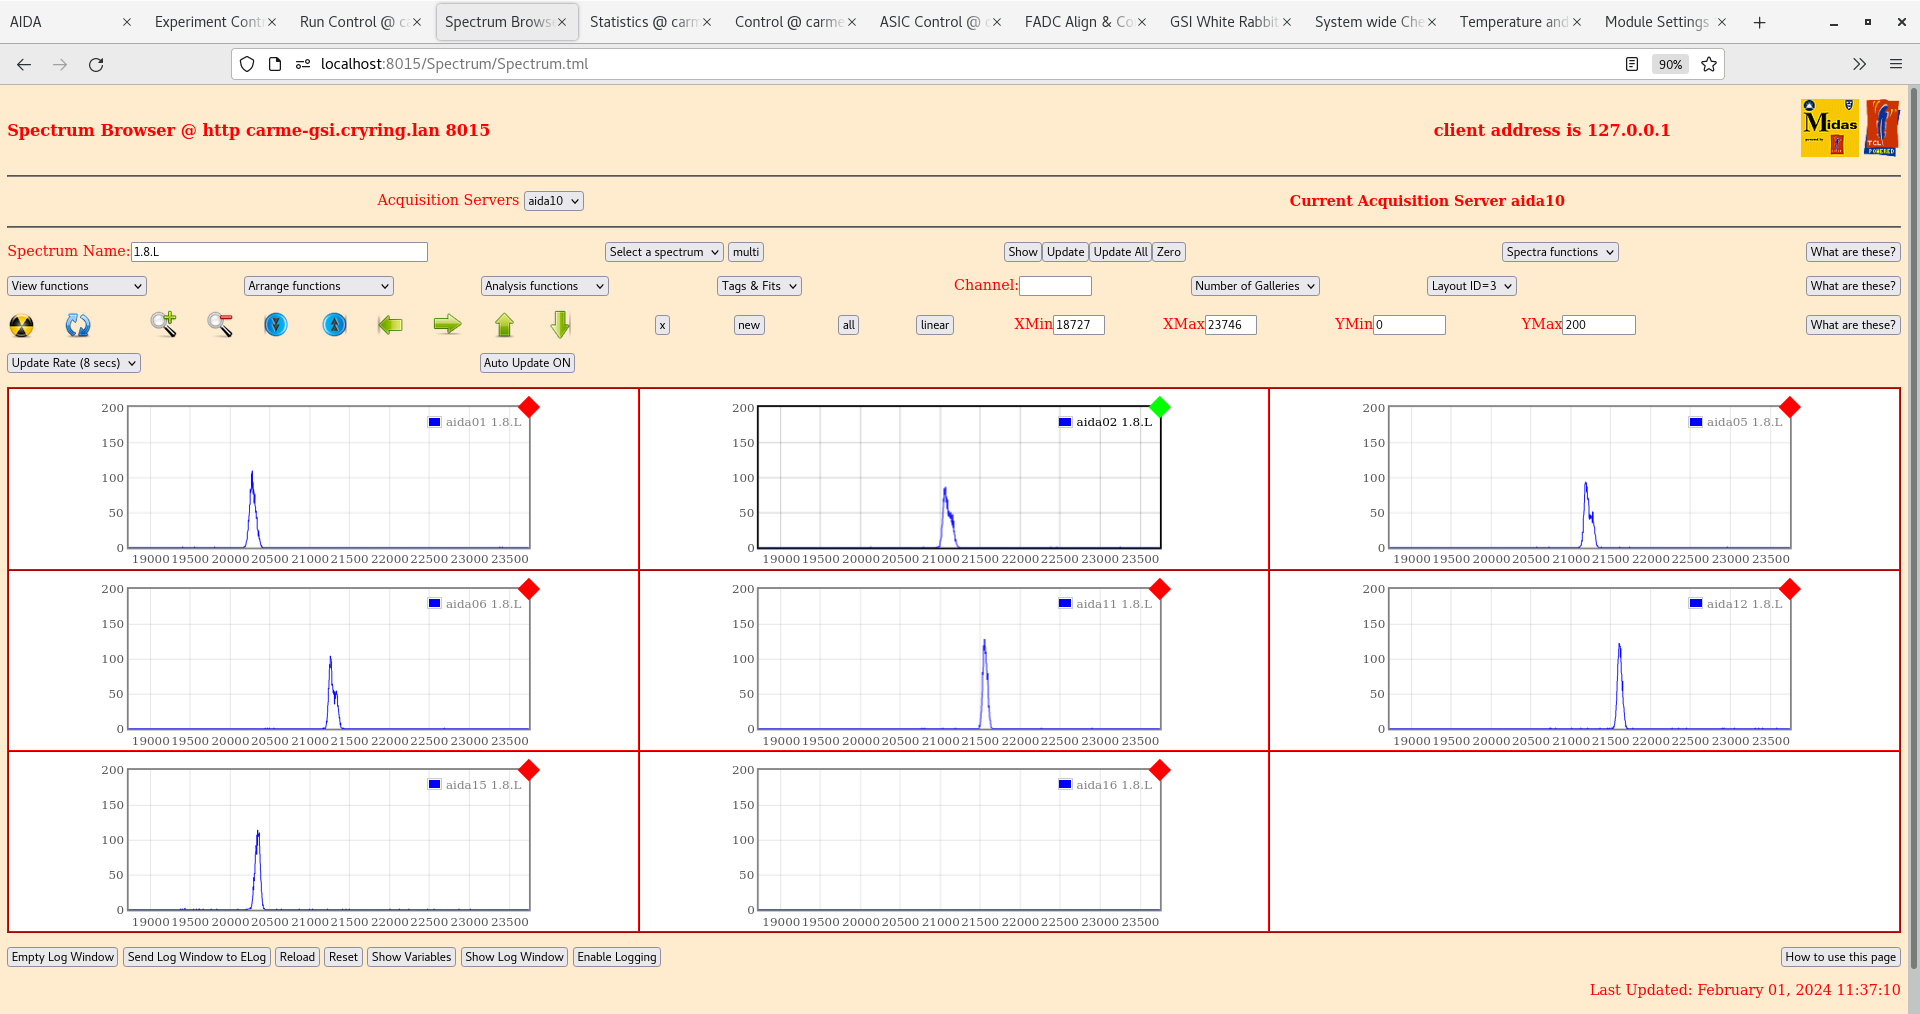
1.8L spectra. - attachment 2,3
1.8W waveforms - attachment 4,5
11:20 Changed shaping time from 0xf to 0x3 (2us)
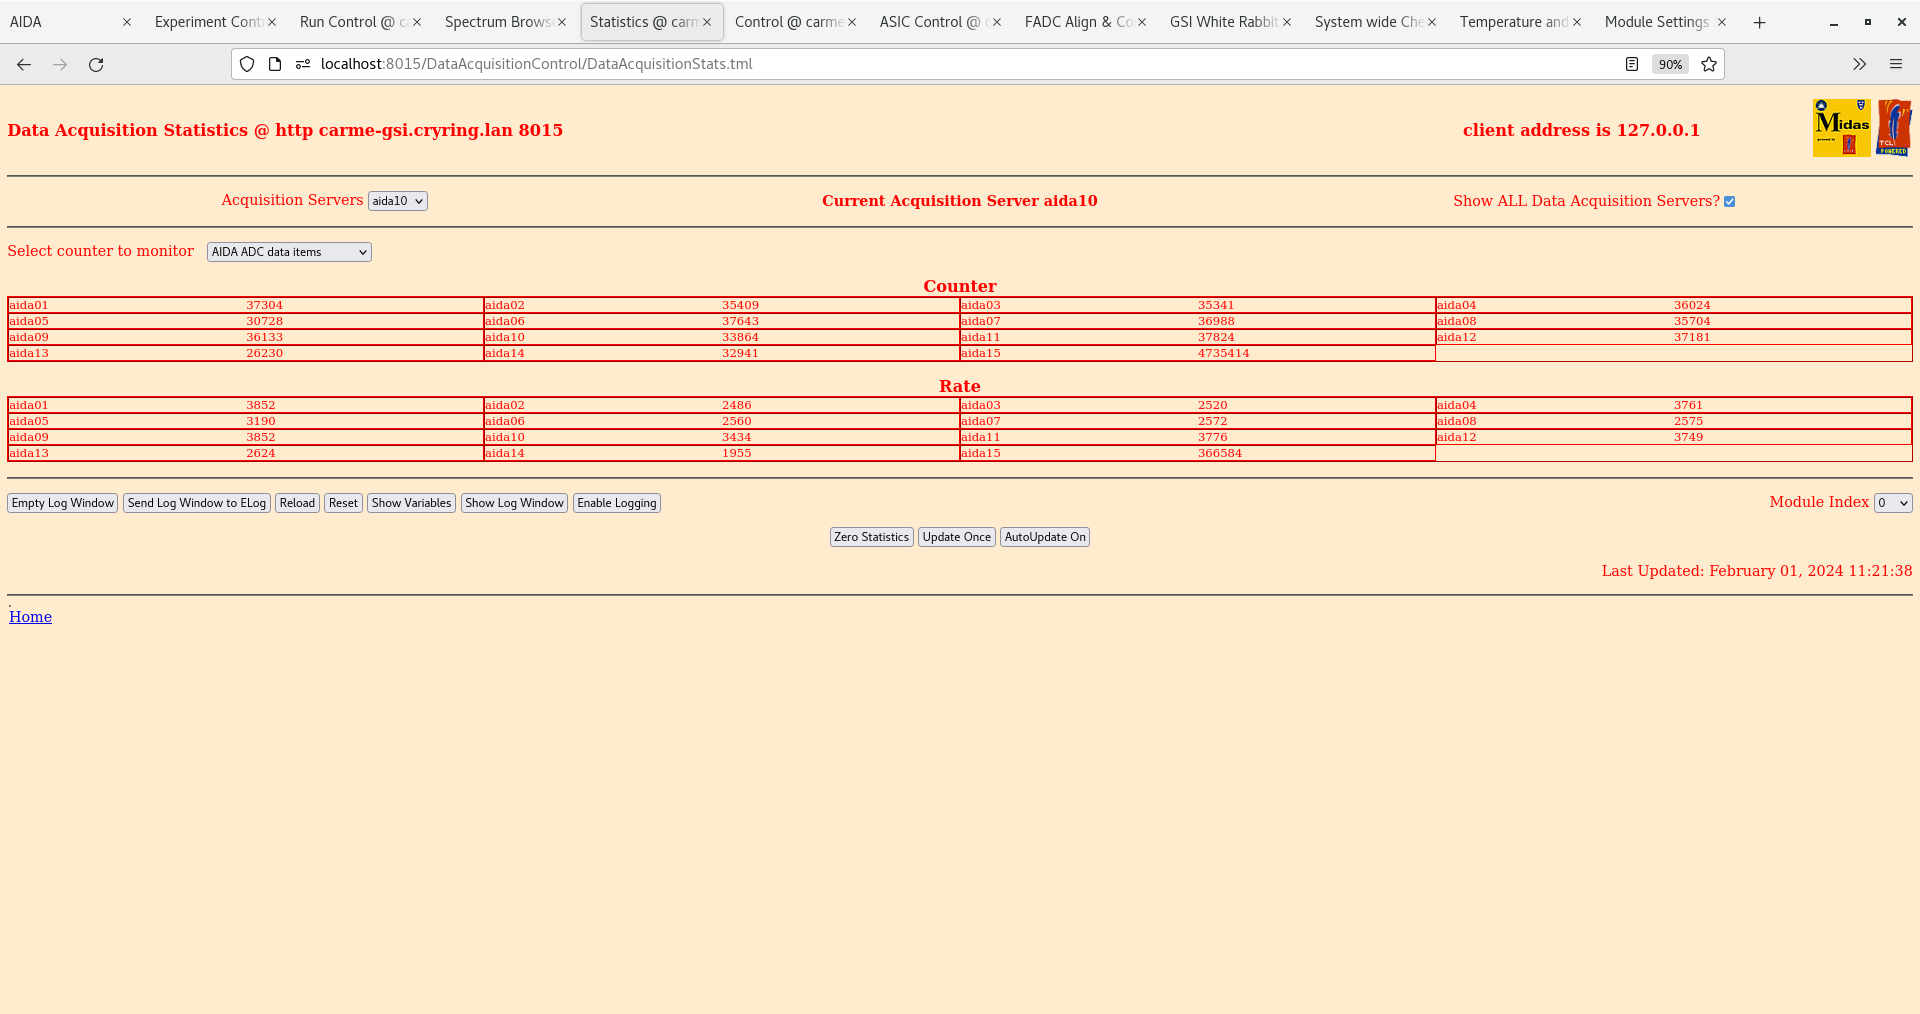
ADC data items check OK - all ~3k attachment 6
Rates - all OK - attachment 7
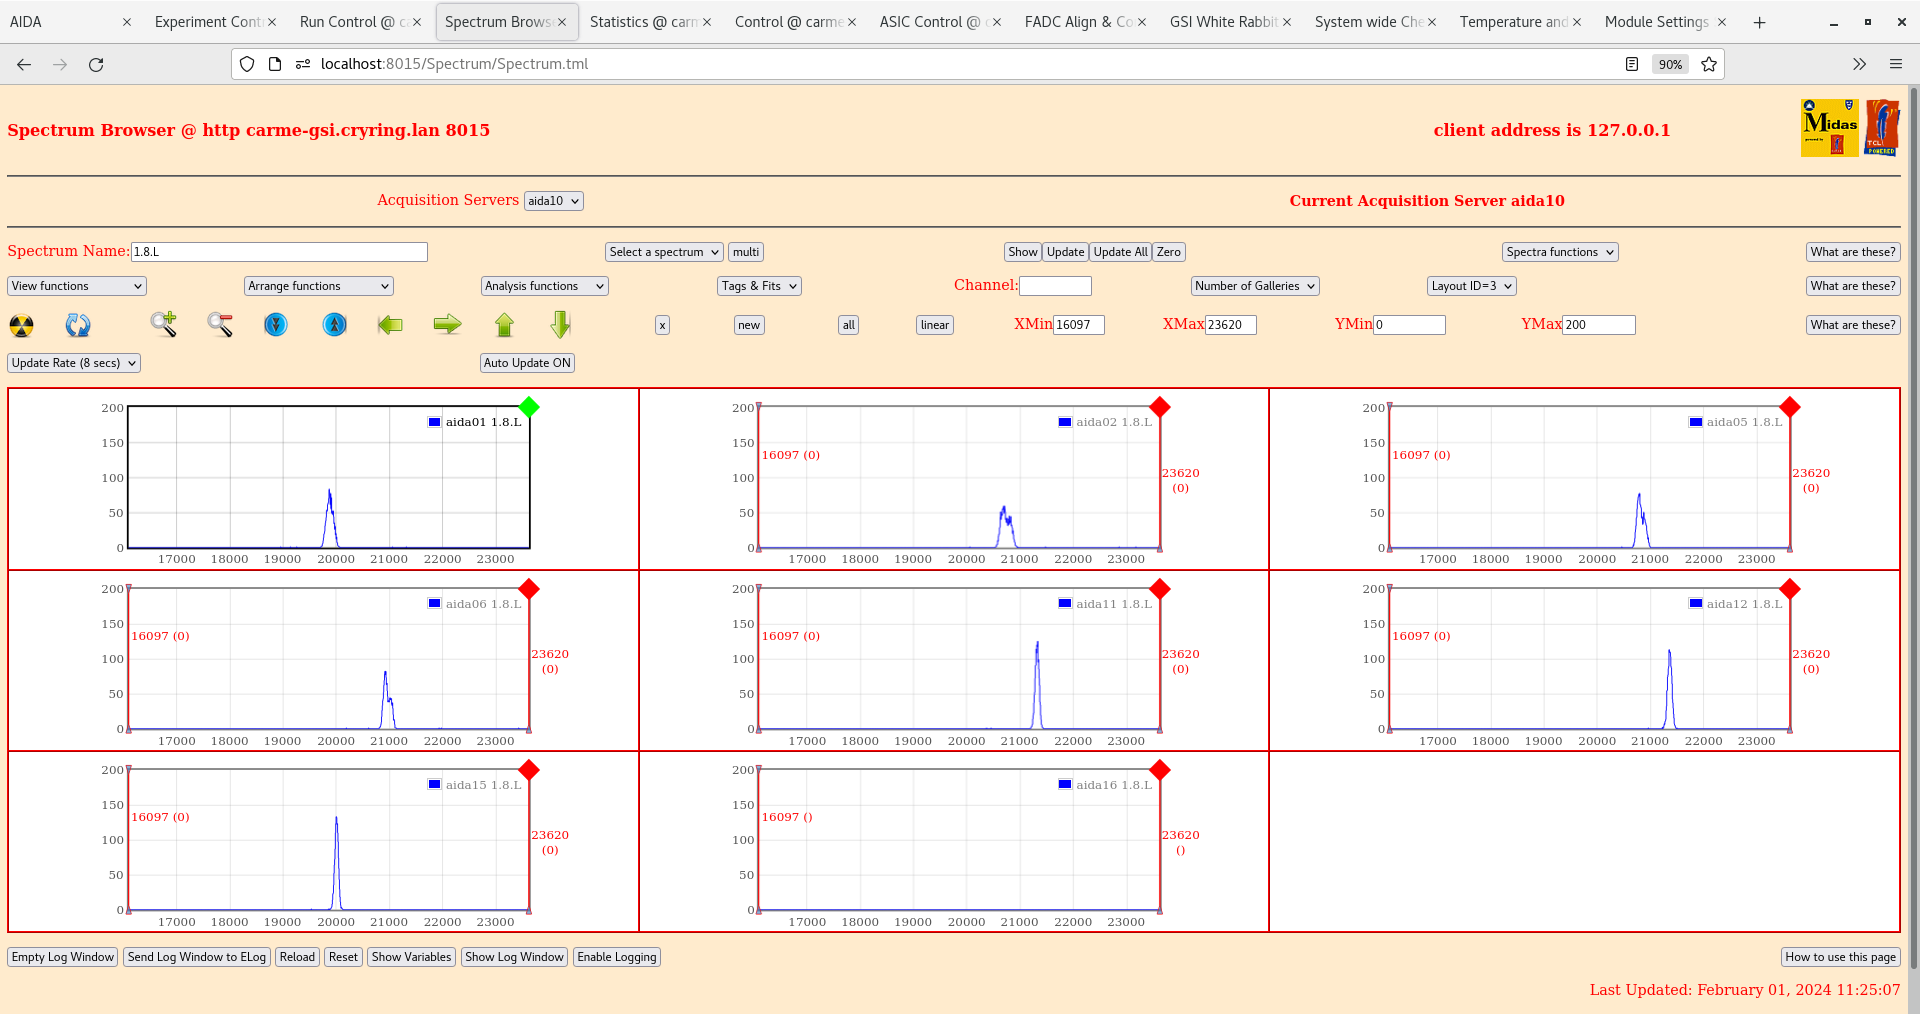
1.8L pn spectra. - attachment 8
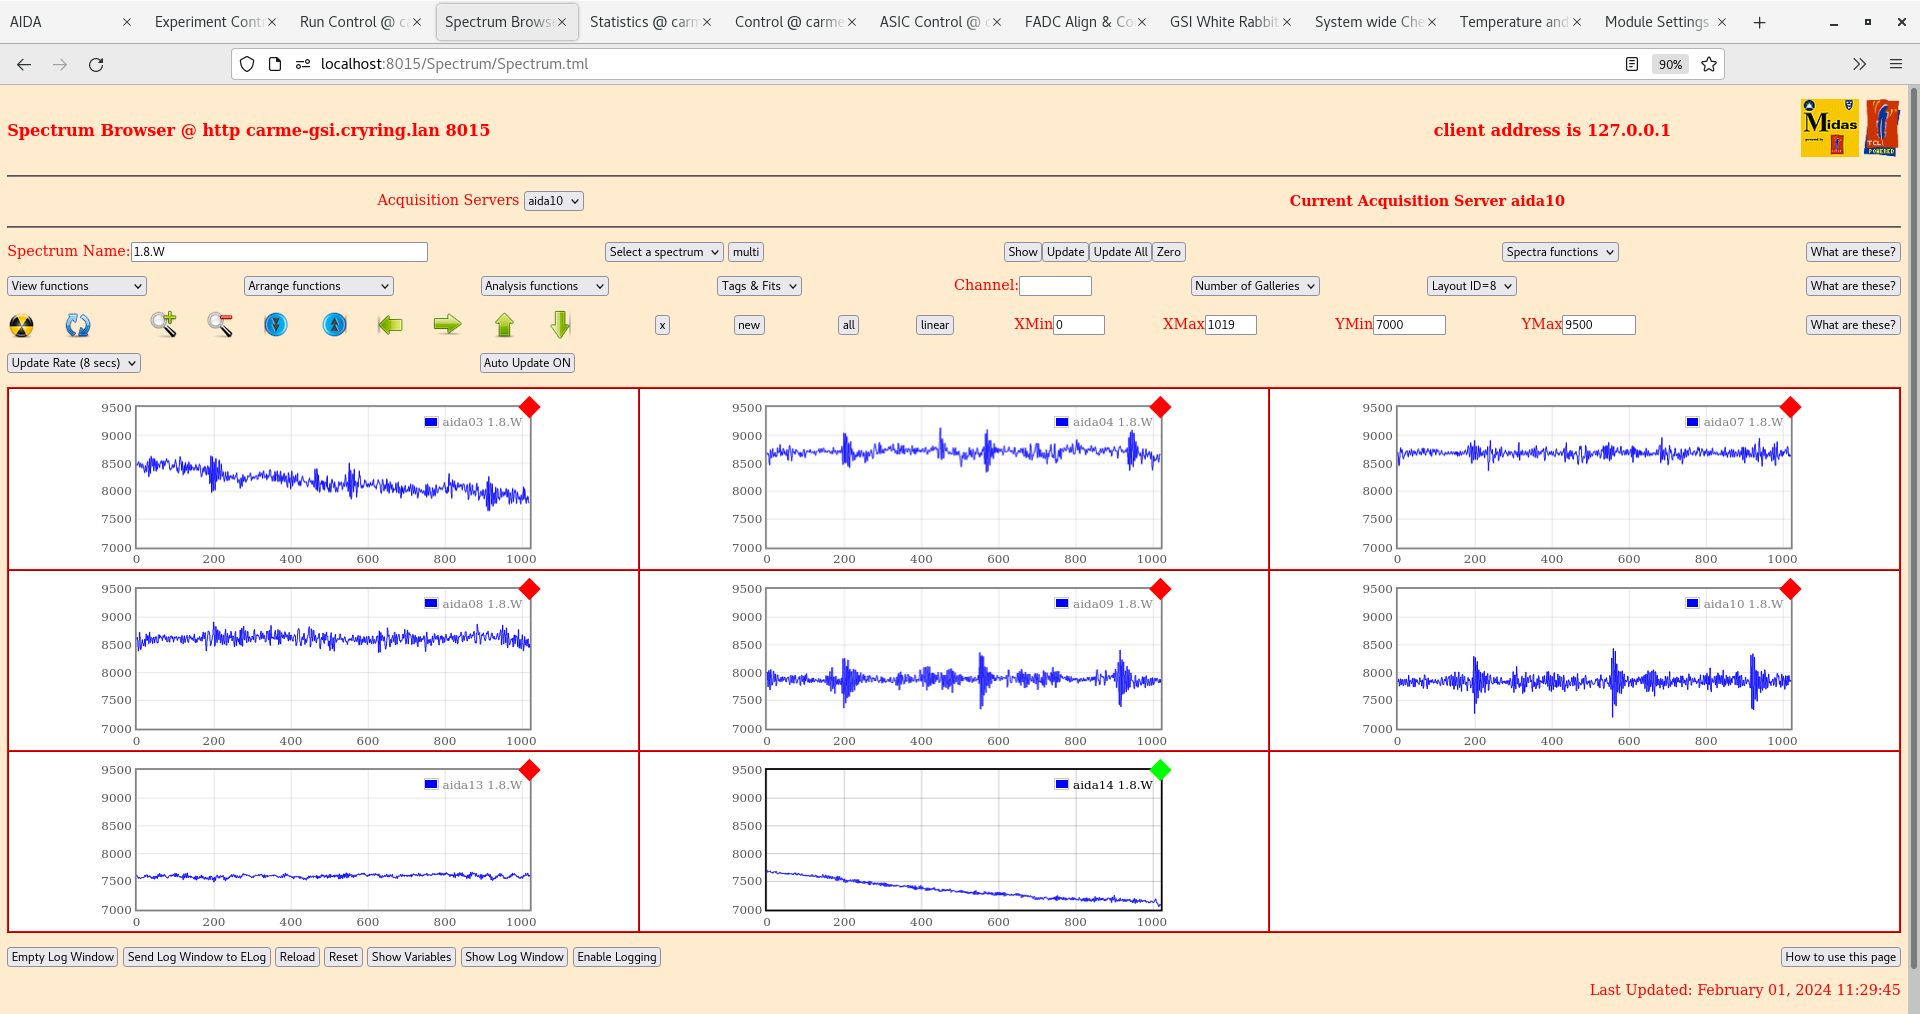
1.8W waveforms - attachment 9,10
11:35 Changed shaping time from 0x3 to 0x7 (4us)
ADC data items check OK - all ~3k attachment 11
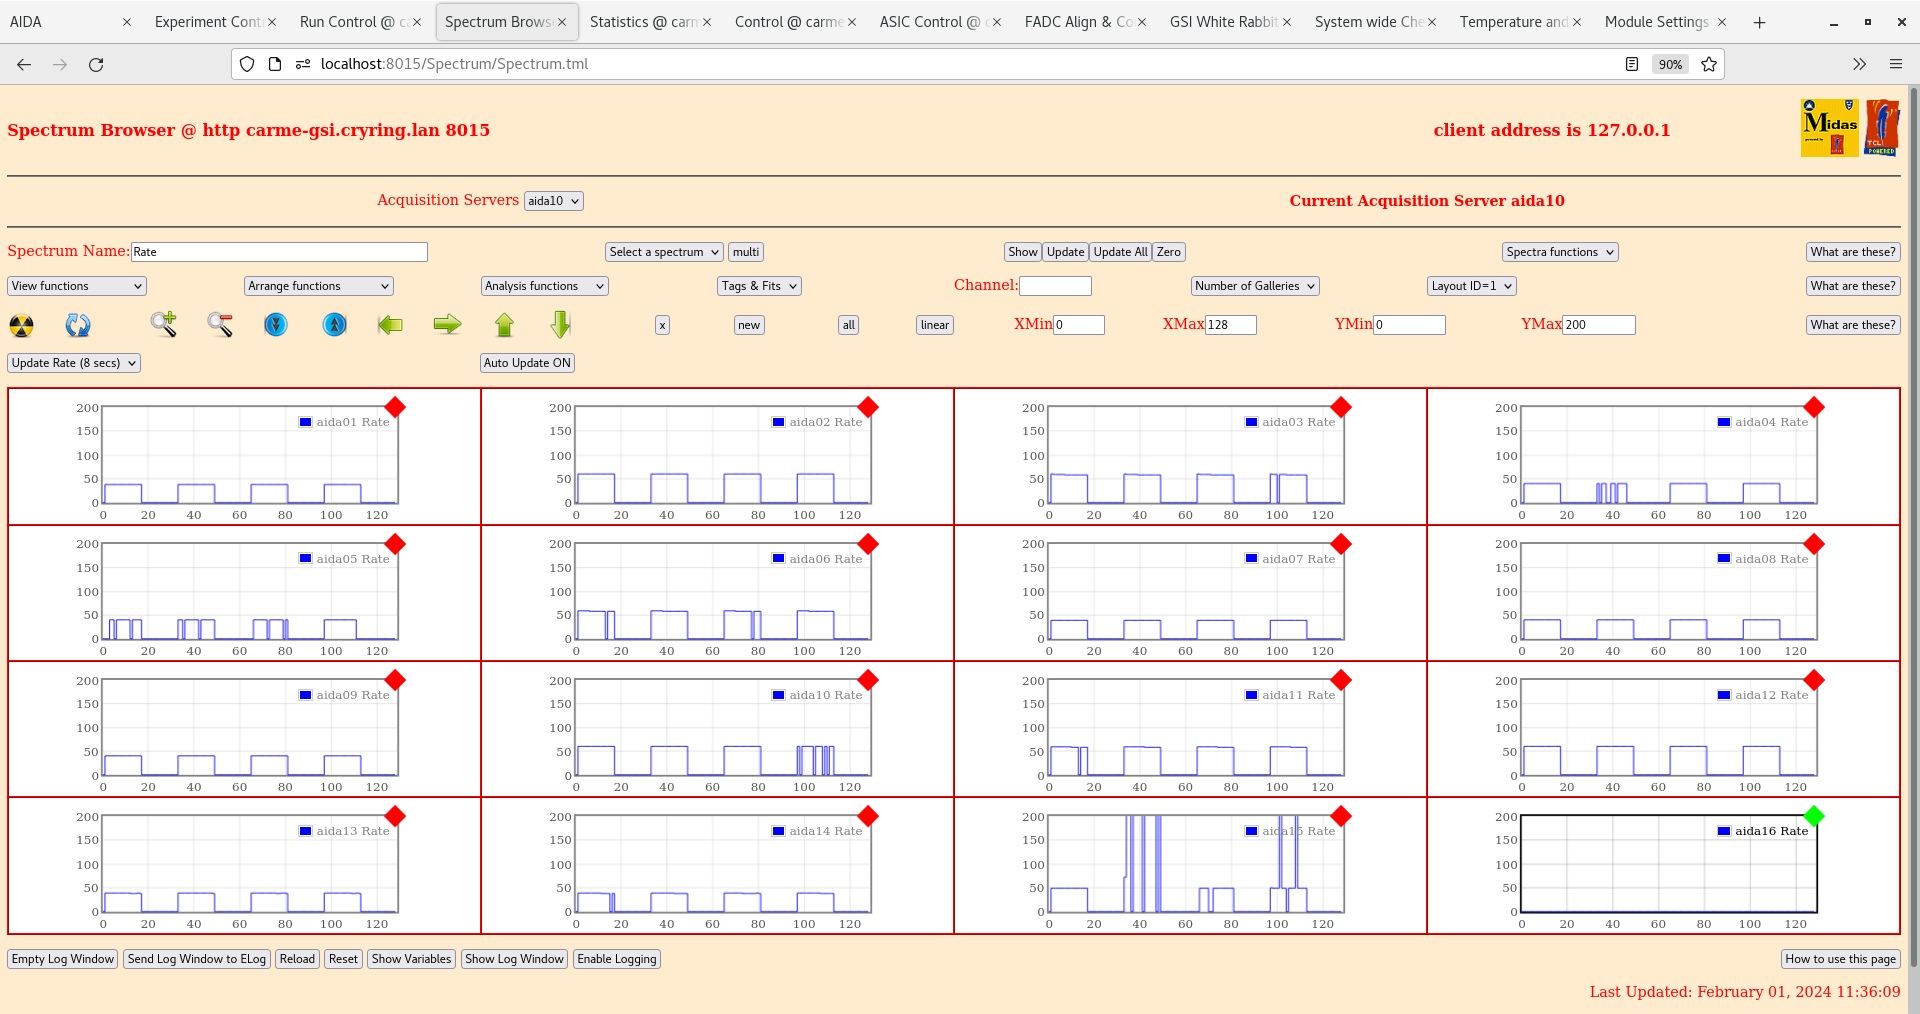
Rates - all OK - attachment 12
1.8L pn spectra. - attachment 13
1.8W waveforms - attachment 14,15
11:45 Changed shaping time from 0x7 to 0xb (6us)
ADC data items check OK - all ~3k - attachment 16
Rates - all OK - attachment 17
1.8L spectra. - attachment 18,19
1.8W waveforms - attachment 20,21
11:59 Changed shaping time from 0xb to 0xd (7us)
ADC data items check OK - all ~3k - attchment 22
Rates - all OK - attachment 23
1.8L pn spectra. - attachment 24
1.8W waveforms - attachment 25, 26
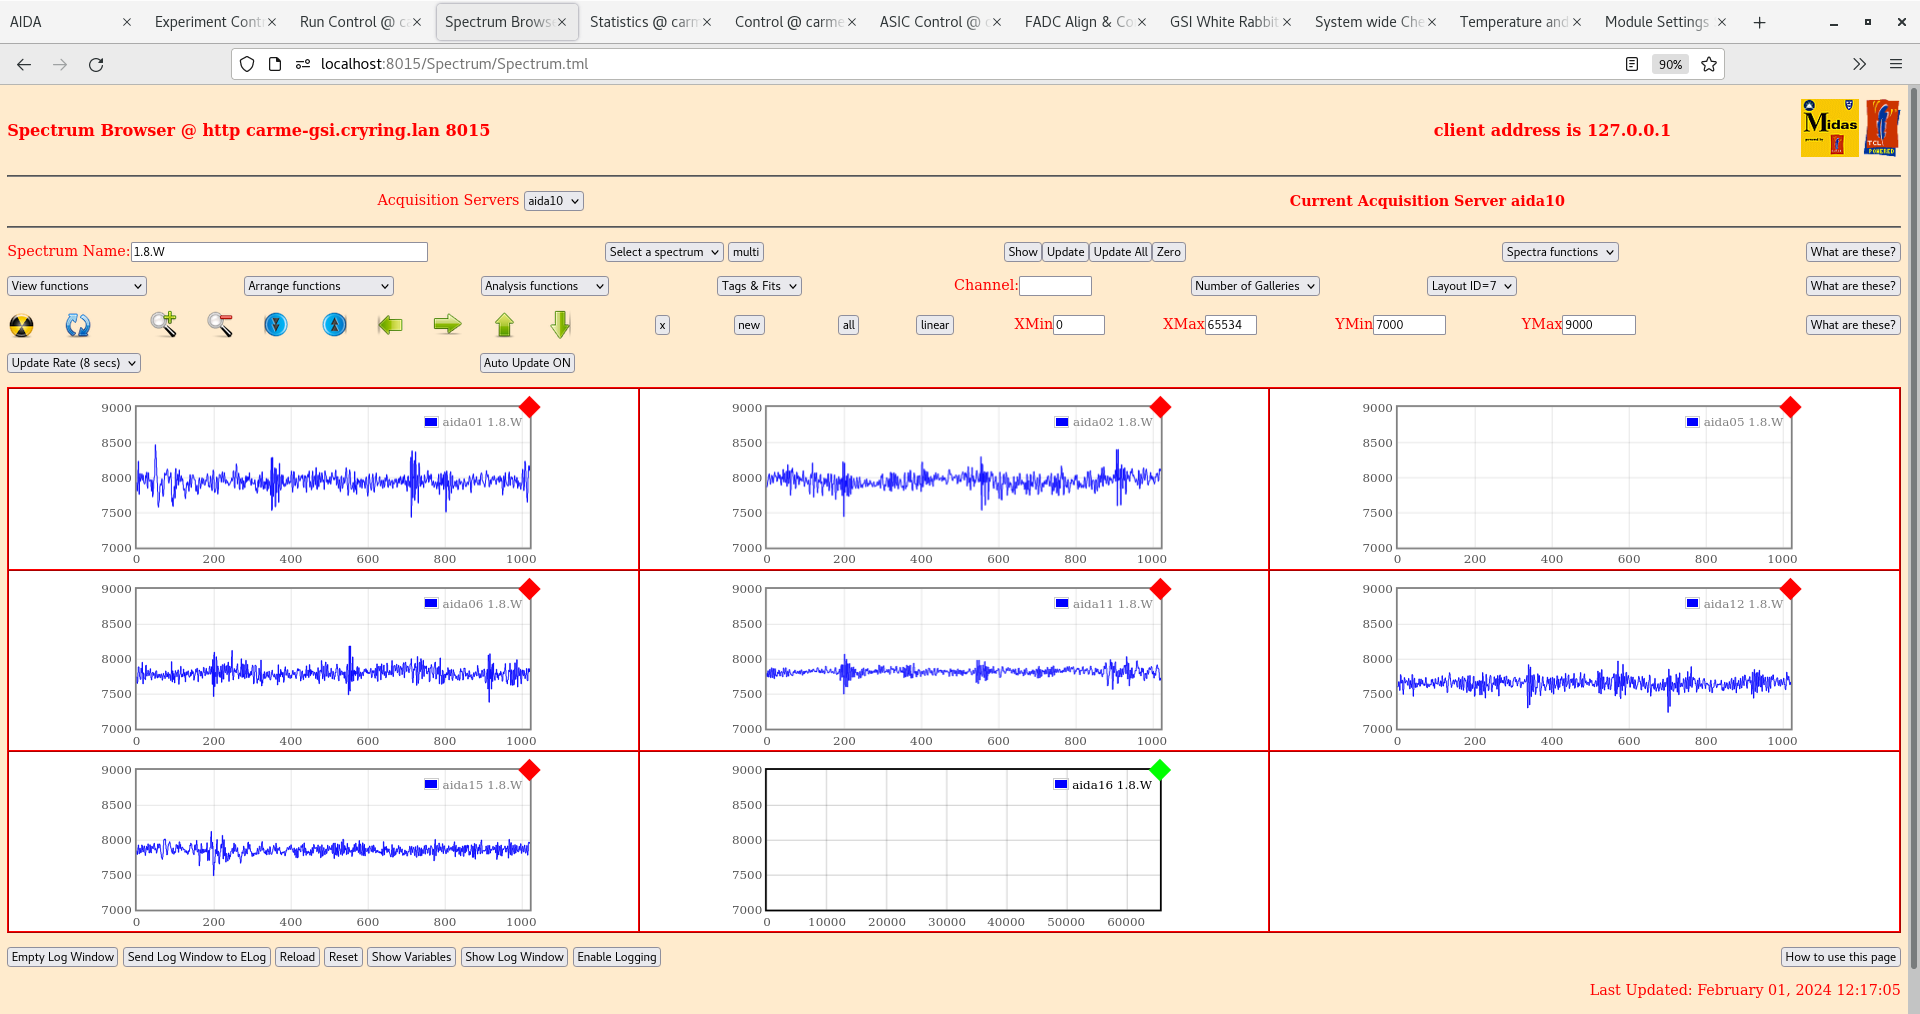
12:09 Changed shaping time back to 0xf (8us)
ADC data items check OK - all ~3k - attchment 27
Rates - all OK - attachment 28
1.8L pn spectra. - attachment 29
1.8W waveforms - attachment 30,31
13:10 Power cycled FEE modules. nn pulser for FEEs 9,10,13,14 are now active again (no changes made in the cave) Pulser widths for nn and pn both consistent with before lunch
|
| Attachment 1: Screenshot_from_2024-02-01_10-55-39.png
|

|
| Attachment 2: Screenshot_from_2024-02-01_11-01-55.png
|
|
| Attachment 3: Screenshot_from_2024-02-01_11-04-08.png
|

|
| Attachment 4: Screenshot_from_2024-02-01_11-06-41.png
|

|
| Attachment 5: Screenshot_from_2024-02-01_11-07-25.png
|

|
| Attachment 6: Screenshot_from_2024-02-01_11-21-46.png
|
|
| Attachment 7: Screenshot_from_2024-02-01_11-24-21.png
|

|
| Attachment 8: Screenshot_from_2024-02-01_11-25-17.png
|
|
| Attachment 9: Screenshot_from_2024-02-01_11-29-19.png
|

|
| Attachment 10: Screenshot_from_2024-02-01_11-29-58.png
|
|
| Attachment 11: Screenshot_from_2024-02-01_11-34-19.png
|

|
| Attachment 12: Screenshot_from_2024-02-01_11-36-16.png
|
|
| Attachment 13: Screenshot_from_2024-02-01_11-37-15.png
|
|
| Attachment 14: Screenshot_from_2024-02-01_11-41-14.png
|

|
| Attachment 15: Screenshot_from_2024-02-01_11-41-50.png
|

|
| Attachment 16: Screenshot_from_2024-02-01_11-45-20.png
|

|
| Attachment 17: Screenshot_from_2024-02-01_11-46-03.png
|

|
| Attachment 18: Screenshot_from_2024-02-01_11-46-56.png
|

|
| Attachment 19: Screenshot_from_2024-02-01_11-50-59.png
|

|
| Attachment 20: Screenshot_from_2024-02-01_11-52-32.png
|

|
| Attachment 21: Screenshot_from_2024-02-01_11-53-17.png
|

|
| Attachment 22: Screenshot_from_2024-02-01_11-59-19.png
|

|
| Attachment 23: Screenshot_from_2024-02-01_12-00-18.png
|

|
| Attachment 24: Screenshot_from_2024-02-01_12-01-00.png
|

|
| Attachment 25: Screenshot_from_2024-02-01_12-07-16.png
|

|
| Attachment 26: Screenshot_from_2024-02-01_12-07-48.png
|

|
| Attachment 27: Screenshot_from_2024-02-01_12-10-03.png
|

|
| Attachment 28: Screenshot_from_2024-02-01_12-10-47.png
|

|
| Attachment 29: Screenshot_from_2024-02-01_12-12-15.png
|

|
| Attachment 30: Screenshot_from_2024-02-01_12-17-28.png
|
|
| Attachment 31: Screenshot_from_2024-02-01_12-18-20.png
|

|